Custom agent
What is Custom Agent?
The Custom agent provides a flexible framework to create and configure your own AI agents tailored to specific needs. It allows you to define the agent's behavior, knowledge sources, and even its appearance, giving you significant control over its functionality.
The Custom agent offers the following extensive customization options:
-
Customizable knowledge base: You can select multiple workspaces and even websites as knowledge sources for your agent, allowing it to draw information from diverse locations.
-
Tailored responses: You can define a system prompt to guide the agent's behavior and set specific instructions for how it should format its responses (e.g., using bullet points, specific tone).
-
Conversation starters: You can pre-define conversation starters that appear as clickable prompts, helping users initiate interactions with your Custom agent.
-
Branding and appearance: You can upload a logo for your Custom agent, and if published to your website, its appearance can be further customized using CSS.
-
Integration with external websites: Custom agents can be published and integrated into your own company's website using provided script tags, allowing you to host an AI assistant tailored to your specific content.
Configuring and creating the Custom agent
The process of configuring a Custom agent involves both creation and detailed setup:
-
Navigate to Agents section and click Explore.
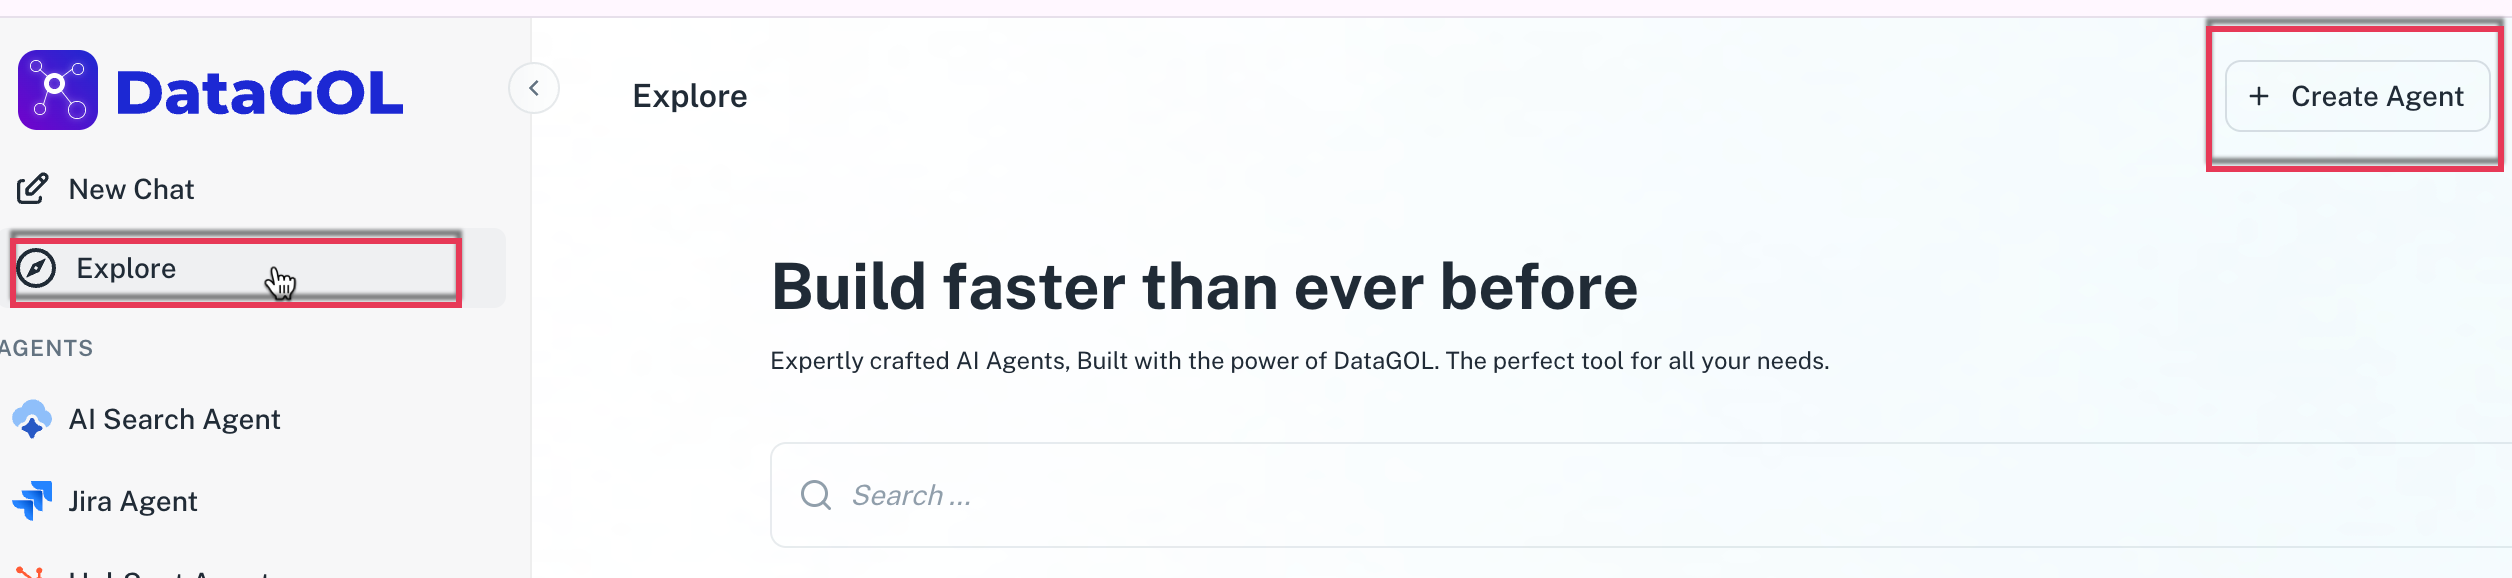
-
In the Explore page, click Create agent. The Create Agent page is displayed.
-
Enter the following details:
-
Basic Info:

-
Name and Description: Give your agent a clear identity with a unique name and description.
-
Upload Logo: Upload your company logo. This unlocks additional customizability, allowing you to set specific background and text colors so the interface feels like an extension of your brand.
-
-
Deep Research: Toggle the Deep Research option if your agent needs to perform complex, multi-step analysis or browse the web for real-time information.
-
Advance Settings: Configure the following:
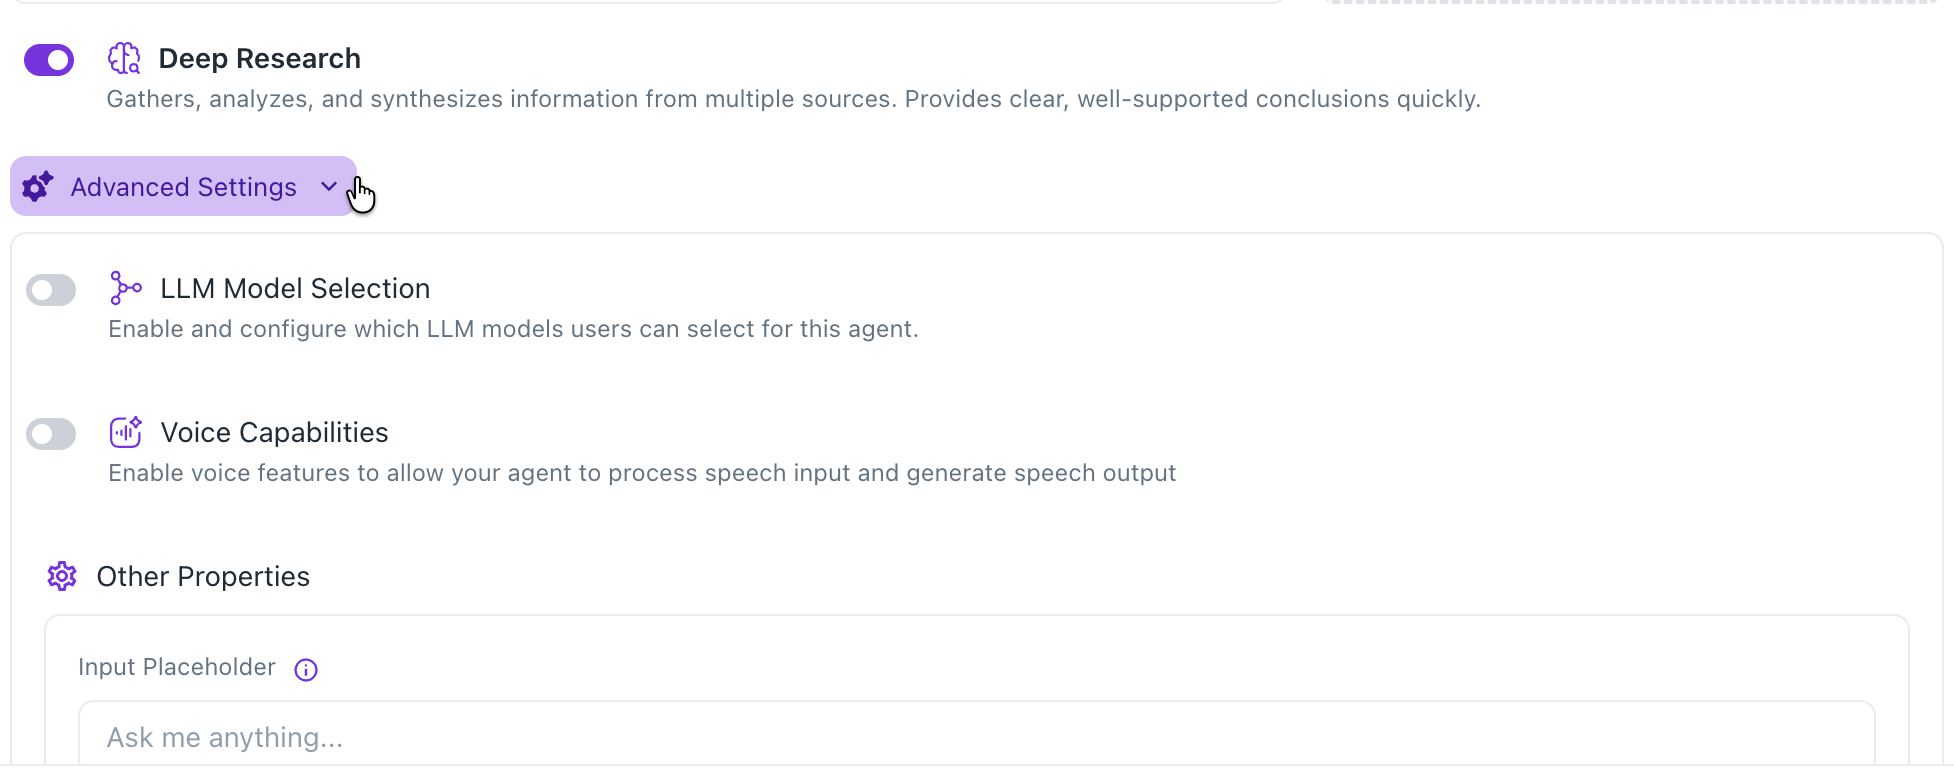
- Enable and configure which LLM models users can select for this agent.
- Enable voice features like Speech-to-Text or Text-to-Speech if you want to allow your agent to process speech input and generate speech output.
- Provide the place holder text to be shown in the chat input box.
-
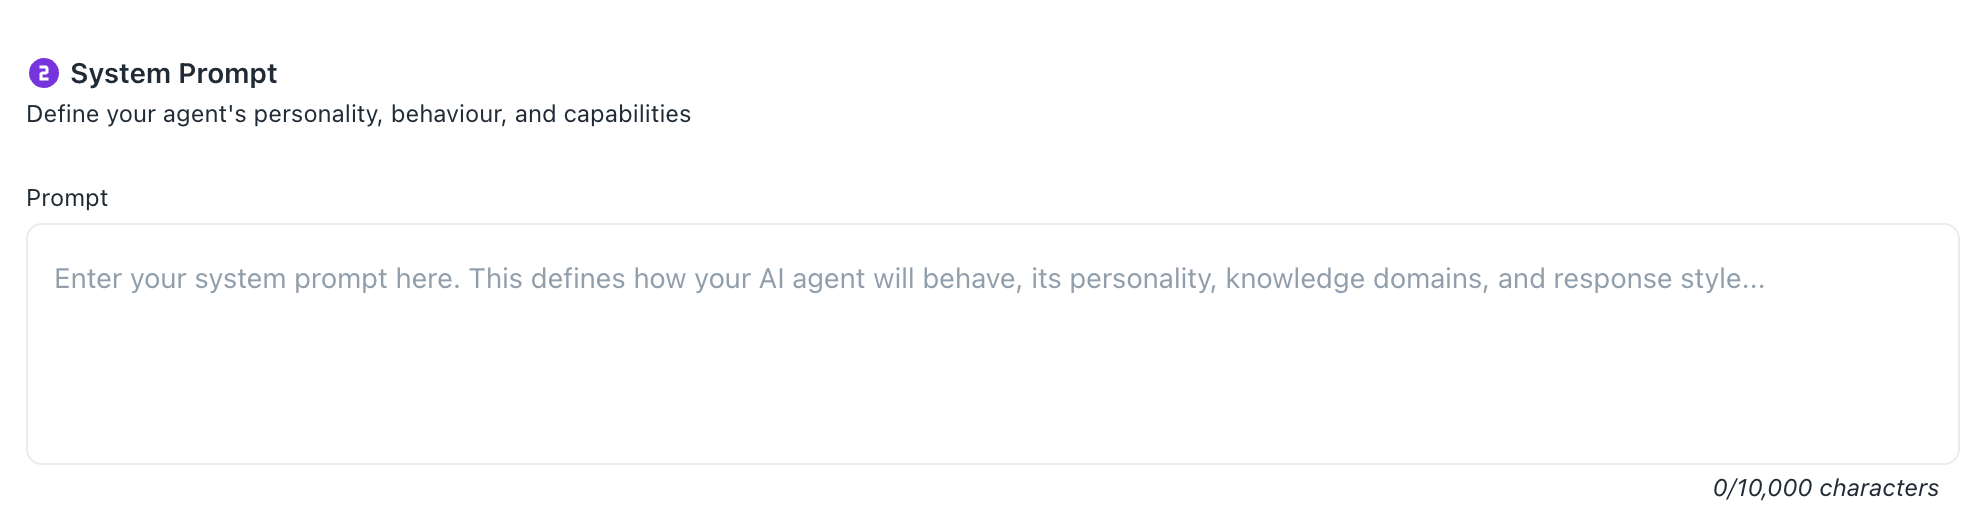
System Prompting: Define the agent’s personality. This is where you instruct it on how to speak and how to handle specific client inquiries.
-
Tools & Capabilities: Configure MCP servers and other tools for your agent.
- To make your agent useful, you must give it a source of truth. Scroll to the Workspaces section. Select the workspace containing your documents. The agent will now be able to search these documents and provide citations (links to the exact source) in its responses.
- Select the required Connectors. You can also click the New Connector button and create new credentials for the reviewed and recommended tools.
- Add Model Context Protocol (MCP)servers that provide additional capabilities to your agent.
- Turn on the Web Search button to enable web search and browser capabilities for your agent to access live internet information.
-
Using the Custom agent
Once your Custom agent is configured and saved or published, users can interact with it based on its defined knowledge base and instructions.
-
Within the platform: Select your Custom agent from the Explore section. You can then ask questions, and the agent will respond based on the content of its configured workspaces and websites, adhering to the system prompt and instructions you've set.
-
On your website: If you have published the agent and embedded its script, it will appear as an interactive element (e.g., a chat popup) on your website. Users can then ask questions related to your website's content or the specific knowledge you have provided.
What's New
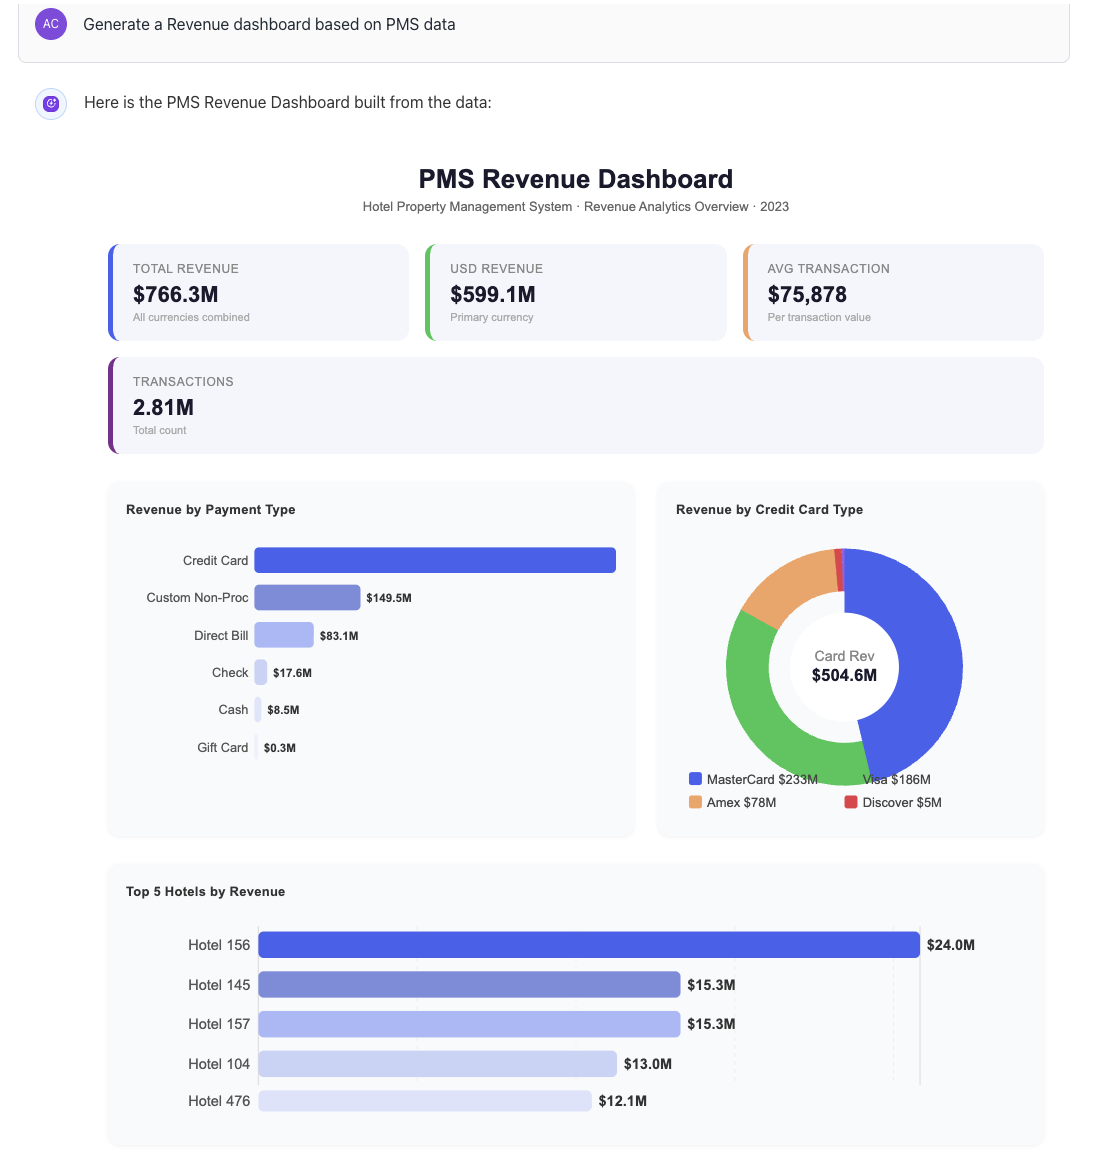
🎨 Charts and Dashboards Now Available in Custom Agent
The Frontend Design Skill has been integrated into the Custom Agent, enabling users to generate charts and dashboards directly from their data queries.
Feature Highlights
- Ask the Custom Agent to visualize data and receive fully rendered charts and dashboards inline
- Visual insights are generated based on natural language queries — no manual configuration required
- Brings rich data visualization capabilities into the core agent experience
How to Use
Simply ask the Custom Agent to create a chart or dashboard as part of your query. For example:
- "Show me a bar chart of sales by region"
- "Create a dashboard summarizing this month's usage metrics"
Notes
- This feature is available to all Custom Agent users
- Chart and dashboard output is powered by the Frontend Design Skill
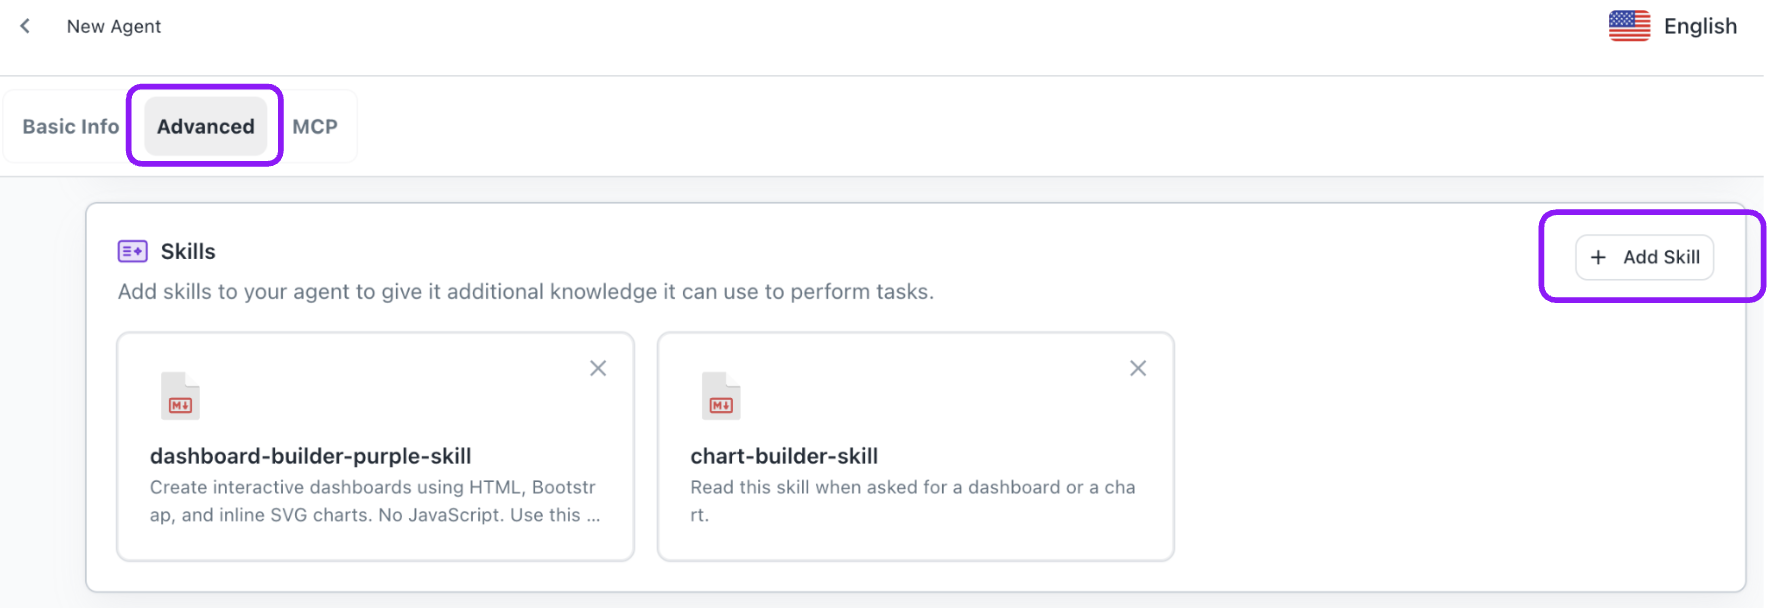
🛠️ Skill Library — Add Customized Skills to Your Agent
Users can now add customized skills directly to the Custom Agent through the Skill Library, unlocking greater intelligence and flexibility tailored to specific workflows.
Sample Skills
- 🧮 calc — Perform calculations and data processing based on certain customized logic on the data
- 📊 chart — Generate responsive, production-ready charts using Chart.js and Bootstrap. Create clear, responsive charts with design thinking built in.
- 📋 dashboard-builder — Compose full dashboards from data queries showcasing KPIs
How to Use
- Navigate to the Advanced section within your Custom Agent settings and click Add Skill
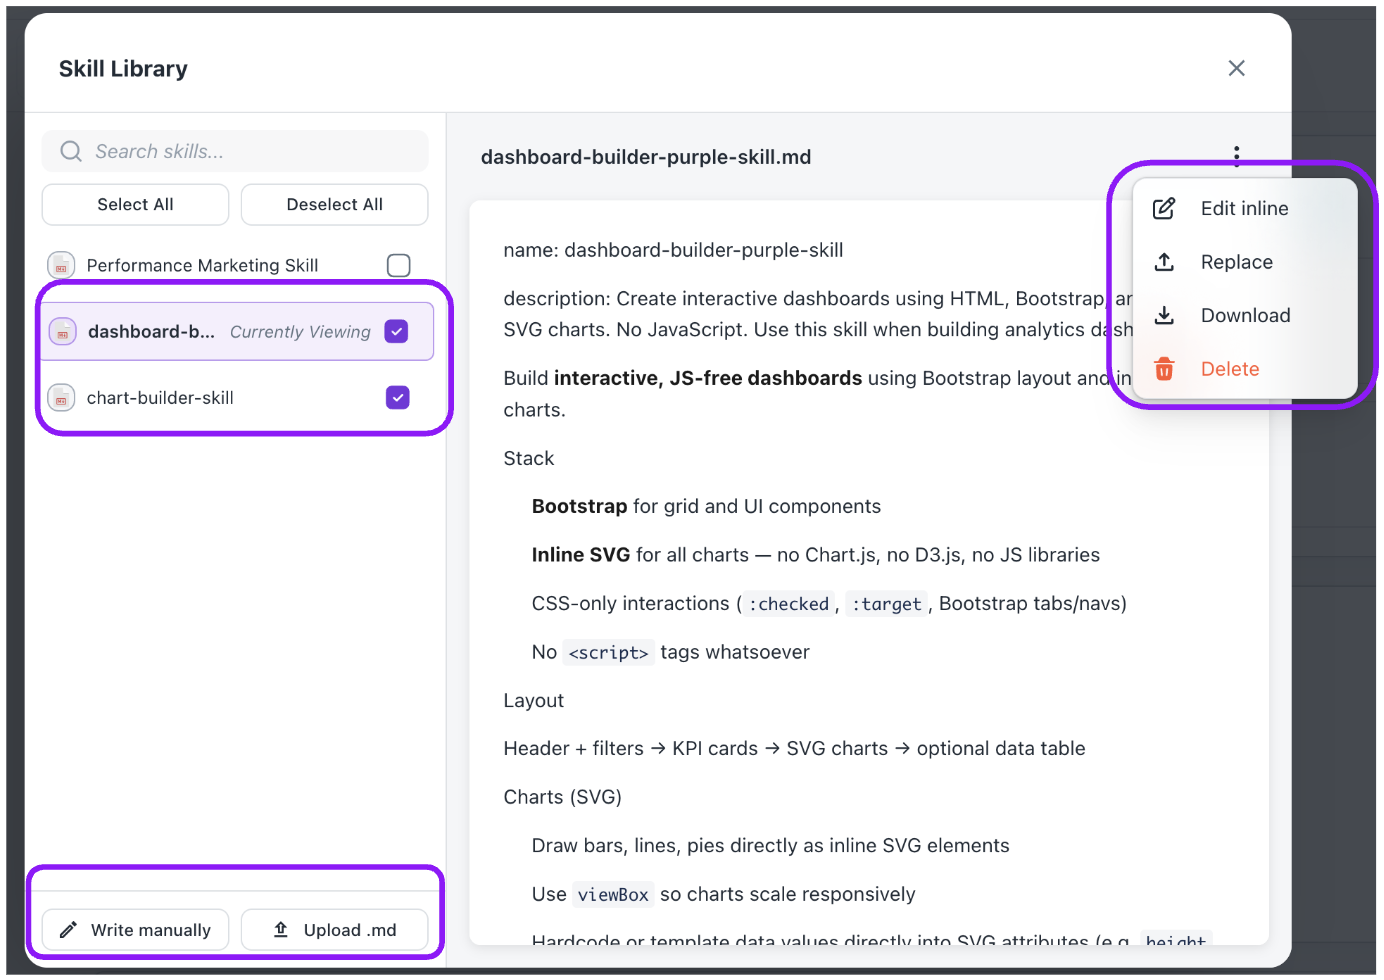
- Within the Skill library modal, use Upload .md option to browse and upload for the skill you need, alternatively you can also use Write Manually option to write down the skills.
- Select and attach it to your agent
- The agent will immediately leverage the skill for relevant queries
Managing Skills
Each skill in the library can be managed via the ⋮ (three-dot menu) on the skill card:
- Edit Inline — Modify the skill content directly within the library
- Replace — Swap the skill file with an updated version
- Download — Export the skill as a
.mdfile - Delete — Remove the skill from the library
Notes
- Skills can be written manually or uploaded as
.mdfiles via the Skill Library - Multiple skills can be combined to create a more powerful, specialized agent
- Available to all Custom Agent users
Add Workspace MCP Server to Custom Agents
Users can now configure Workspace MCP server directly within Custom Agent settings for enhanced workspace-level integrations and data access.
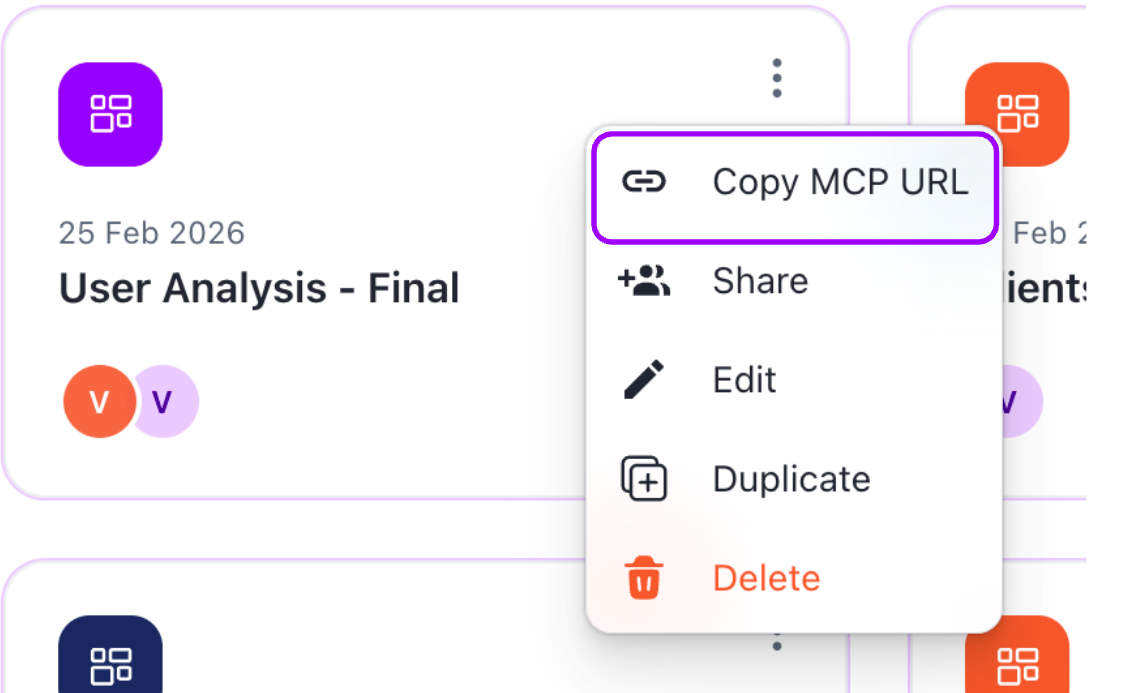
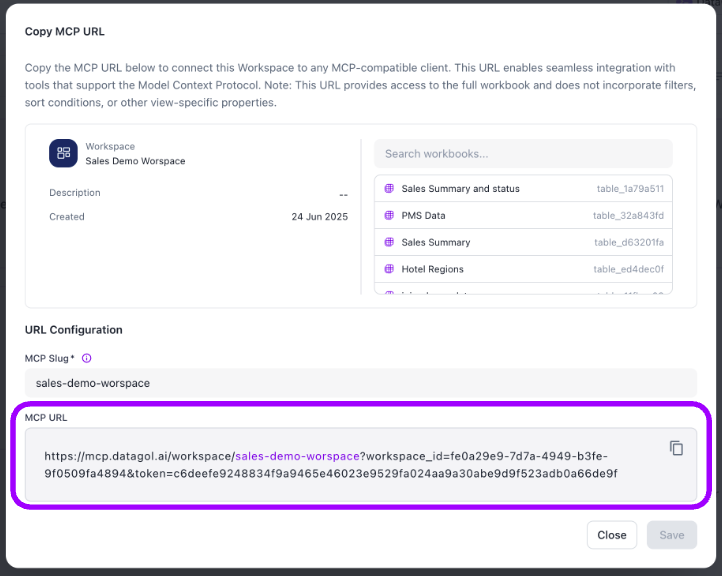
Copy MCP URL from Workspace
Workspaces now expose a Copy MCP URL option directly from the three-dot menu, opening a modal that displays the full MCP-compatible URL alongside all workbooks contained in that workspace.
How to use it
- Navigate to your workspace list and click the ⋮ (three-dot) menu on any workspace card.
- Select Copy MCP URL from the dropdown.
- In the modal that opens, review the workbooks included and the auto-generated MCP Slug.
- Click the copy icon next to the MCP URL field and paste it into your MCP client.
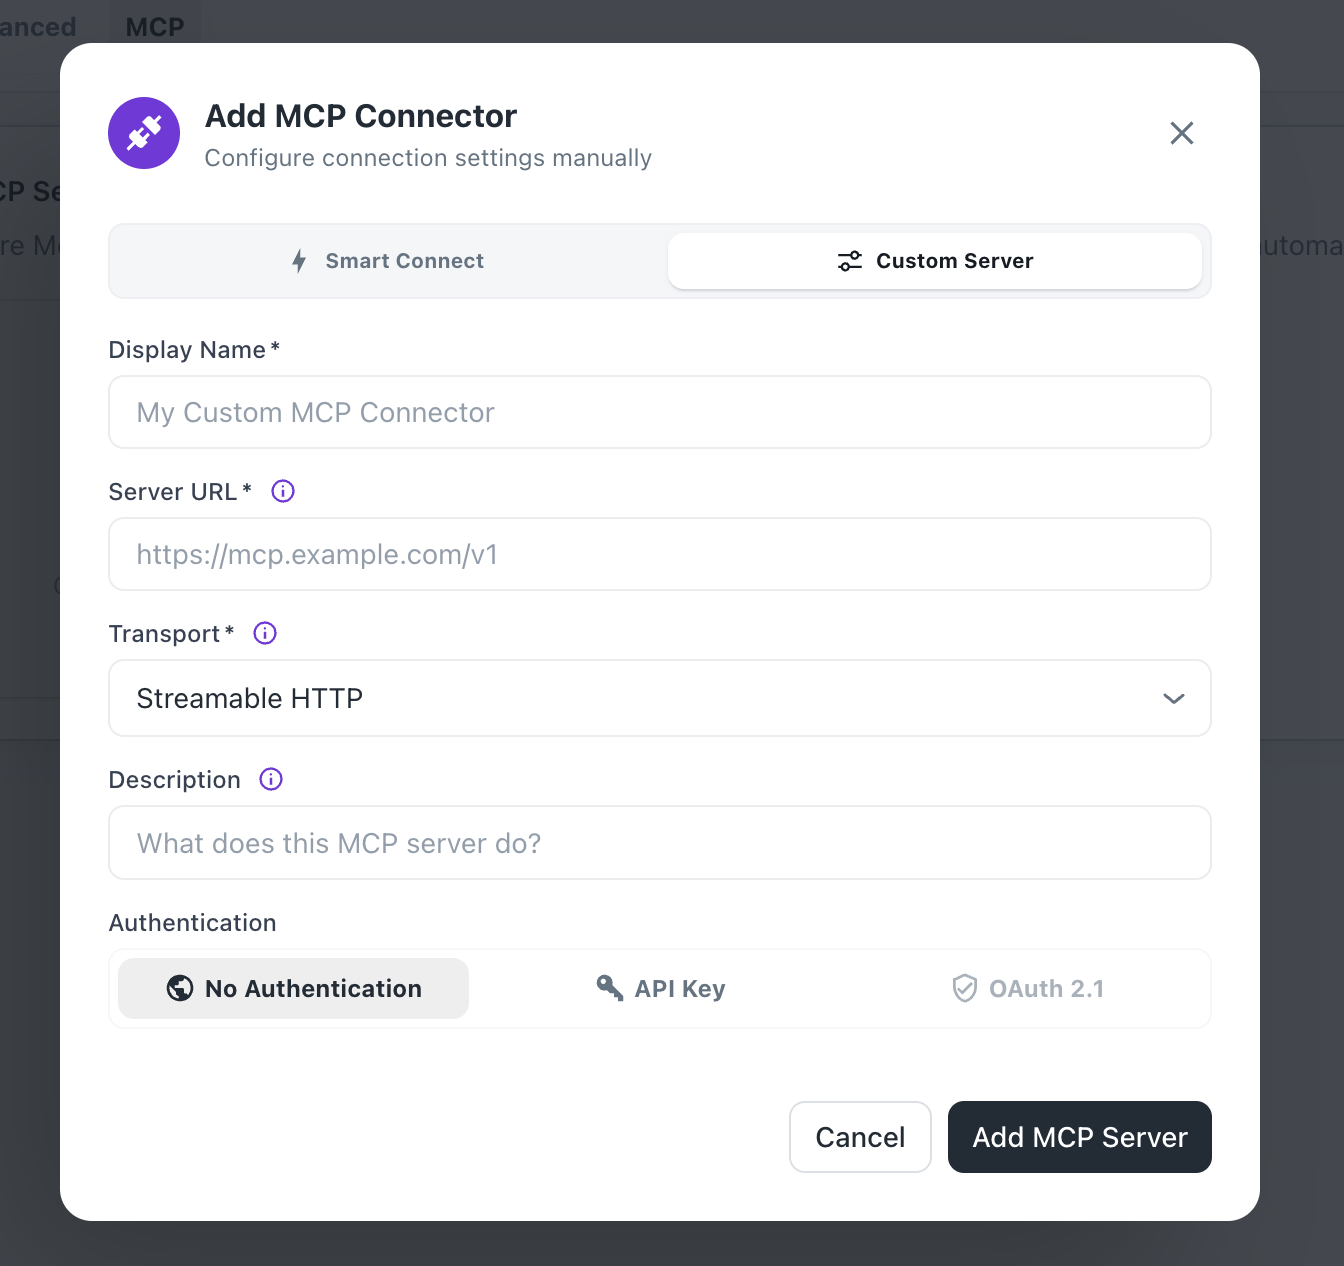
Steps to Configure a Workspace MCP Server to a Custom Agent
- Go to Custom Agent
- Edit the agent Settings
- Navigate to the MCP section
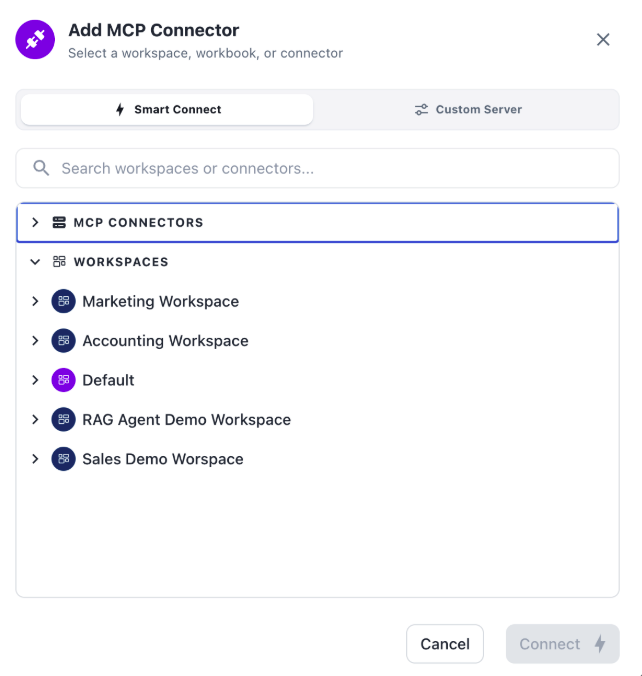
- Click Add MCP Server
- Select Custom Server
- Enter the Display Name
- Paste the MCP endpoint in the Server URL
- Click Add MCP Server
Once configured, the Custom Agent can query workbooks available within the connected workspace MCP and provide contextual answers across workspace data sources.
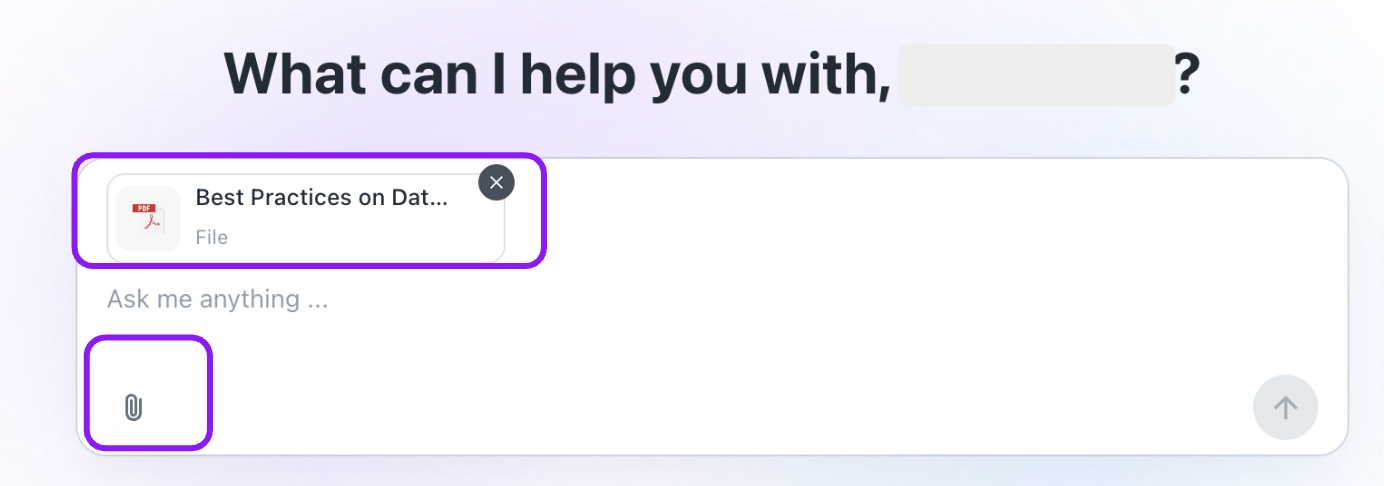
Custom Agent - File Attachments:
Attach Files to Chat and Ask Questions About Them Users can now attach files directly to a Custom Agent chat session and ask questions about the file's contents. This enables document-driven conversations without requiring the file to be pre-loaded into a workbook or data source.
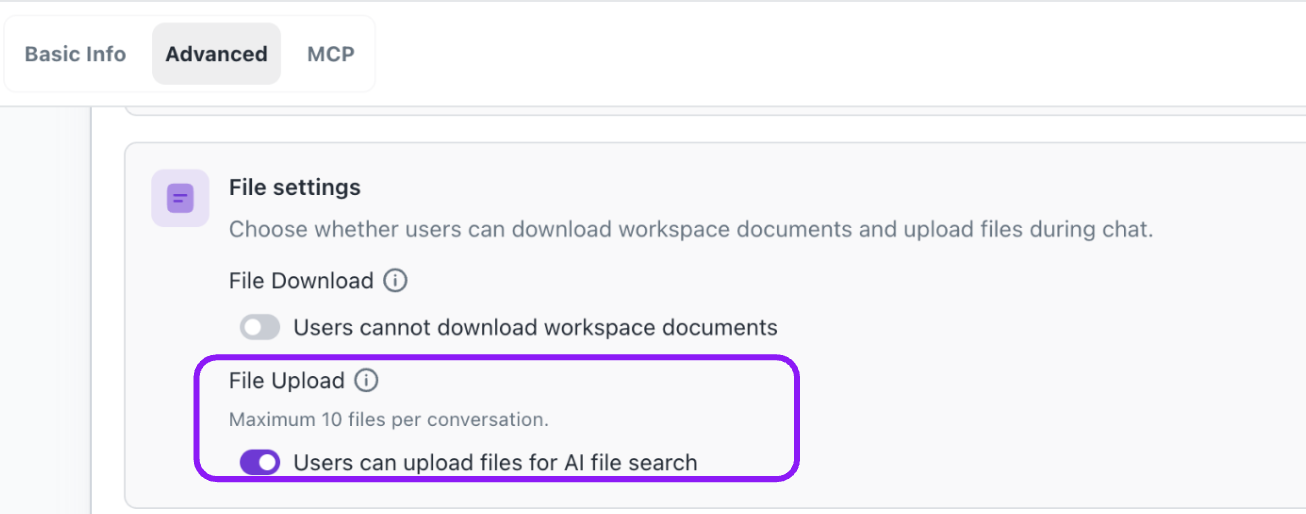
Steps to Configure
- Go to Custom Agent
- Edit the agent Settings
- Navigate to the Advanced section
- Scroll down to the Chat Interface section where you will find File Settings
- Enable the File Upload toggle
- Click on Save Changes
Was this helpful?