Adding data sources
Only an Account admin or Lakehouse admin can add data sources.
Do the following to add a data source.
-
From the left navigation panel, click Lakehouse and then click Data Sources.
-
From the upper right corner of the page, click the + New Database button to start the process of adding a new database.

-
Choose a database provider from the list, for example, MySQL.
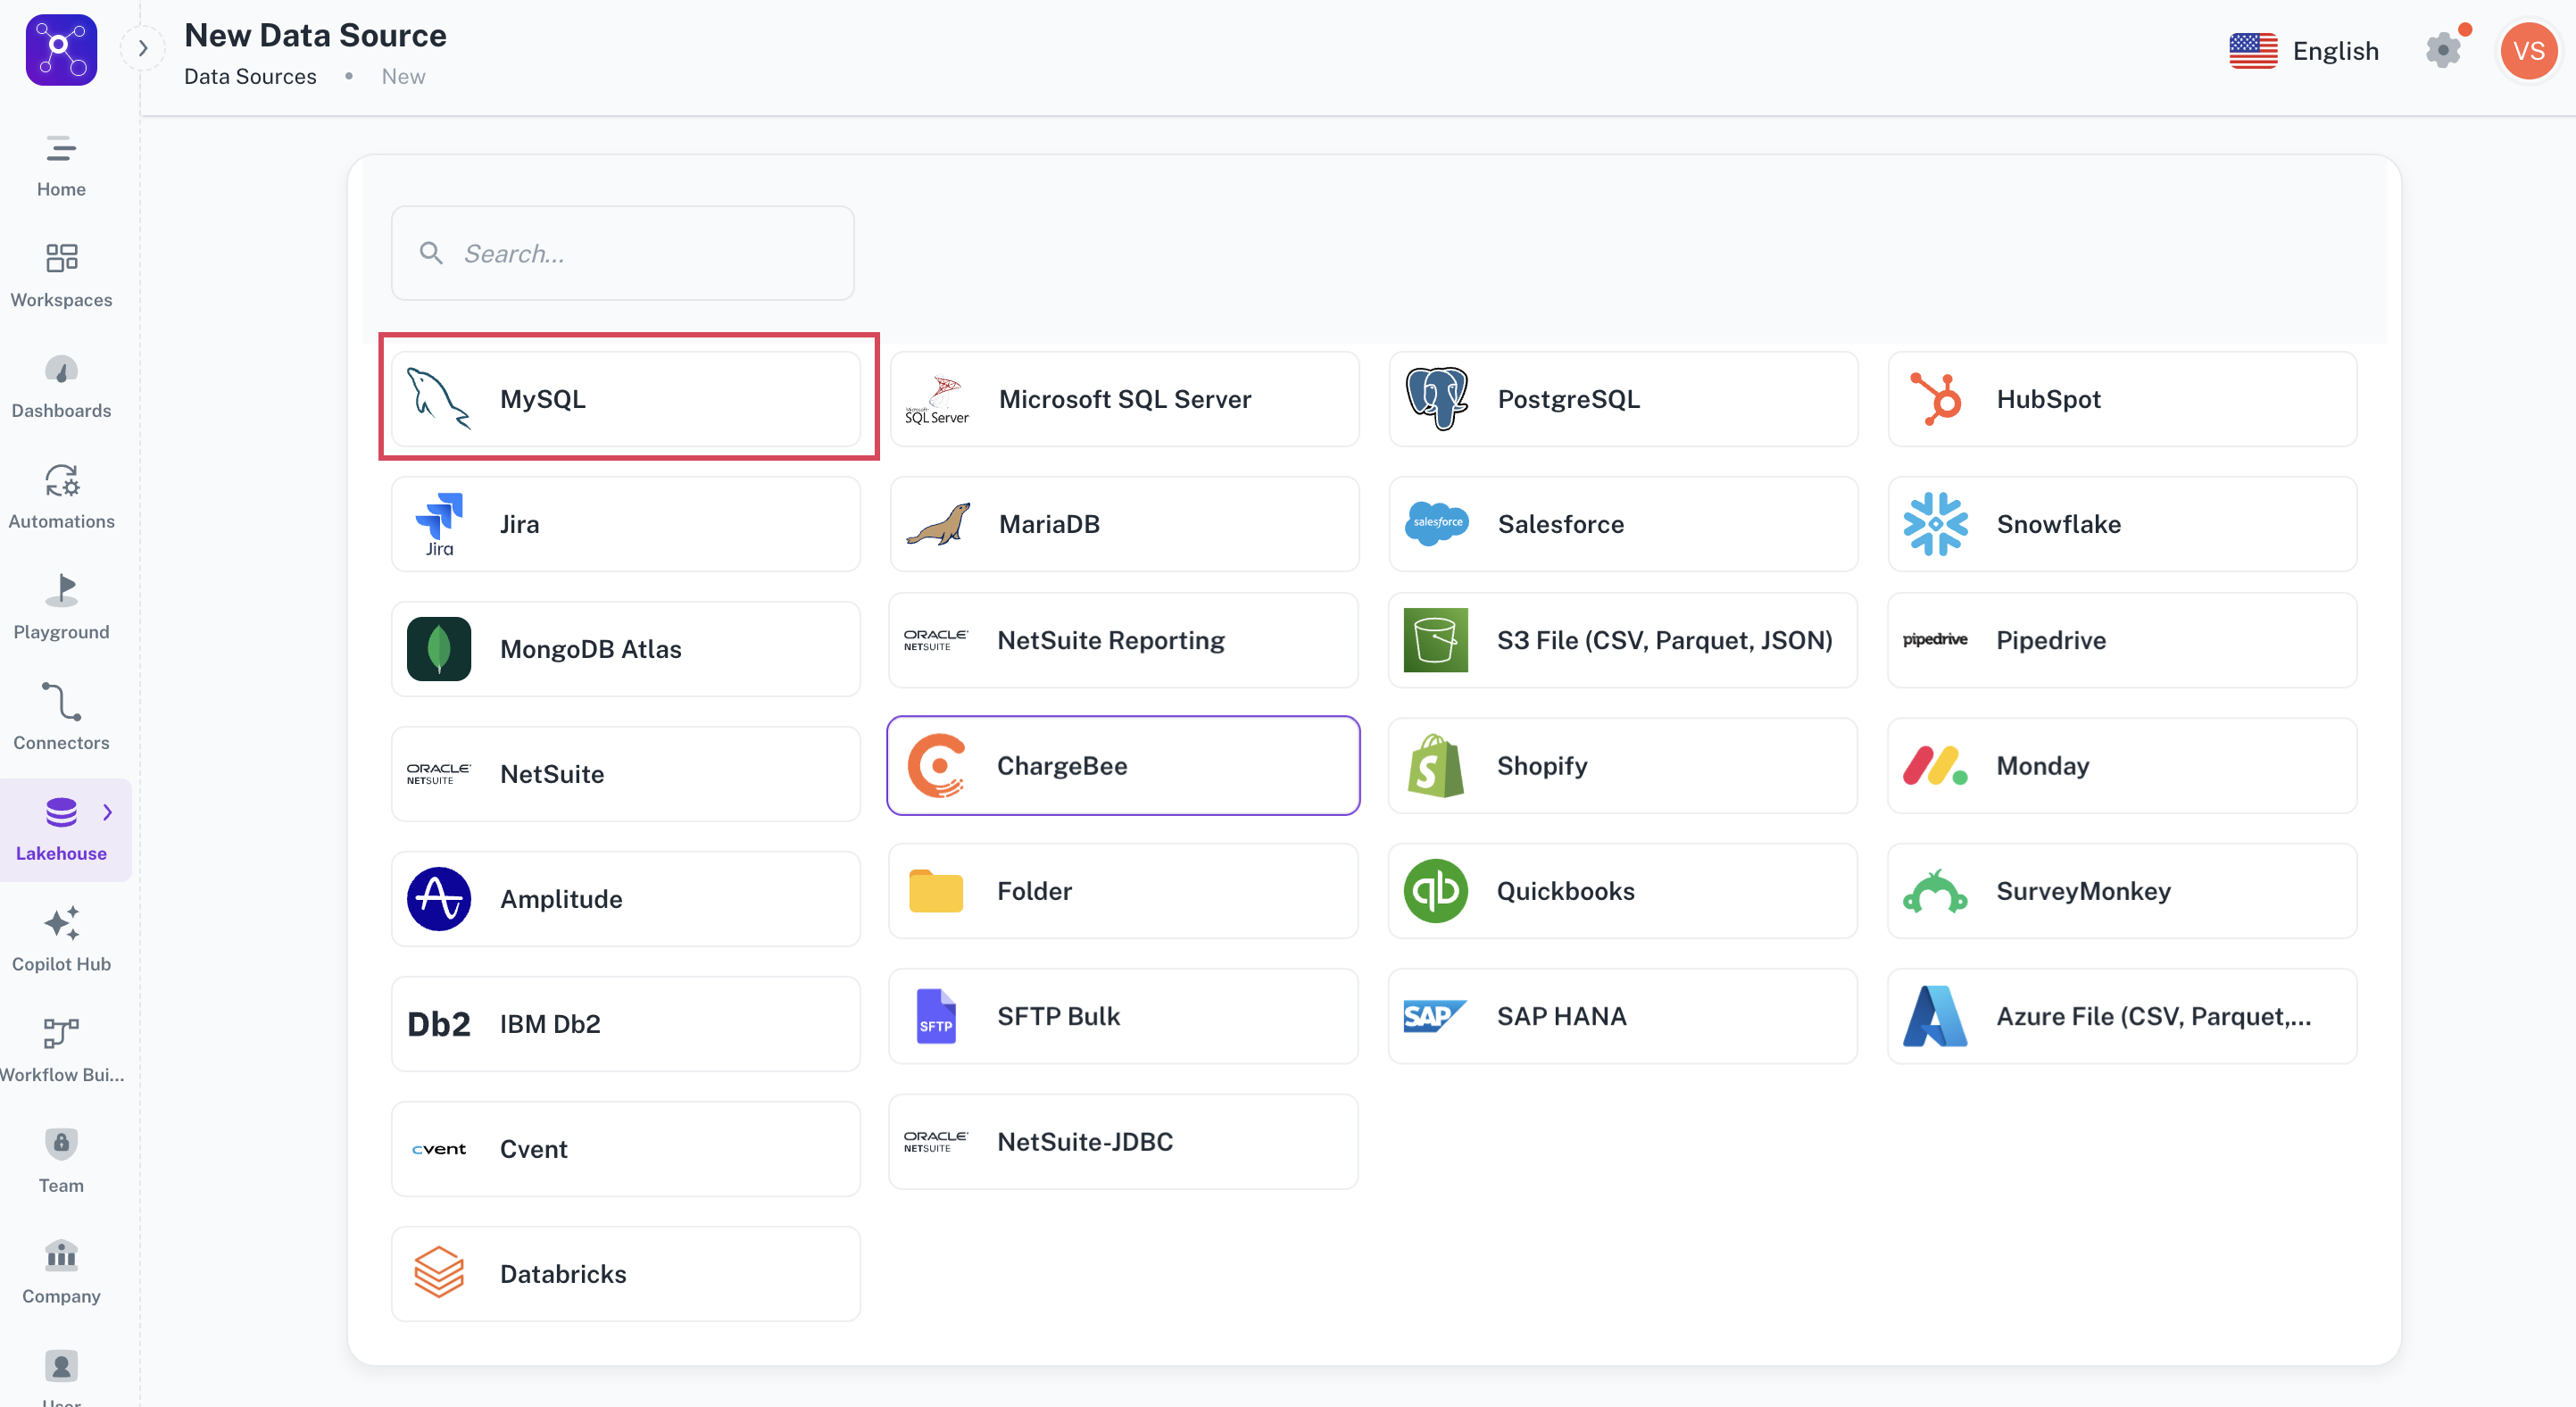
-
Enter the required integration details for the selected database provider, such as connection name, database name, host, port, username, and password etc.
-
Click Submit. Once you have connected a data source, the system immediately fetches its schema. After this schema retrieval process is complete you can browse and interact with the tables and data within that data source.
Databases
Adding Amazon Redshift as data source
-
From the left navigation panel, click Lakehouse and then click Data Sources.
-
From the upper right corner of the page, click the + New Database button to start the process of adding a new database.
-
Specify the following details to add Amazon Redshift and then click Submit. Once you have connected a data source, the system immediately fetches its schema. After this schema retrieval process is complete you can browse and interact with the tables and data.
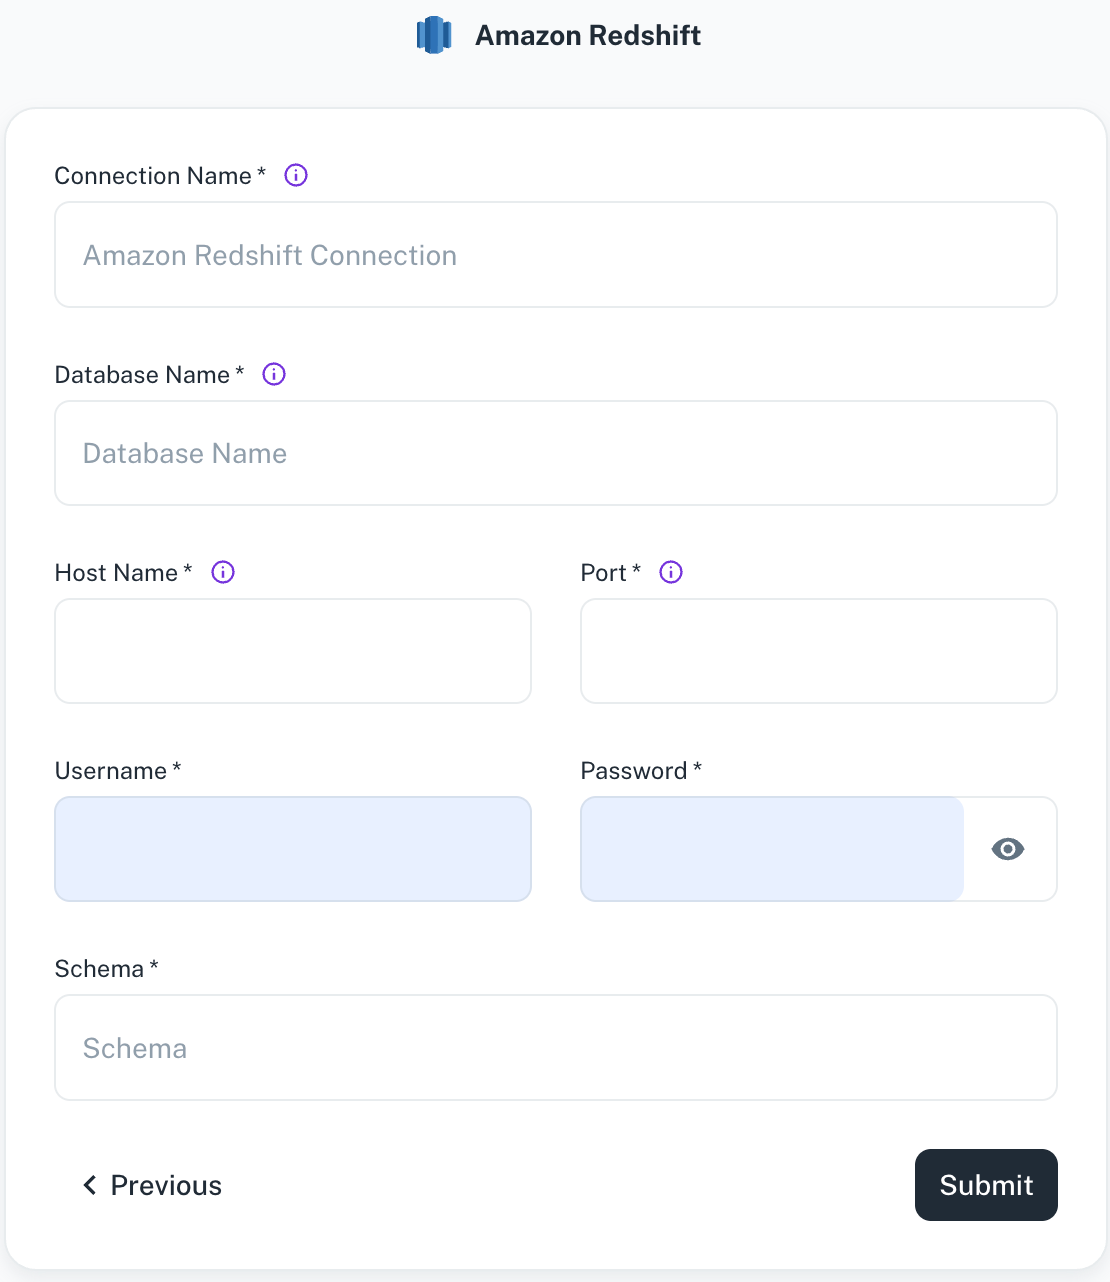
Field Description Connection Name Enter a unique name for this connection. This will help you identify it later. Database Name Specify the name of the existing database you want to connect to. Hostname Provide the hostname or IP address of the server where the database resides. Port Enter the port number used by the database server. Username/Password Provide the credentials to access the database server. Schema Specify the schema name for your connection. -
Click Submit.
Adding Databricks as data source
-
From the left navigation panel, click Lakehouse and then click Data Sources.
-
From the upper right corner of the page, click the + New Database button to start the process of adding a new database.
-
Specify the following details to add Databricks and then click Submit. Once you have connected a data source, the system immediately fetches its schema. After this schema retrieval process is complete you can browse and interact with the tables and data.
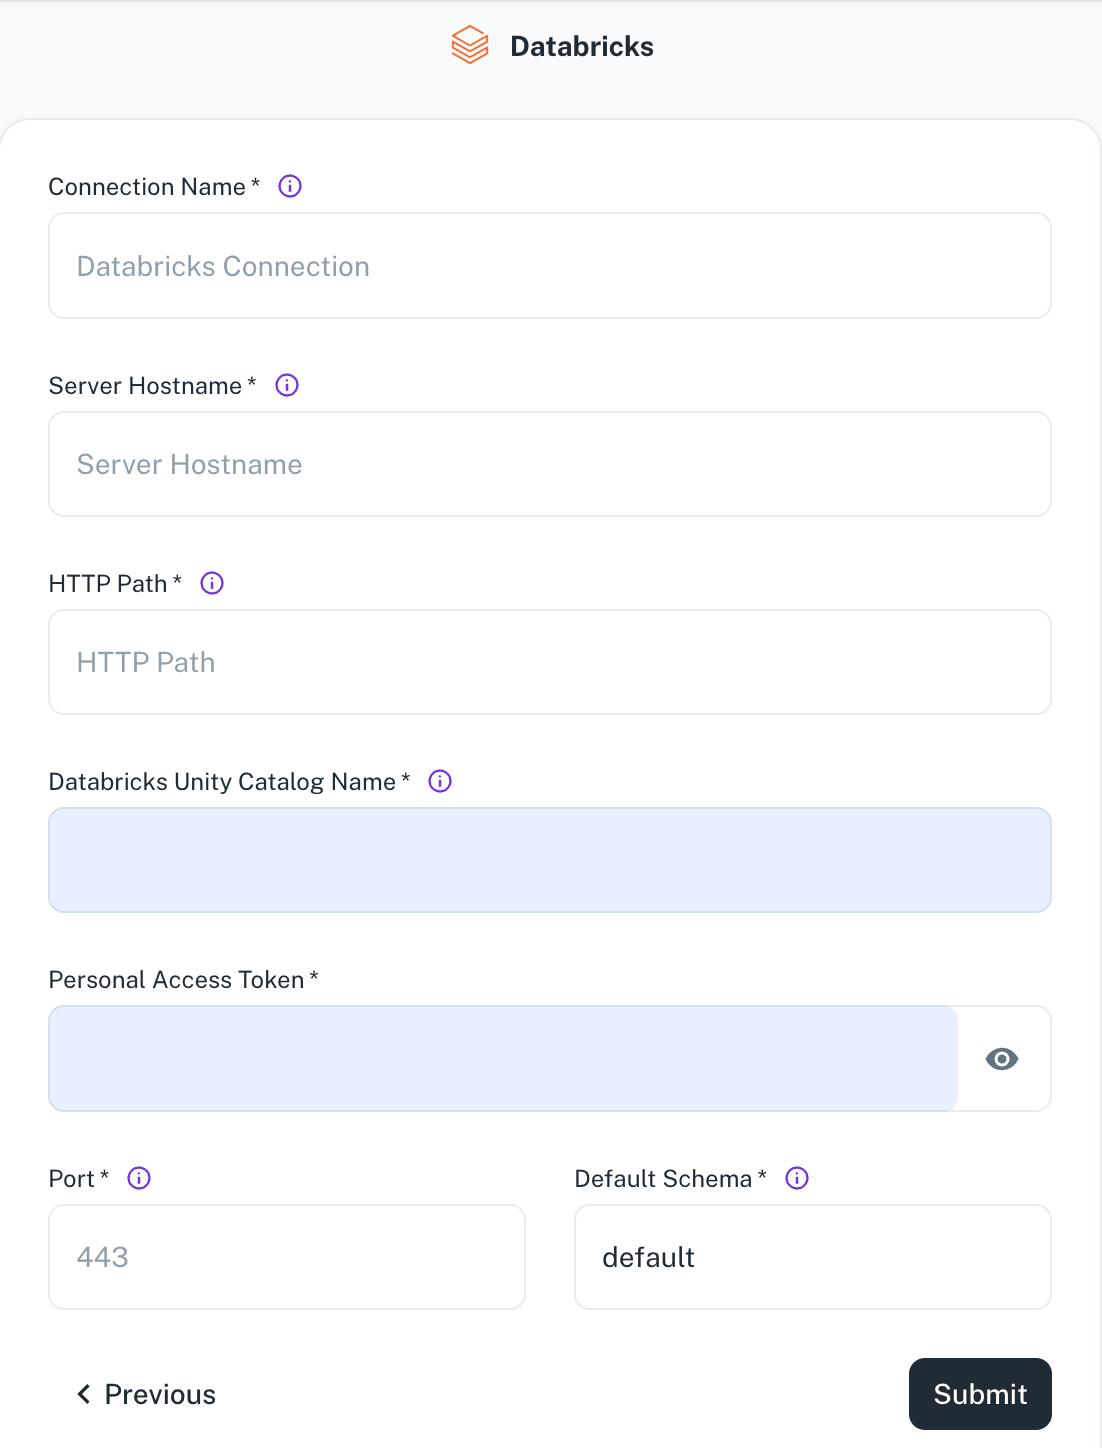
Field Description Connection Name Enter a unique name for this connection. This will help you identify it later. Server Hostname Specify the host name of the Databricks cluster you want to connect to. HTTP Path Specify the HTTP path of the Databricks cluster you want to connect to. Databricks Unity Catalog Name Enter the name of the unity catalog for the database. Personal Access Token Specify the personal access token to authenticate access to the Databricks cluster. Port Specify the Databricks cluster port. Default Schema The default schema tables are written. If not specified otherwise, the default schema will be used. -
Click Submit.
Adding Google BigQuery data source
-
From the left navigation panel, click Lakehouse and then click Data Sources.
-
From the upper right corner of the page, click the + New Database button to start the process of adding a new database.
-
Specify the following details to add Google BigQuery and then click Submit. Once you have connected a data source, the system immediately fetches its schema. After this schema retrieval process is complete you can browse and interact with the tables and data.
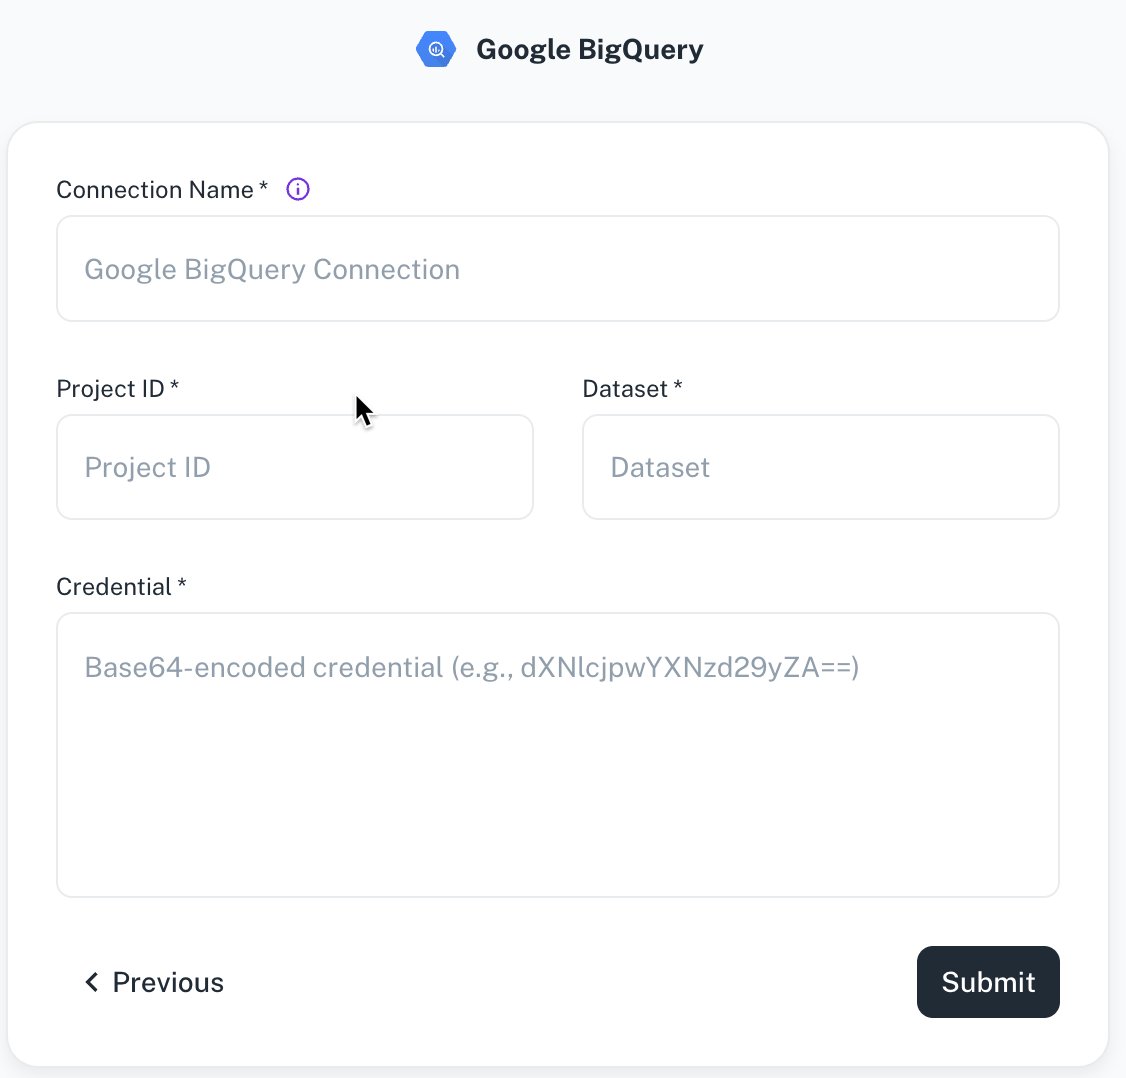
Field Description Connection Name Enter a unique name for this connection. This will help you identify it later. Project ID Specify the ID of the project that you want to connect. Dataset Specify the dataset name or ID for your connection. Credentials Specify the credentials to authenticate access to BigQuery. -
Click Submit.
Adding IBM DB2 as data source
-
From the left navigation panel, click Lakehouse and then click Data Sources.
-
From the upper right corner of the page, click the + New Database button to start the process of adding a new database.
-
Specify the following details to add IBM DB2 and then click Submit. Once you have connected a data source, the system immediately fetches its schema. After this schema retrieval process is complete you can browse and interact with the tables and data.
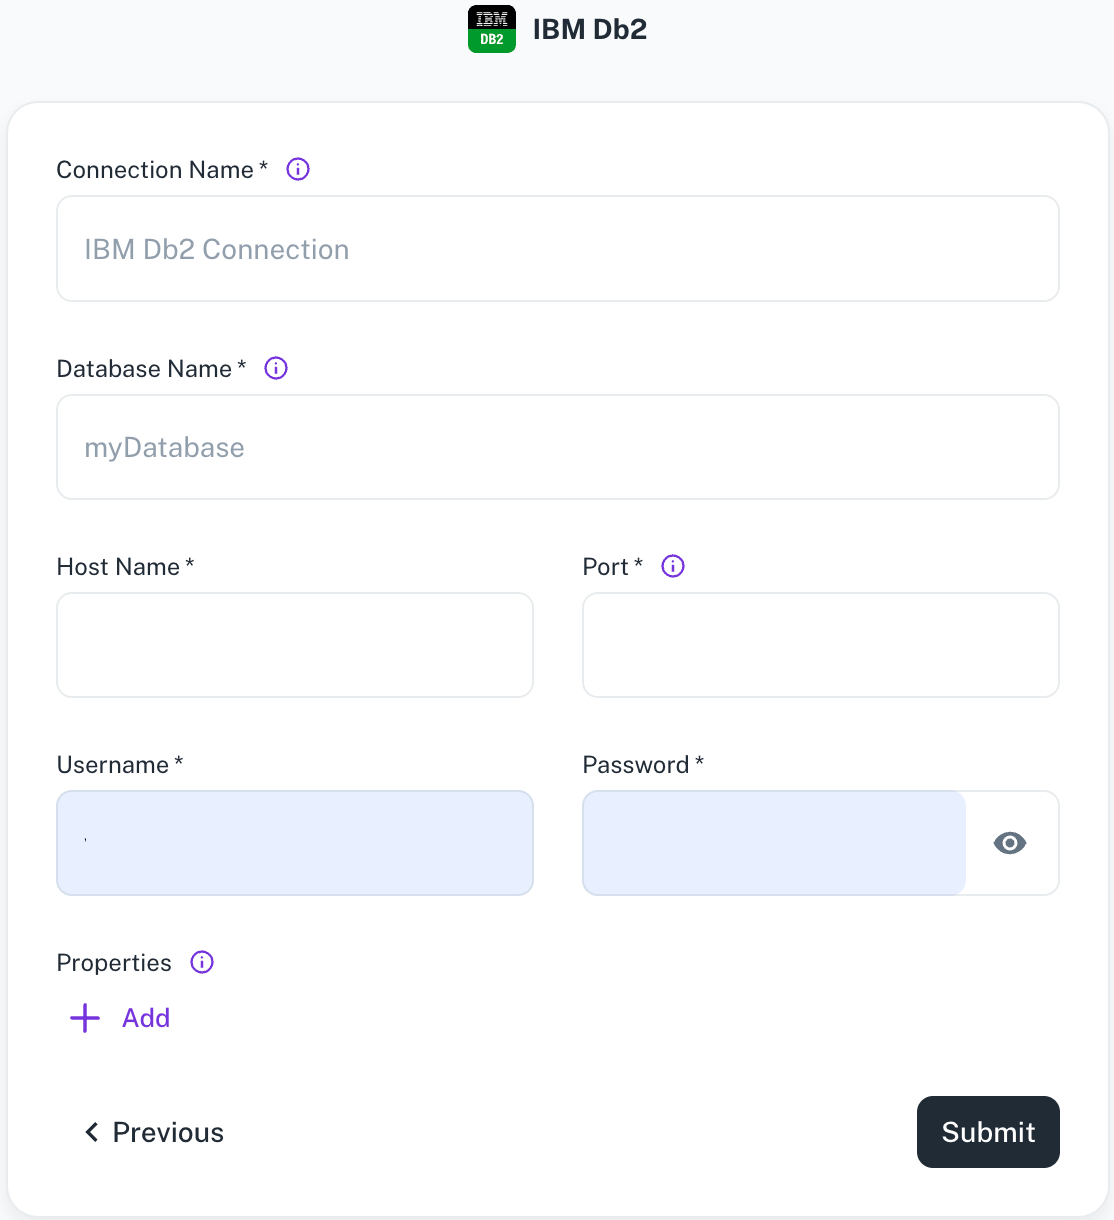
Field Description Connection Name Enter a unique name for the connection. Database Name Specify the name of the existing database you want to connect to. Host Name Specify the host address of the database server. Port Specify the port number of the database server. Username / Password Provide the credentials for the account. Properties Specify additional settings by entering key/value pairs. Each pair represents a unique property and its value. -
Click Submit.
Adding MariaDB data source
-
From the left navigation panel, click Lakehouse and then click Data Sources.
-
From the upper right corner of the page, click the + New Database button to start the process of adding a new database.
-
Specify the following details to add MariaDB and then click Submit. Once you have connected a data source, the system immediately fetches its schema. After this schema retrieval process is complete you can browse and interact with the tables and data.
| Field | Description |
|---|---|
| Connection name | Enter a unique name for the connection. |
| Database name | Specify the name of the existing database you want to connect to. |
| Hostname | Provide the hostname or IP address of the server where the database resides. |
| Port | Enter the port number used by the database server. |
| Username/Password | Provide the credentials to access the database server. |
| Properties | Specify additional settings by entering key/value pairs. Each pair represents a unique property and its value. |
- Click Submit.
Adding MongoDB Atlas data source
-
From the left navigation panel, click Lakehouse and then click Data Sources.
-
From the upper right corner of the page, click the + New Database button to start the process of adding a new database.
-
Specify the following details to add MongoDB Atlas and then click Submit. Once you have connected a data source, the system immediately fetches its schema. After this schema retrieval process is complete you can browse and interact with the tables and data.
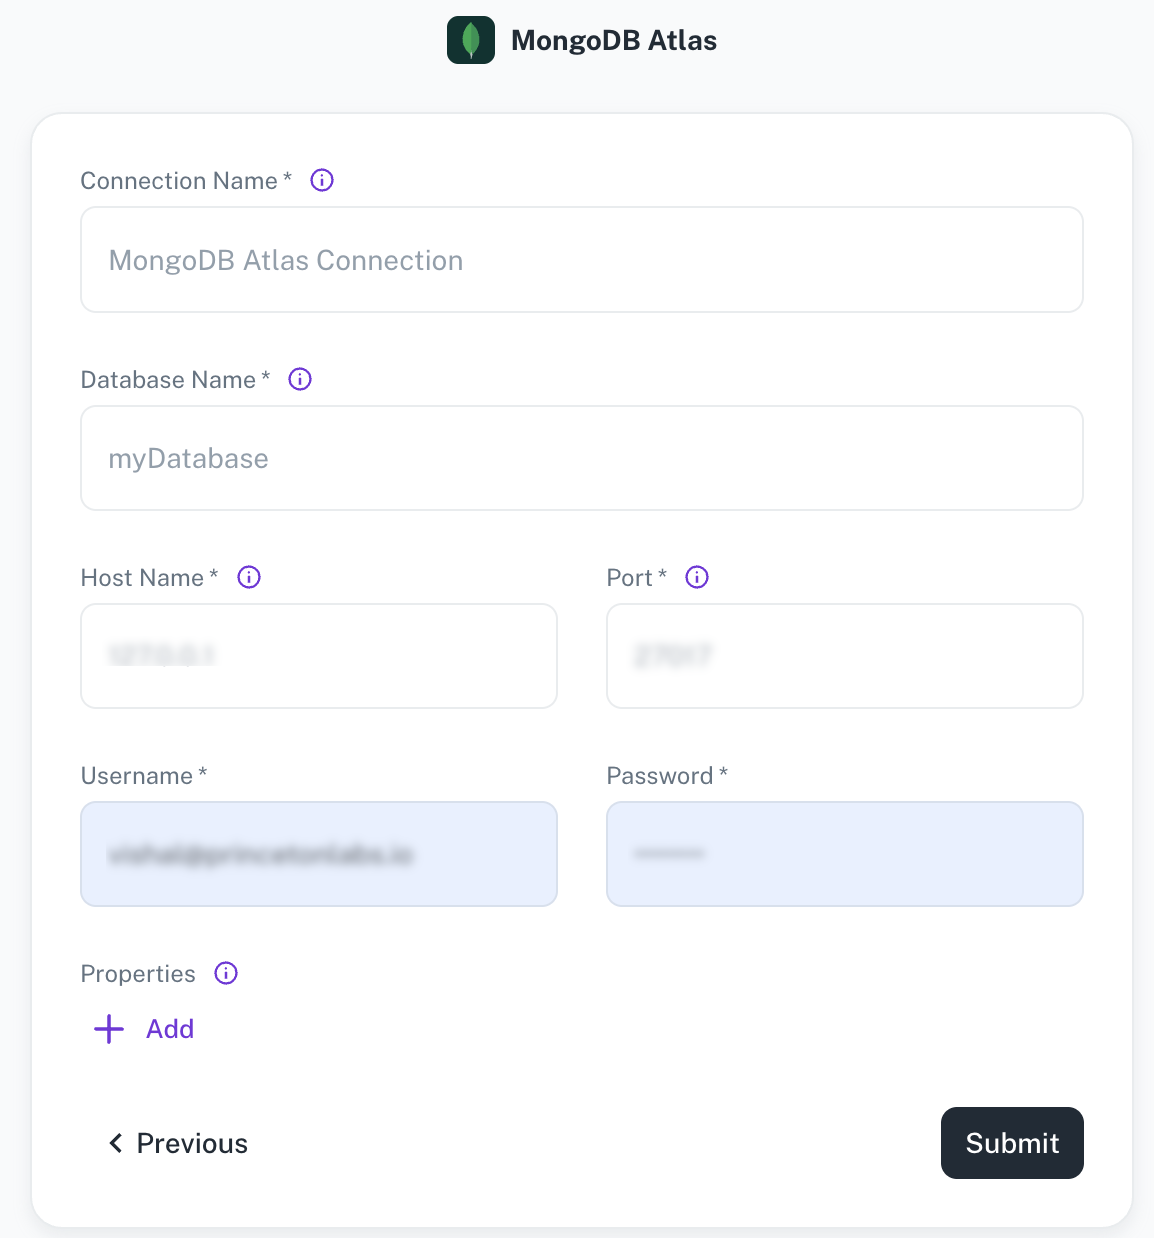
Field Description Connection Name Enter a unique name for this connection. This will help you identify it later. Database Name Specify the name of the existing database you want to connect to. Schema Name Specify the schema name for your connection. Hostname Provide the hostname or IP address of the server where the database resides. Port Enter the port number used by the database server. Username/Password Provide the credentials to access the database server. Properties Specify additional settings by entering key/value pairs. Each pair represents a unique property and its value. -
Click Submit.
Adding MySQL or PostgreSQL data source
-
From the left navigation panel, click Lakehouse and then click Data Sources.
-
From the upper right corner of the page, click the + New Database button to start the process of adding a new database.
-
Specify the following details to add Microsoft SQL or PostgreSQL and then click Submit. Once you have connected a data source, the system immediately fetches its schema. After this schema retrieval process is complete you can browse and interact with the tables and data.
MySQL PostgreSQL 
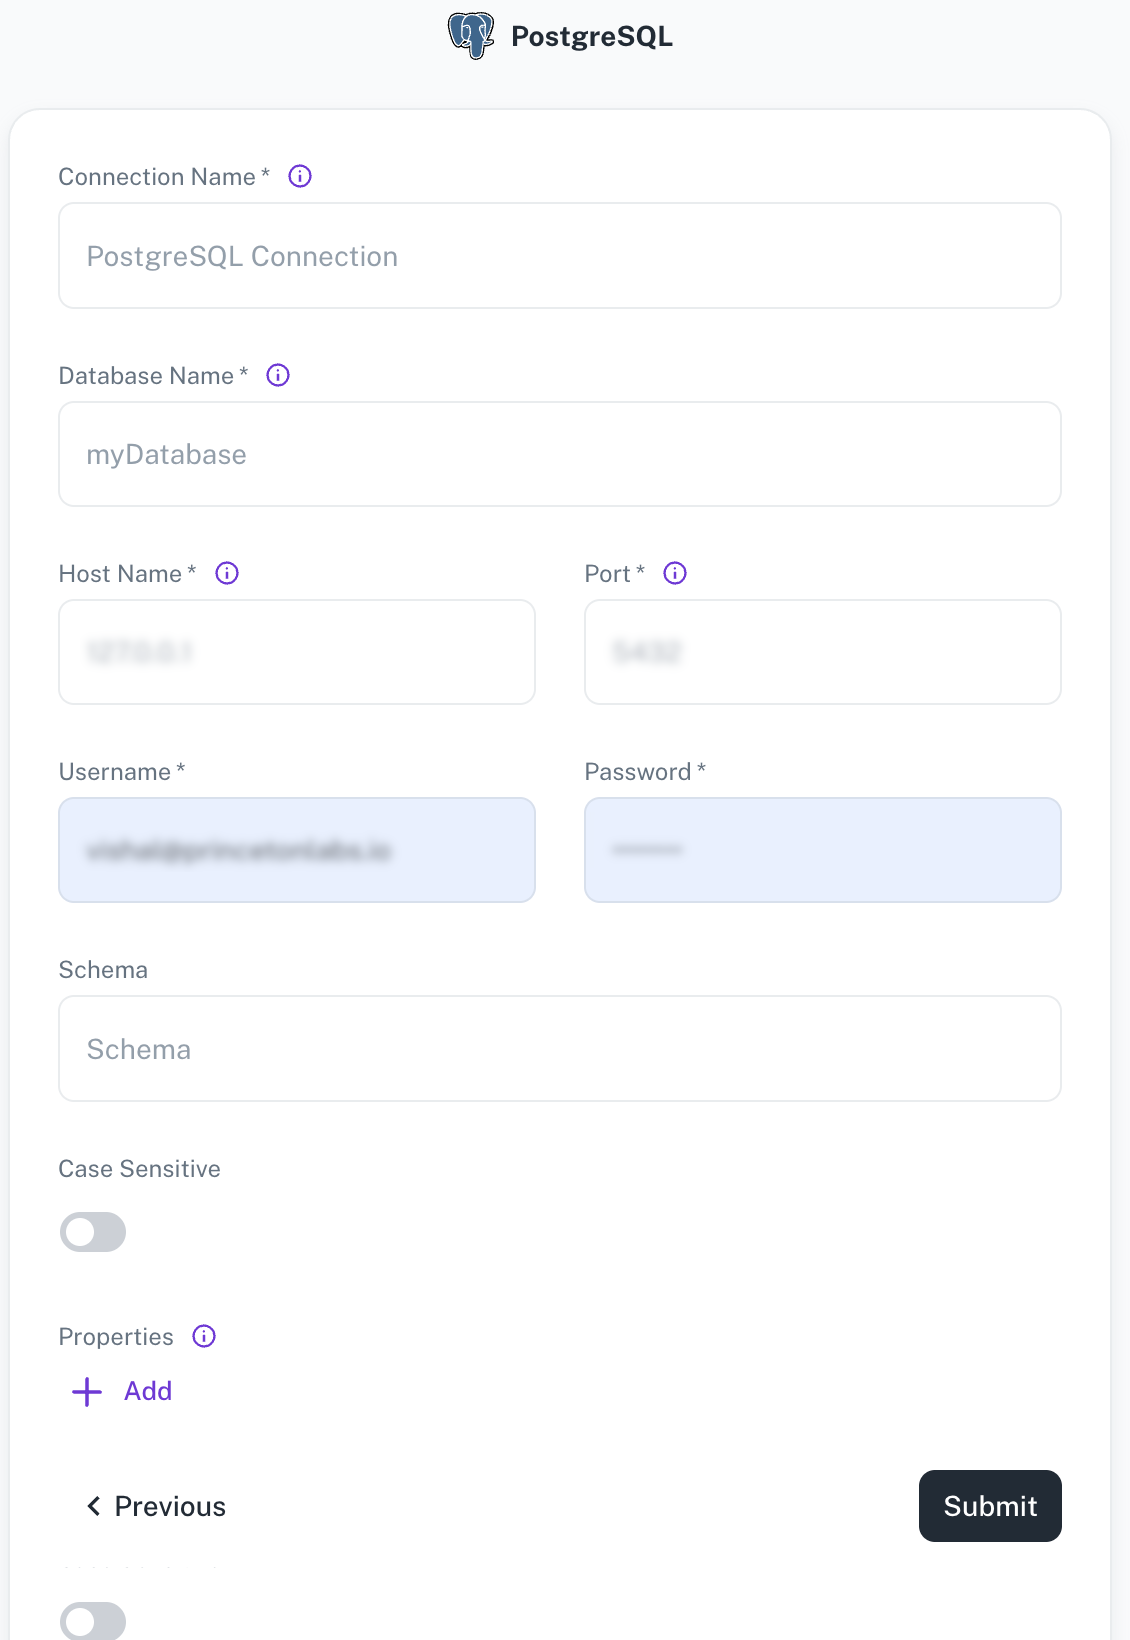
Field Description Connection name Enter a unique name for the connection. Database Specify the name of the existing database that you want to connect. Host name Specify the hostname or IP address of the server wherein the database is located. Port name Enter the port number used by the database server. Schema Specify the schema name for your PostgreSQL or Microsoft SQL connection. If left blank, the default schema will be used (“public” for Postgres and “dbo” for Microsoft SQL). Properties Specify additional settings by entering key/value pairs. Each pair represents a unique property and its value. Case Sensitive Specify whether your PostgreSQL or Microsoft SQL Server data source has case-sensitive table names. This option allows for seamless integration with databases that use Camel Case or other naming conventions. -
Click Submit.
Adding SAP HANA as data source
-
From the left navigation panel, click Lakehouse and then click Data Sources.
-
From the upper right corner of the page, click the + New Database button to start the process of adding a new database.
-
Specify the following details to add SAP HANA and then click Submit. Once you have connected a data source, the system immediately fetches its schema. After this schema retrieval process is complete you can browse and interact with the tables and data.
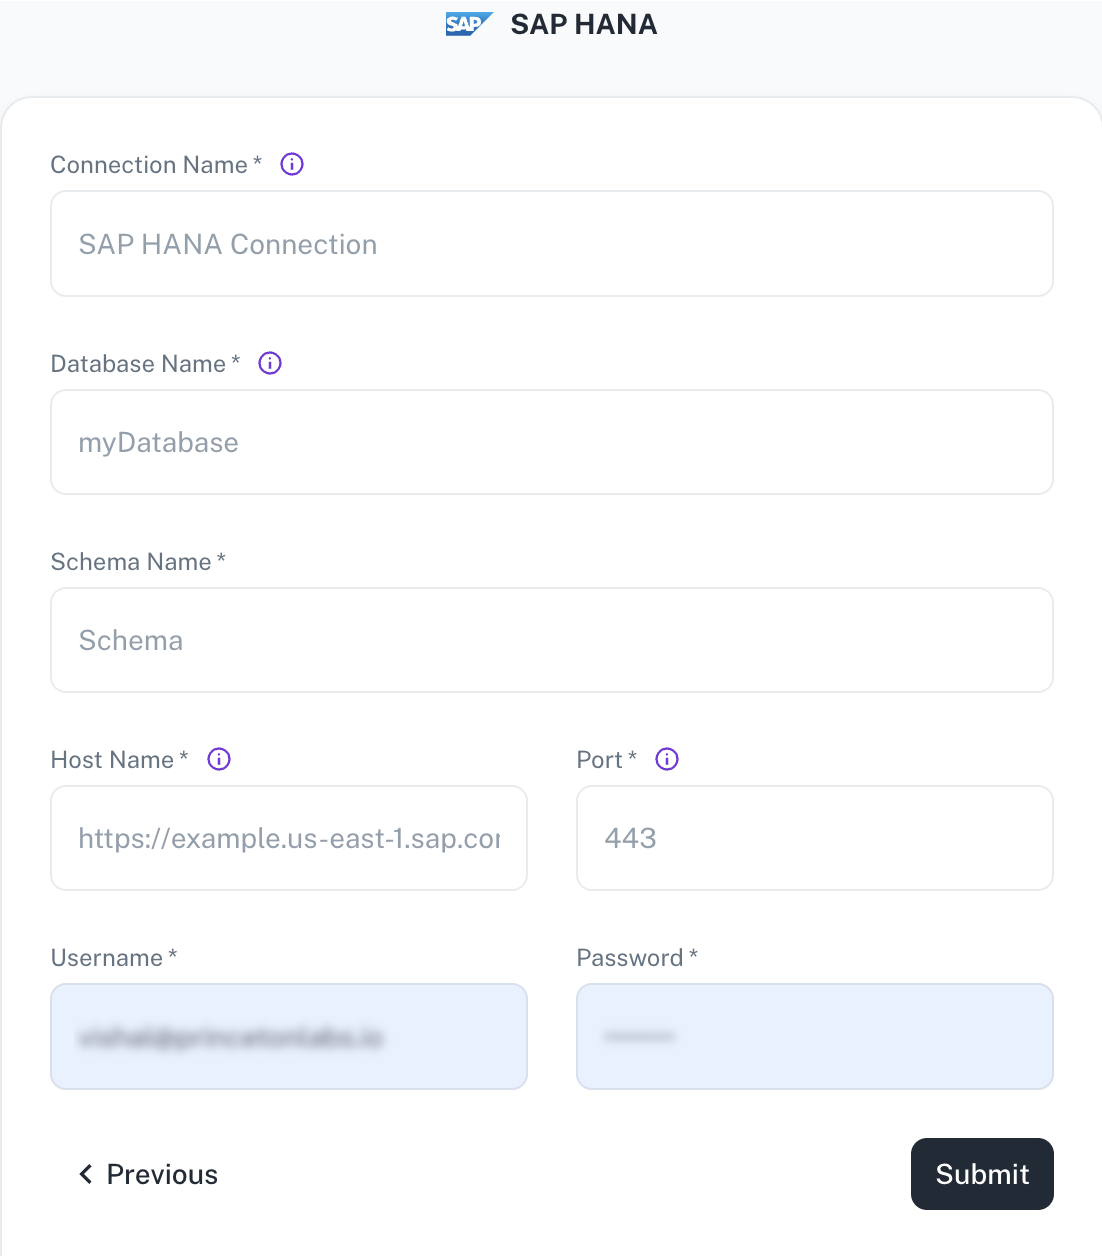
Field Description Connection Name Enter a unique name for the connection. Database Name Specify the name of the existing data that you want to connect. Schema Name Specify the schema name. Hostname Provide the hostname of the server where the database resides. Port Specify the port number used by the database server. Username/Password Specify the credentials to access the server. -
Click Submit.
Adding Snowflake as data source
-
From the left navigation panel, click Lakehouse and then click Data Sources.
-
From the upper right corner of the page, click the + New Database button to start the process of adding a new database.
-
Specify the following details to add Snowflake and then click Submit. Once you have connected a data source, the system immediately fetches its schema. After this schema retrieval process is complete you can browse and interact with the tables and data.
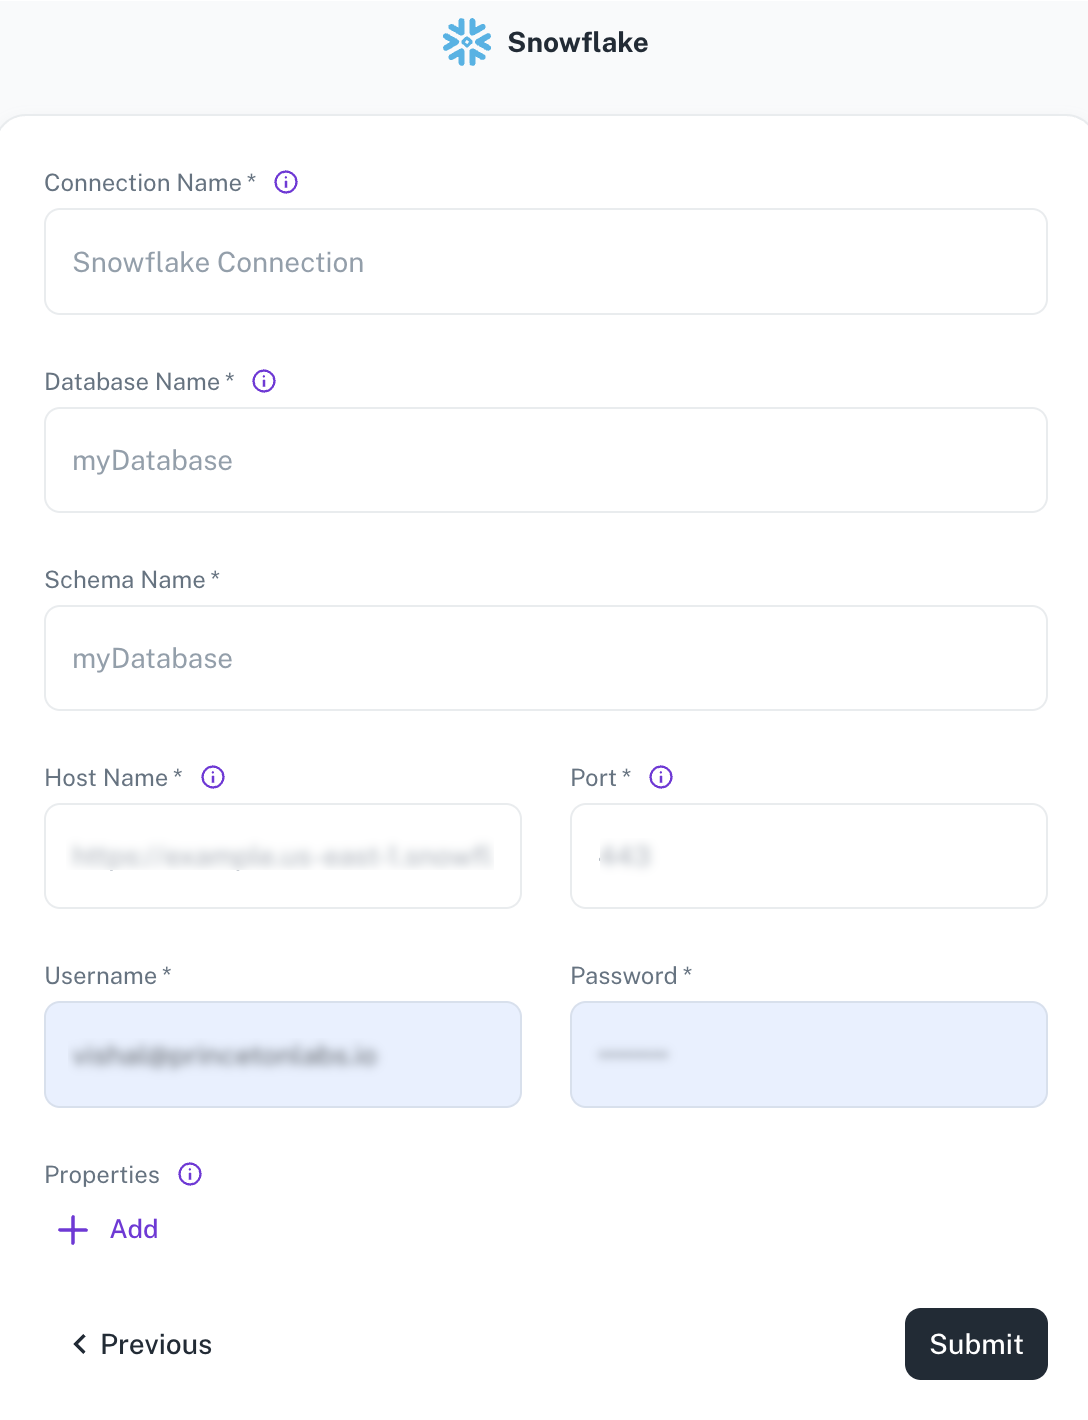
Field Description Connection Name Enter a unique name for this connection. This will help you identify it later. Database Name Specify the name of the existing database you want to connect to. Schema Name Specify the schema name for your connection. Hostname Provide the hostname or IP address of the server where the database resides. Port Enter the port number used by the database server. Username/Password Provide the credentials to access the database server. Properties Specify additional settings by entering key/value pairs. Each pair represents a unique property and its value. -
Click Submit.
Data Files / Storage Services
Adding Azure File as data source
-
From the left navigation panel, click Lakehouse and then click Data Sources.
-
From the upper right corner of the page, click the + New Database button to start the process of adding a new database.
-
Specify the following details to add Azure File and then click Submit. Once you have connected a data source, the system immediately fetches its schema. After this schema retrieval process is complete you can browse and interact with the tables and data.
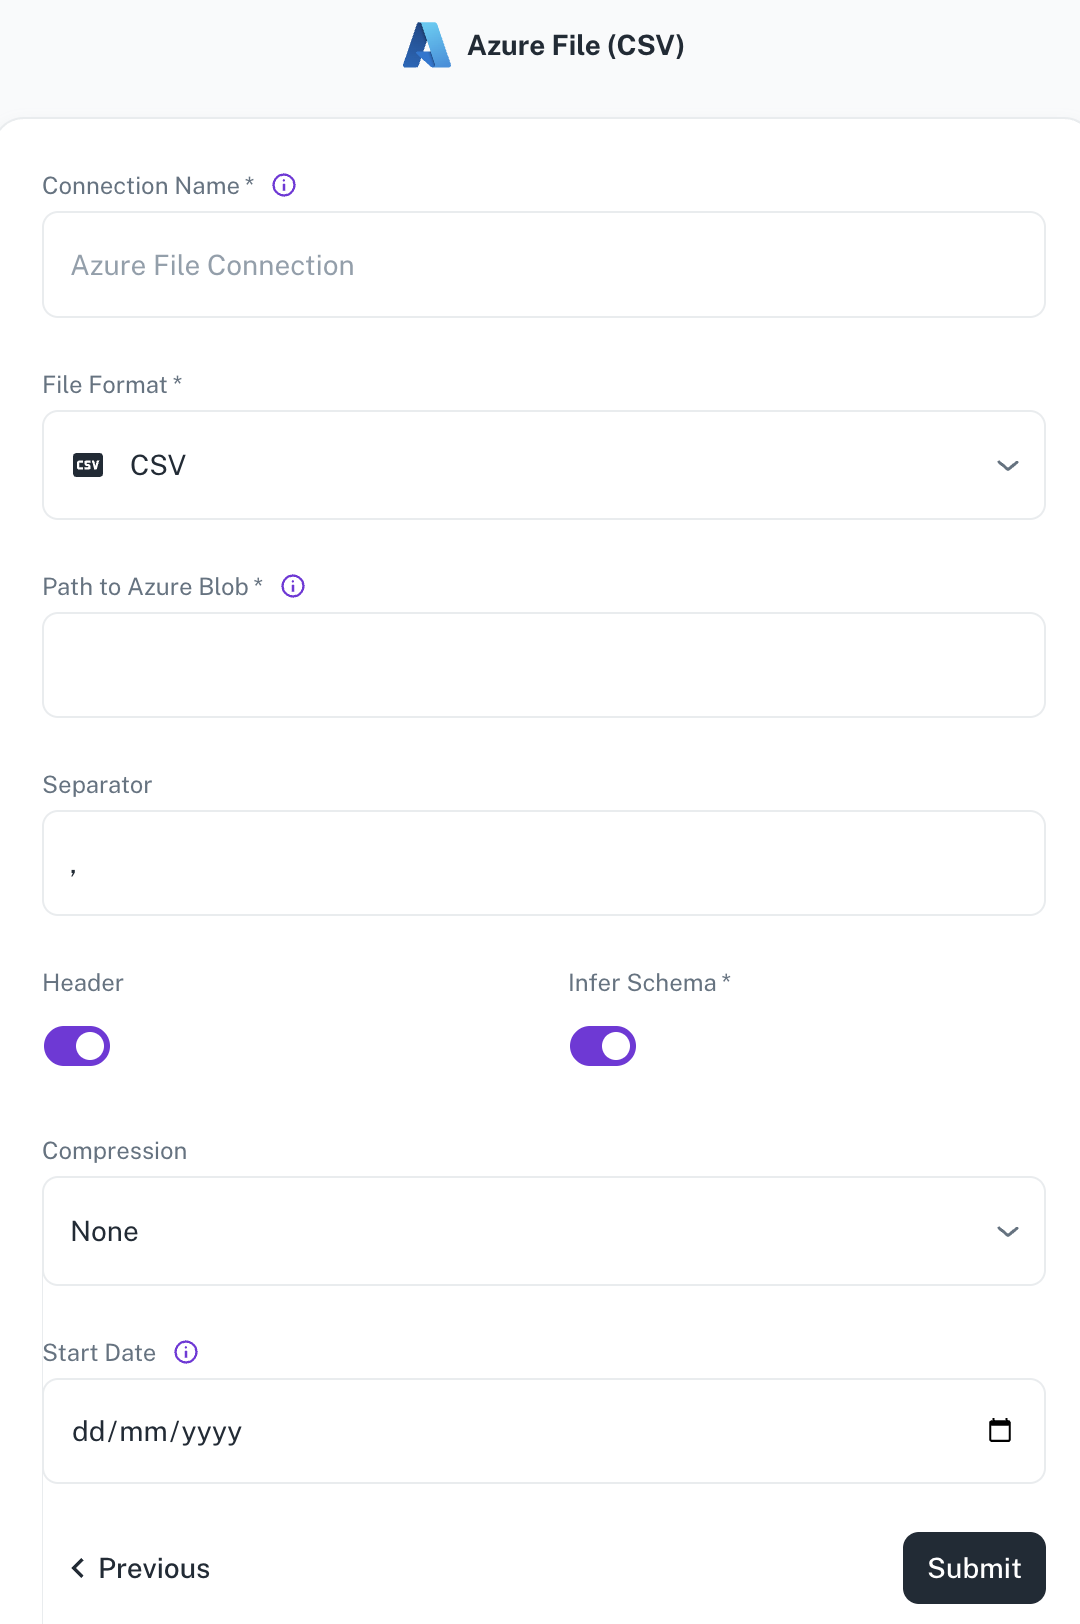
Field Description Connection name Enter a unique name for the connection. File Format Specify any of the following file formats: CSV Parquet JSON Path to Azure container Path of the Azure Blob where the files exist. For example: containername@storageaccountname.dfs.core.windows.net/pathSeparator Specify the separator character to separate the data. For example: “,” Header Toggle to indicate if the first row of your CSV contains column headers. Infer Schema Toggle to automatically determine the data type of each column in your data. Multiline Toggle to format the JSON output across multiple lines. Compression Select the file compression mode. Start date Enter the date in the MM-DD-YYYY format. DataGOL will replicate the data updated on and after this date. If this field is blank, DataGOL will replicate the data for last two years. -
Click Submit.
Adding Folder as a data source
-
From the left navigation panel, click Lakehouse and then click Data Sources.
-
From the upper right corner of the page, click the + New Database button to start the process of adding a new database.
-
Specify the following details to add folder and then click Submit. Once you have connected a data source, the system immediately fetches its schema. After this schema retrieval process is complete you can browse and interact with the tables and data.

Field Description Connection name Enter a unique name for the connection. File Format Specify any of the following file formats: CSV, Parquet, JSON, Excel Separator Specify the separator character. Header Toggle to indicate if the first row of your CSV contains column headers. This field is displayed only when the file format is CSV. Infer Schema Toggle to automatically determine the data type of each column in your data. This field is displayed only when the file format is CSV. Compression Select the file compression mode from any of the following options: Uncompressed, gzip, lzo, brotli, lz4, and zstd. Null Value A set of case-sensitive strings that should be interpreted as null values. For example, if the value 'NA' should be interpreted as null, enter 'NA' in this field. -
Click Submit.
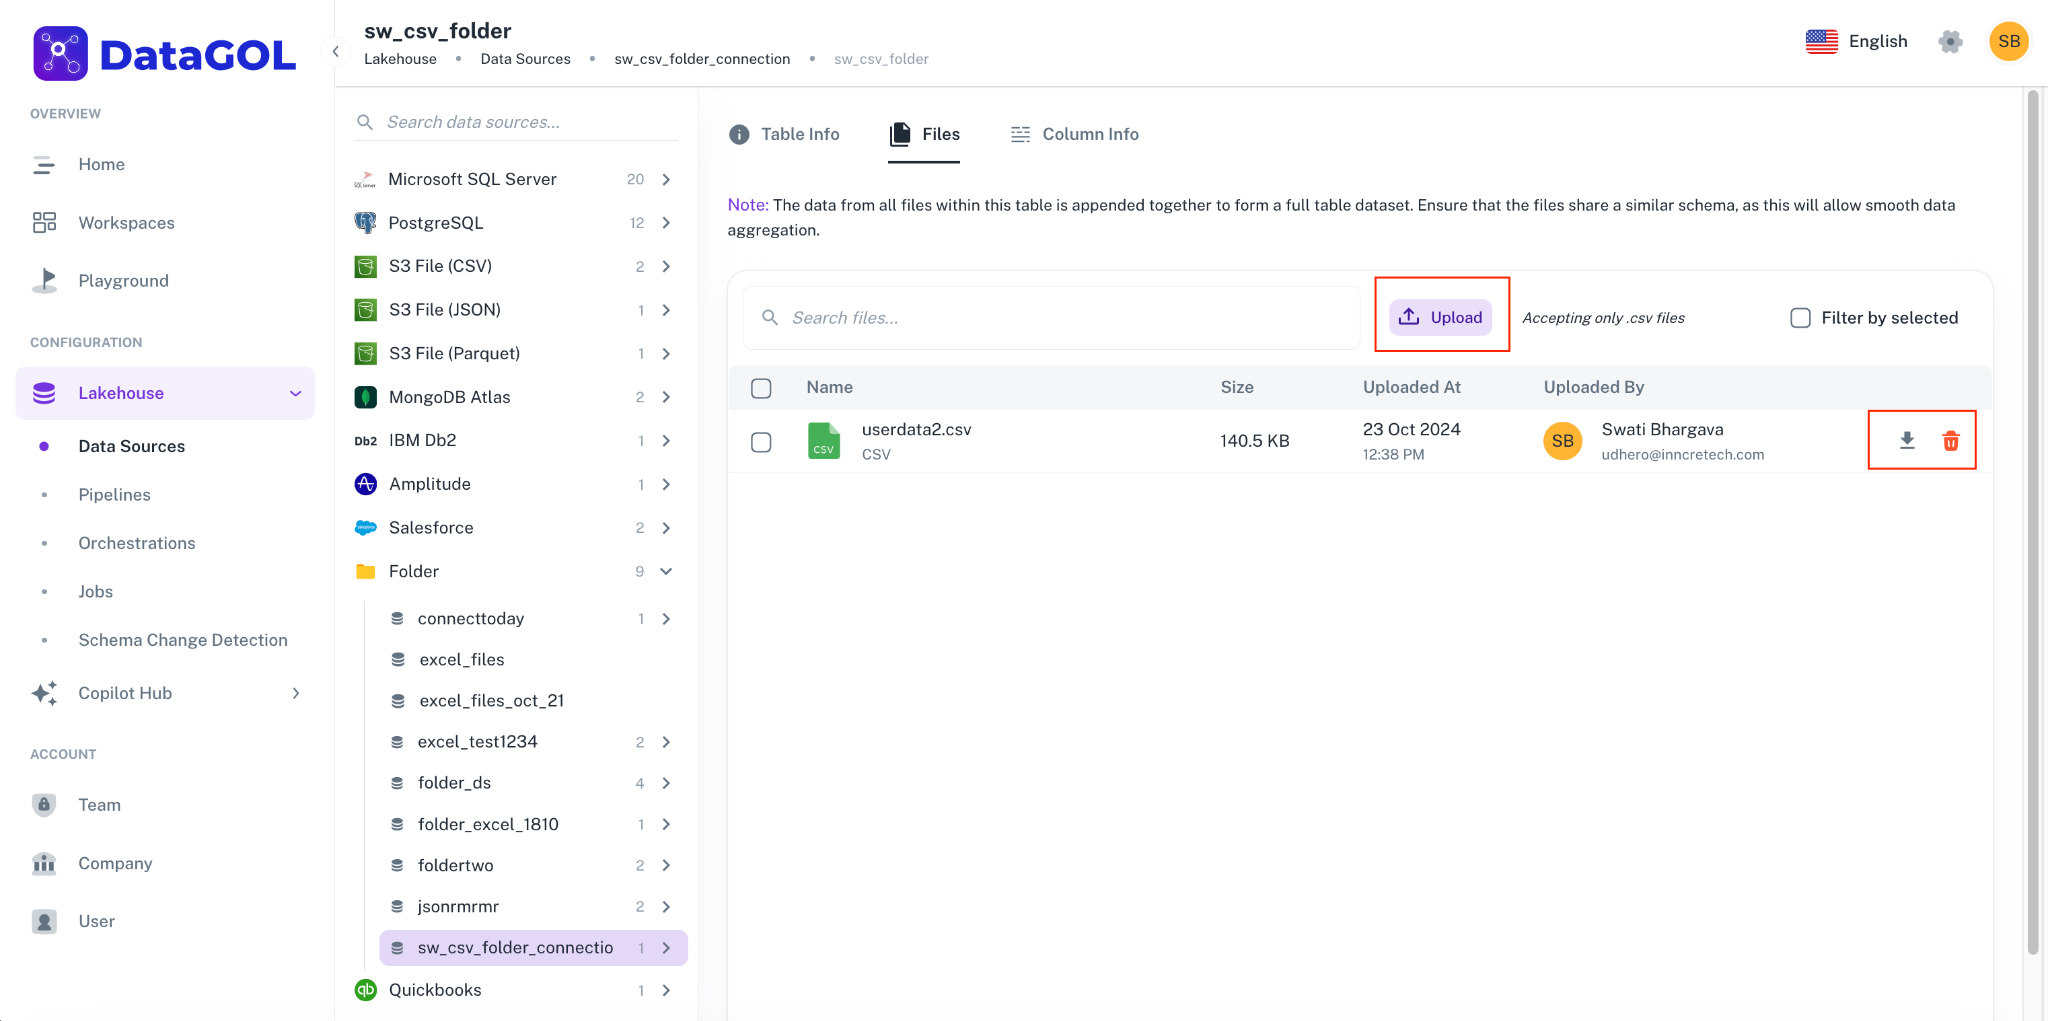
After creating a data source, add a new folder to define a unique data table. Any files uploaded to this folder will be automatically merged to populate the table's data.

To upload, download, or delete files within a specific folder, click the folder name or access the settings menu. The Files tab will provide you with the necessary options.
-
Adding files of different schemas in the same folder is not supported.
-
Multi tab excel files are not supported.
-
Folder names cannot be only numbers. Validation is yet to be added.
Adding S3 data source
The Spark environment, at the company level, allows for only one set of S3 access credentials to be configured at any given time. Consequently, Spark can be set up to access data from either DataGOL's S3 account or a single, specific client's S3 account.
Simultaneous access to data residing in multiple, different S3 accounts (like DataGOL's and a client's at the same time) is NOT supported with the current configuration.
Before you add a S3 data source, ensure to add the following beforehand from the Company section of the Home page.
-
AWS Access Keys
-
AWS Secret Key
-
Region
-
Root Directory
Do the following:
-
On the Home page of DataGOL, from the left navigation panel, click Company.
-
Click the Keys tab.
-
In the AWS Settings box, click the edit button and specify the following details:
-
AWS Access Keys
-
AWS Secret Key
-
Region
-
-
In the Root Directory text box, specify the root directory.
s3 is available only in Amazon AWS infrastructure. S3 is not available as part of Microsoft Azure.
-
From the left navigation panel, click Lakehouse and then click Data Source.
-
From the upper right corner of the page, click the + New Database button to start the process of adding a new database.
-
Specify the following details to add S3 data source and then click Submit. Once you have connected a data source, the system immediately fetches its schema. After this schema retrieval process is complete you can browse and interact with the tables and data.
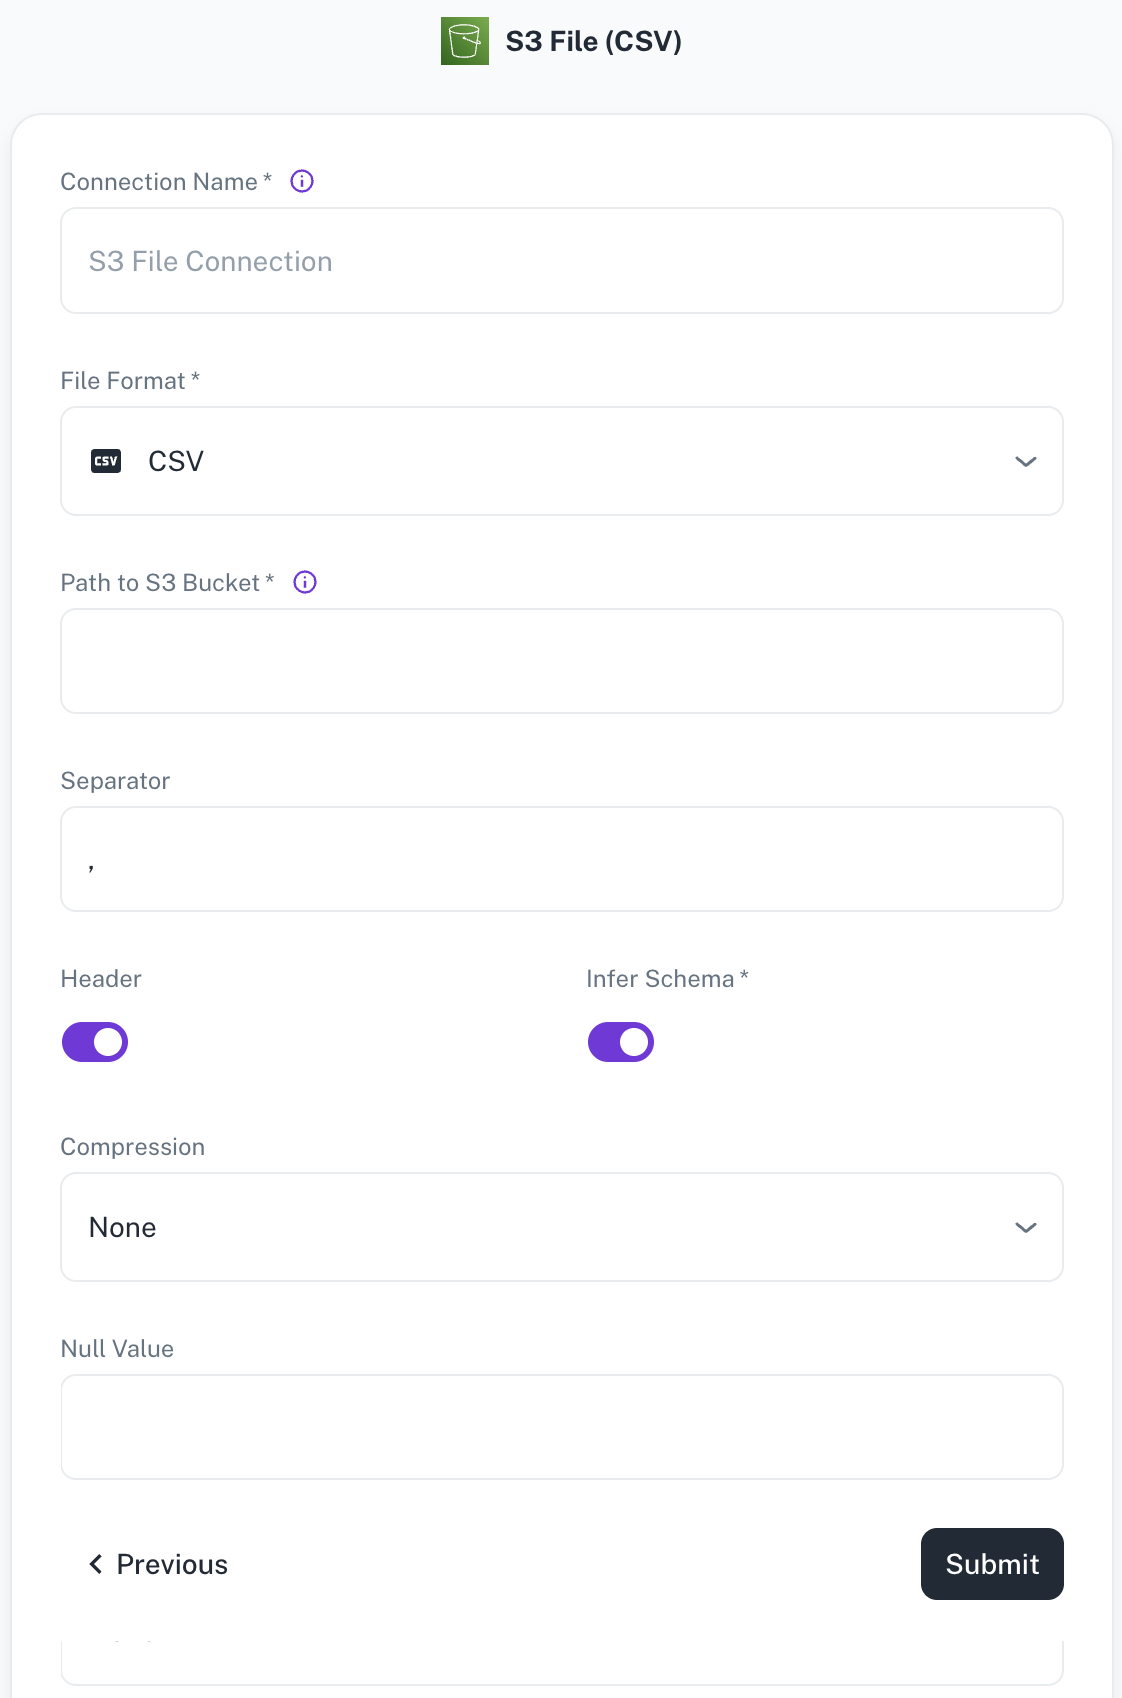
Field Description Connection name Enter a unique name for the connection. File Format Specify any of the following file formats: CSV,Parquet,JSON,Delta(Coming soon)Path to S3 bucket Specify the path of the S3 bucket where the files exist. Example: If file is present in s3a://catalog/db/source/test.csvthen path will becatalog/db. Example format:s3a://catalog/db/Separator Specify the separator character. Header Toggle to indicate if the first row of your CSV contains column headers. Infer Schema Toggle to automatically determine the data type of each column in your data. Compression Select the file compression mode from the following options: Uncompressed,gzip,lzo,brotli,lz4,zstdNull Value A set of case-sensitive strings that should be interpreted as null values. For example, if the value 'NA' should be interpreted as null, enter 'NA' in this field. -
Click Submit.
Spark's configuration limits you to using credentials for only one S3 account at a time. This means that, at the company level, you can either configure Spark with access to your DataGOL S3 account or your S3 account, but not both simultaneously.
Adding SFTP Bulk as data source
The following connector information is required from the client:
-
Username
-
Password
-
Host
-
Port
-
File Type
-
Stream Name
-
Folder Path
-
CSV Separator
-
Start Date
Do the following:
-
Login to a SFTP server using your credentials.
-
Create a folder in the server and drop your files there.
To add SFTP Bulk as data source, do the following:
-
From the left navigation panel, click Lakehouse and then click Data Sources.
-
From the upper right corner of the page, click the + New Database button to start the process of adding a new database.
-
Specify the following details to add SFTP Bulk and then click Submit. Once you have connected a data source, the system immediately fetches its schema. After this schema retrieval process is complete you can browse and interact with the tables and data.
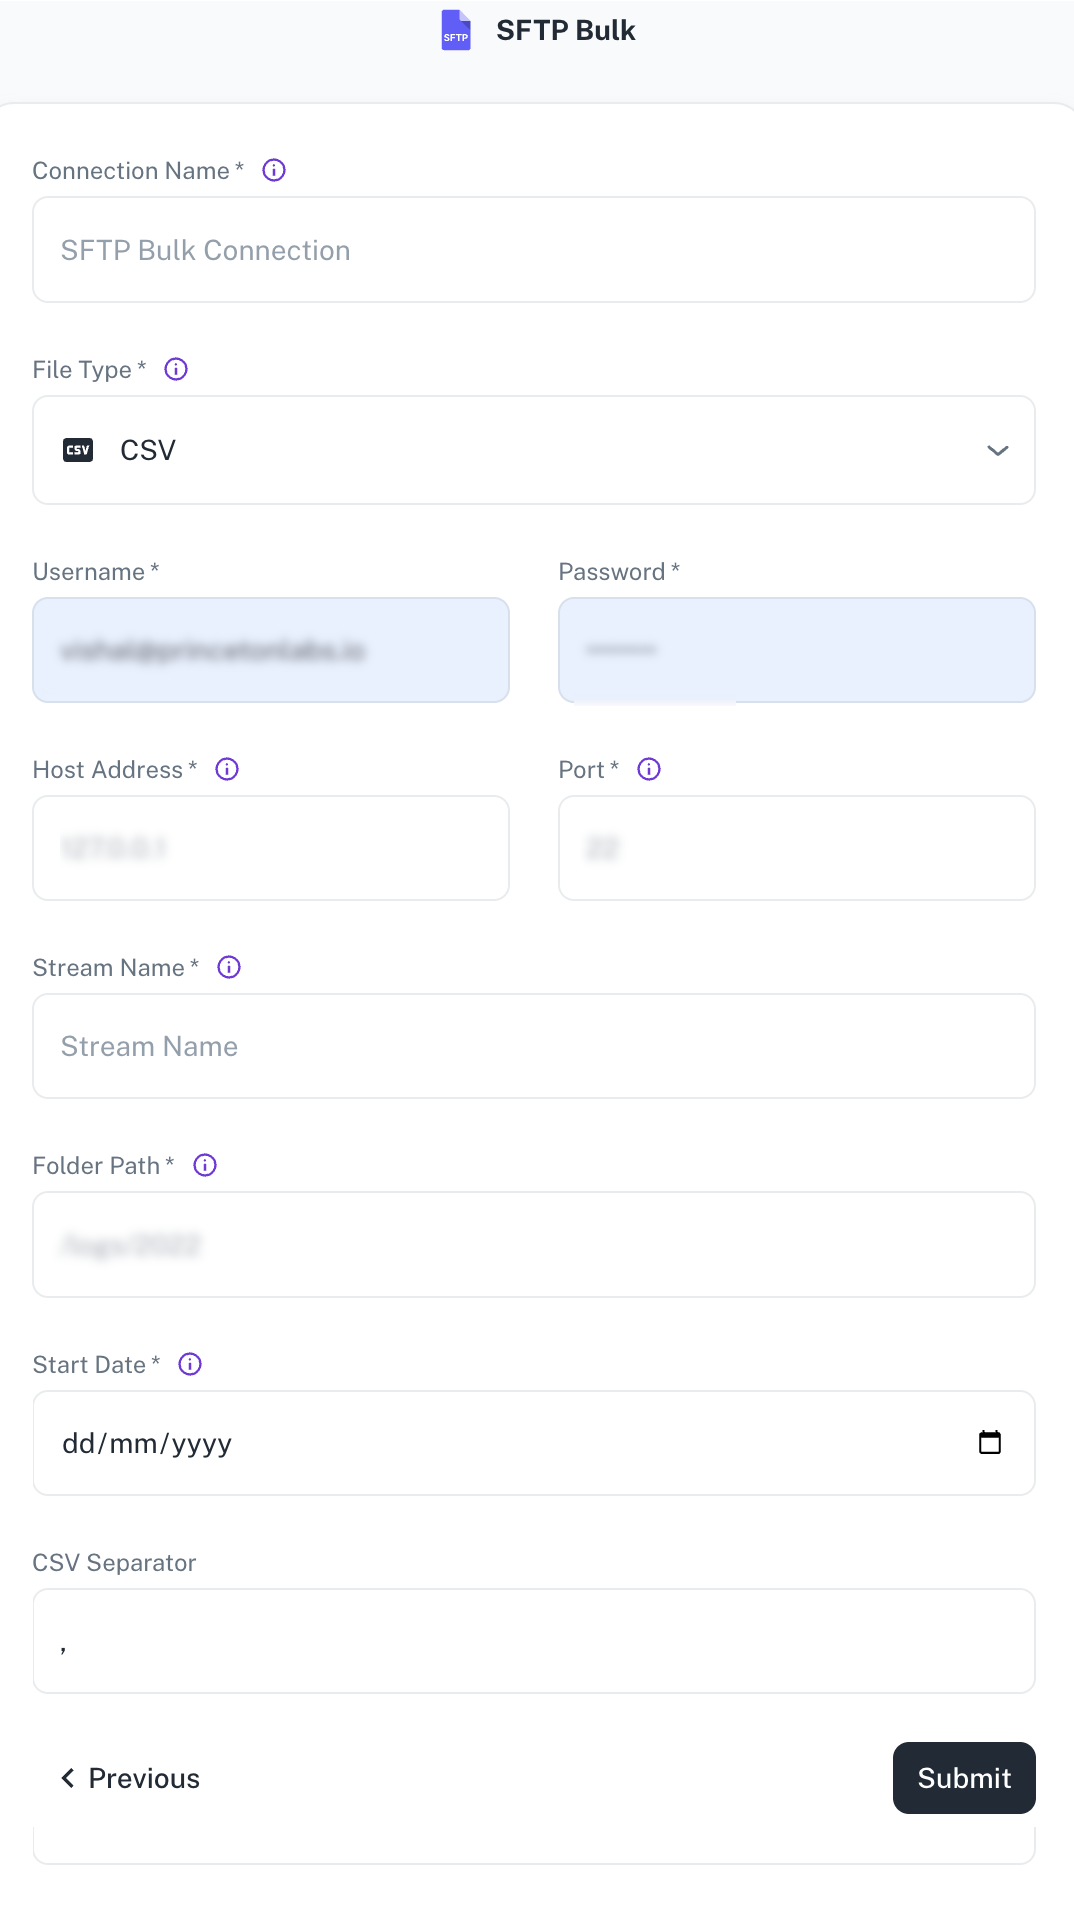
Field Description Connection Name Enter a unique name for the connection. File Type Currently, only CSV files are supported. Username / Password Specify the client credentials. Host Address Specify the SFTP server address. Port Specify the port number of the SFTP server. Stream Name Enter name of the output table you want to create. Specify the desired name for the data stream (table) in the destination warehouse. This can be any name and is independent of the actual CSV file names. Sync modes (incremental/full refresh) are configured at the stream level, not at the pipeline level. Folder Path Provide the absolute path to the folder on the SFTP server containing the CSV files (e.g., /home/Ubuntu/SFTP/credit). Ensure this path is accurate.Start Date Specify the date from which to begin replicating data. This allows for historical data selection. CSV separator Specify the delimiter used in the CSV files (comma is the default). Other separators like spaces can also be configured. -
Click Submit.
Business Applications/SaaS
Adding Amplitude as data source
The following connector information is required from the client:
-
API Key
-
Secret Key
-
Start Date
Do the following:
-
Log on to your Amplitude account.
-
Navigate to Settings > Organization Settings > Projects and click the name of the project you want to view or edit. This opens the General tab, where you will find the following information about your project:
-
API Key
-
Secret Key
-
Create a project first, if you don’t have one already. Refer to Create a project in Amplitude.
To add Amplitude as data source, do the following:
-
From the left navigation panel, click Lakehouse and then click Data Sources.
-
From the upper right corner of the page, click the + New Database button to start the process of adding a new database.
-
Specify the following details to add Amplitude and then click Submit. Once you have connected a data source, the system immediately fetches its schema. After this schema retrieval process is complete you can browse and interact with the tables and data.
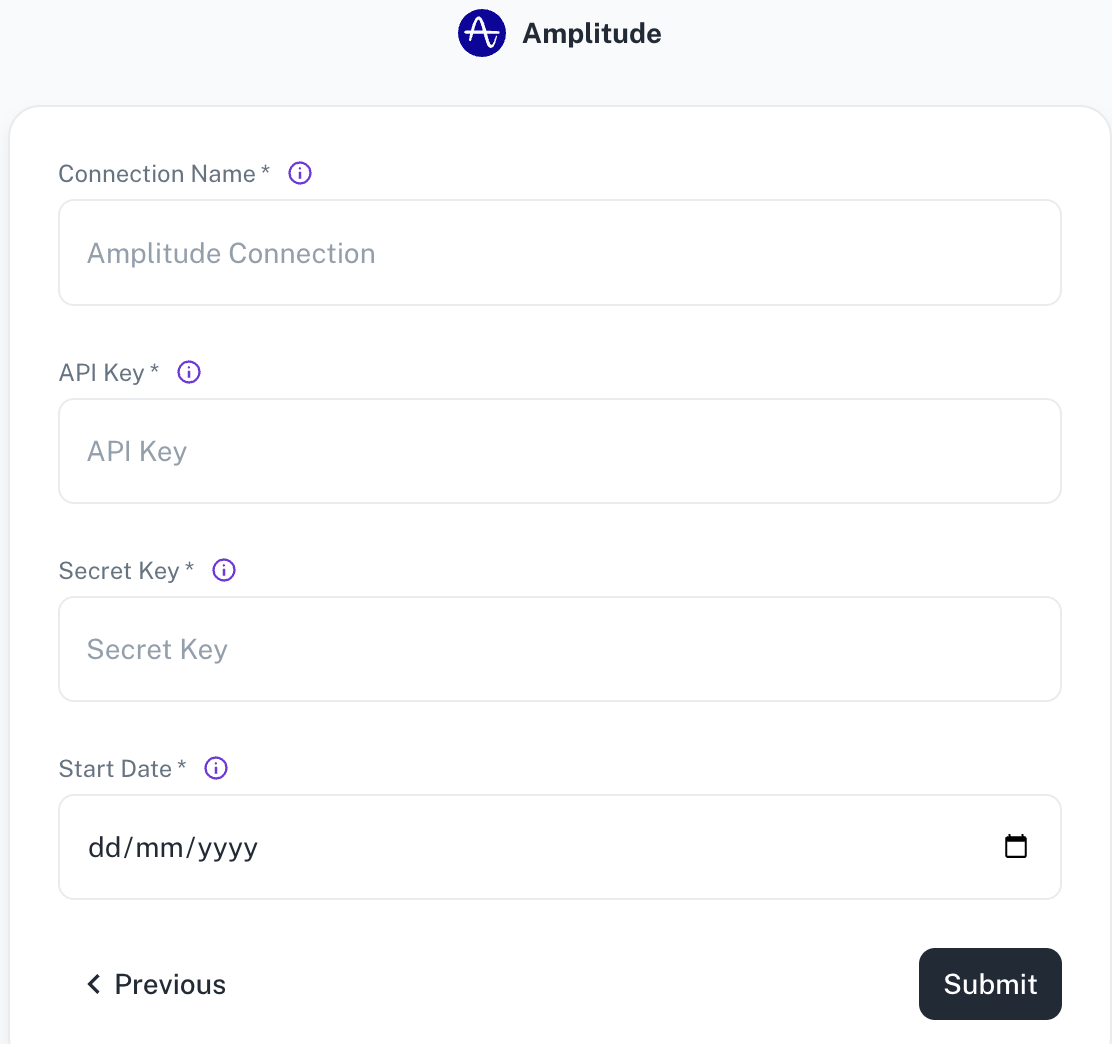
Field Description Connection Name Enter a unique name for the connection. API Key Amplitude API Key. See the docs for more information on how to generate this key. Secret Key Amplitude Secret Key. Start Date Enter the date in the MM-DD-YYYY format. DataGOL will replicate the data updated on and after this date. -
Click Submit.
Adding ChargeBee as data source
The following connector information is required from the client:
-
API key
-
Site
-
Start date
Do the following to
-
Log on to your Chargebee account.
-
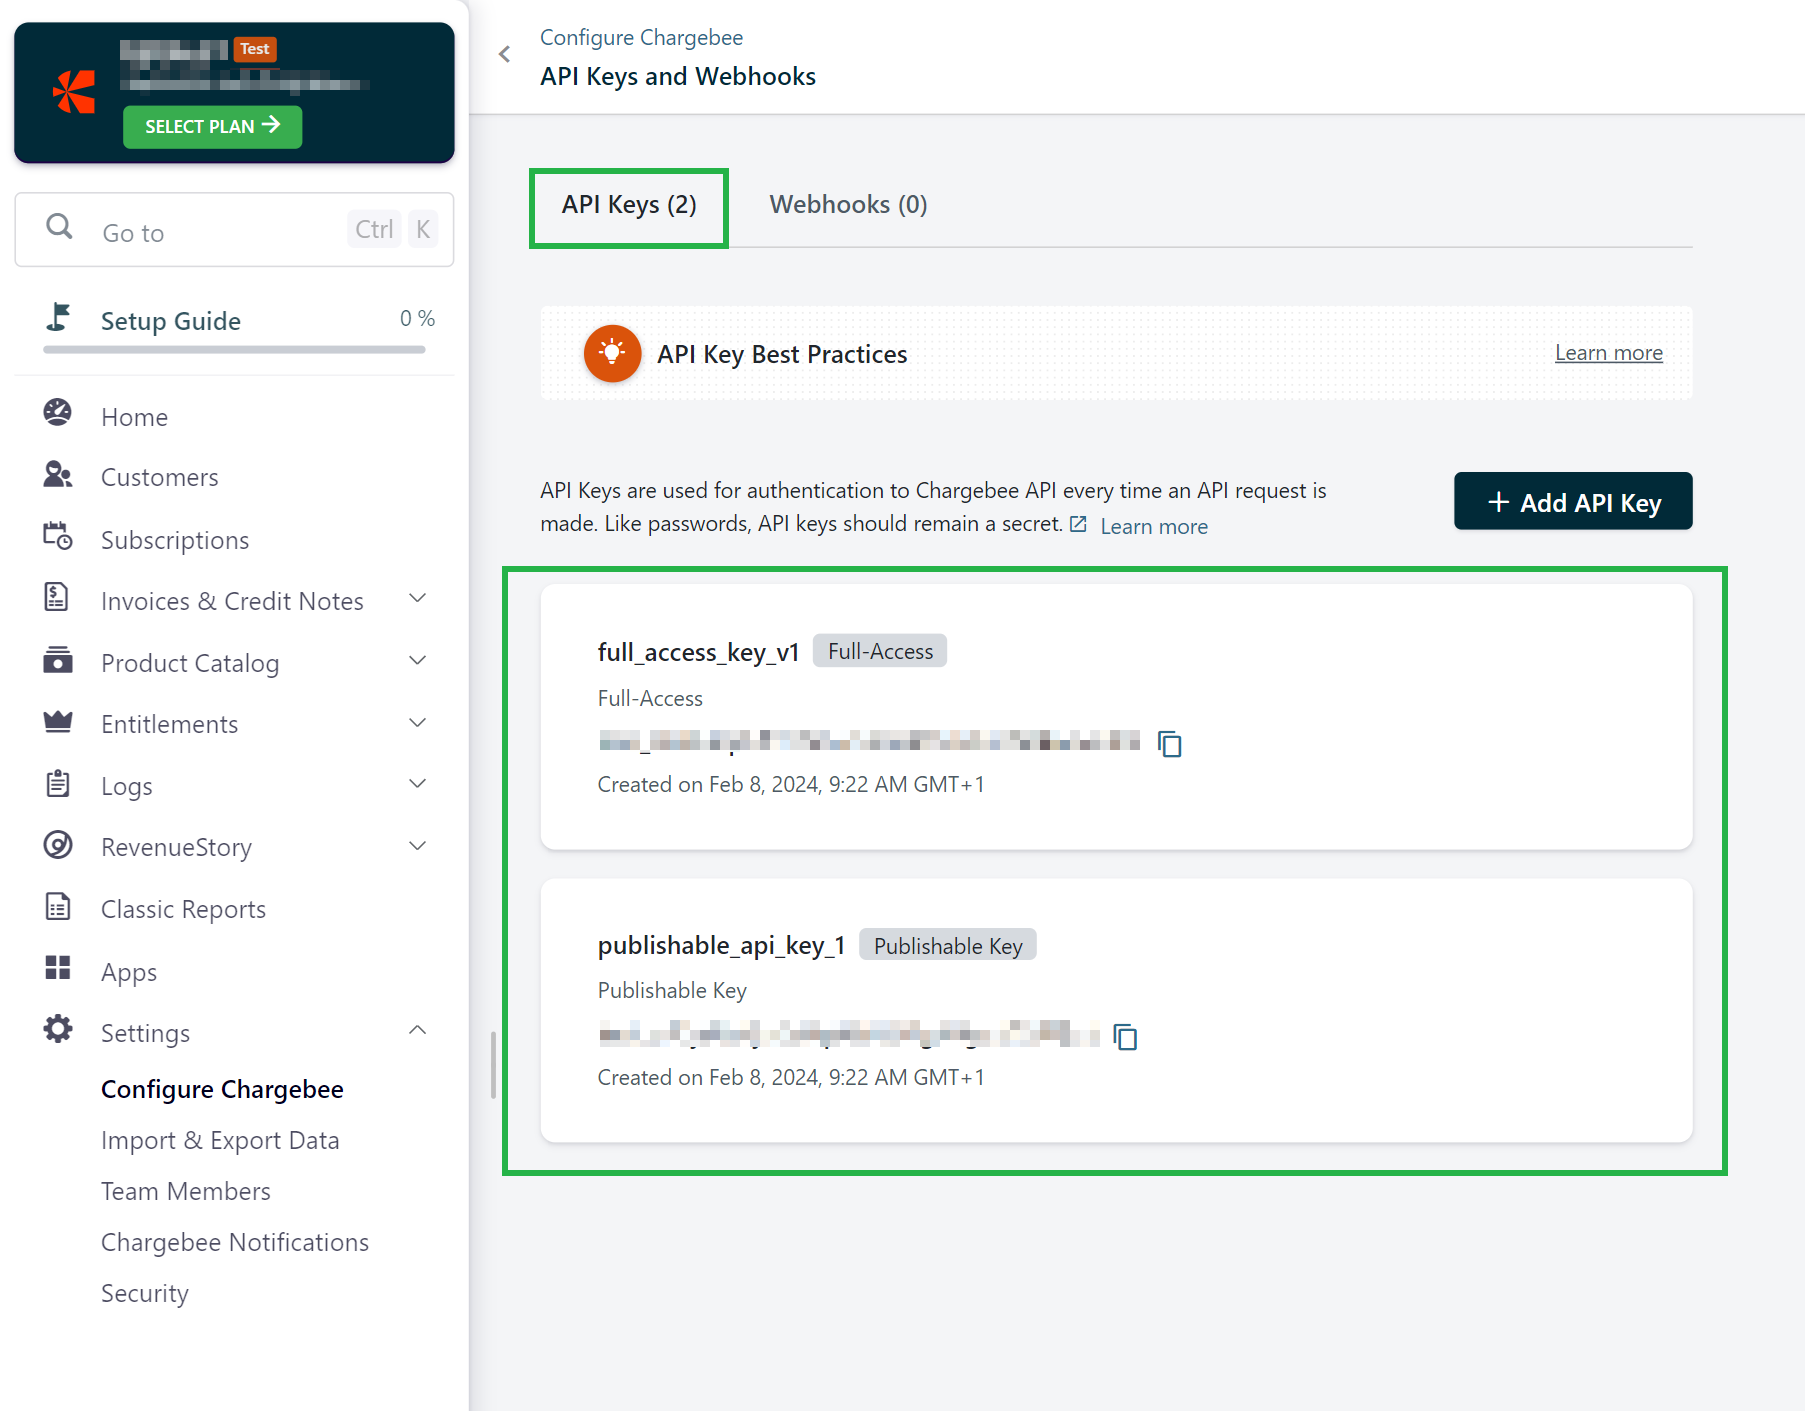
To create and configure the API keys, select Settings > Configure Chargebee > API Keys and Webhooks.
-
Click on the API Keys tab. Any existing API keys are listed.
To add ChargeBee as a data source, do the following:
-
From the left navigation panel, click Lakehouse and then click Data Sources.
-
From the upper right corner of the page, click the + New Database button to start the process of adding a new database.
-
Specify the following details to add Chargebee and then click Submit. Once you have connected a data source, the system immediately fetches its schema. After this schema retrieval process is complete you can browse and interact with the tables and data.

Field Description Connection Name Enter a unique name for the connection. API Key ChargeBee API Key. Site The site prefix for your ChargeBee instance. Start Date Enter the date in the MM-DD-YYYY format. DataGOL will replicate the data updated on and after this date. -
Click Submit.
Adding Cvent as data source
The following connector information is required from the client:
-
Client ID
-
Client Secret
Do the following:
-
Login to your Cvent account and go to Abstracts > Users > Login.
-
Access the Cvent Developer portal:
- Visit Cvent’s Developer Portal. You can typically access it by searching for "Cvent Developer Portal" or by navigating directly to developers cvent portal
-
Create a New Application:
-
Once you are logged into the Developer Portal, look for an option to create a new application.
-
You'll need to provide some details about your application, such as:
-
Name of the application.
-
Description of the application.
-
Redirect URL (if applicable).
-
-
-
Get Your Client ID and Client Secret:
-
After registering your application, you will be provided with:
-
Client ID: A unique identifier for your application.
-
Client Secret: A secret key that is used for securely authenticating API requests on behalf of your app.
-
-
To add Cvent as a data source, do the following:
-
From the left navigation panel, click Lakehouse and then click Data Sources.
-
From the upper right corner of the page, click the + New Database button to start the process of adding a new database.
-
Specify the following details to add Cvent and then click Submit. Once you have connected a data source, the system immediately fetches its schema. After this schema retrieval process is complete you can browse and interact with the tables and data.
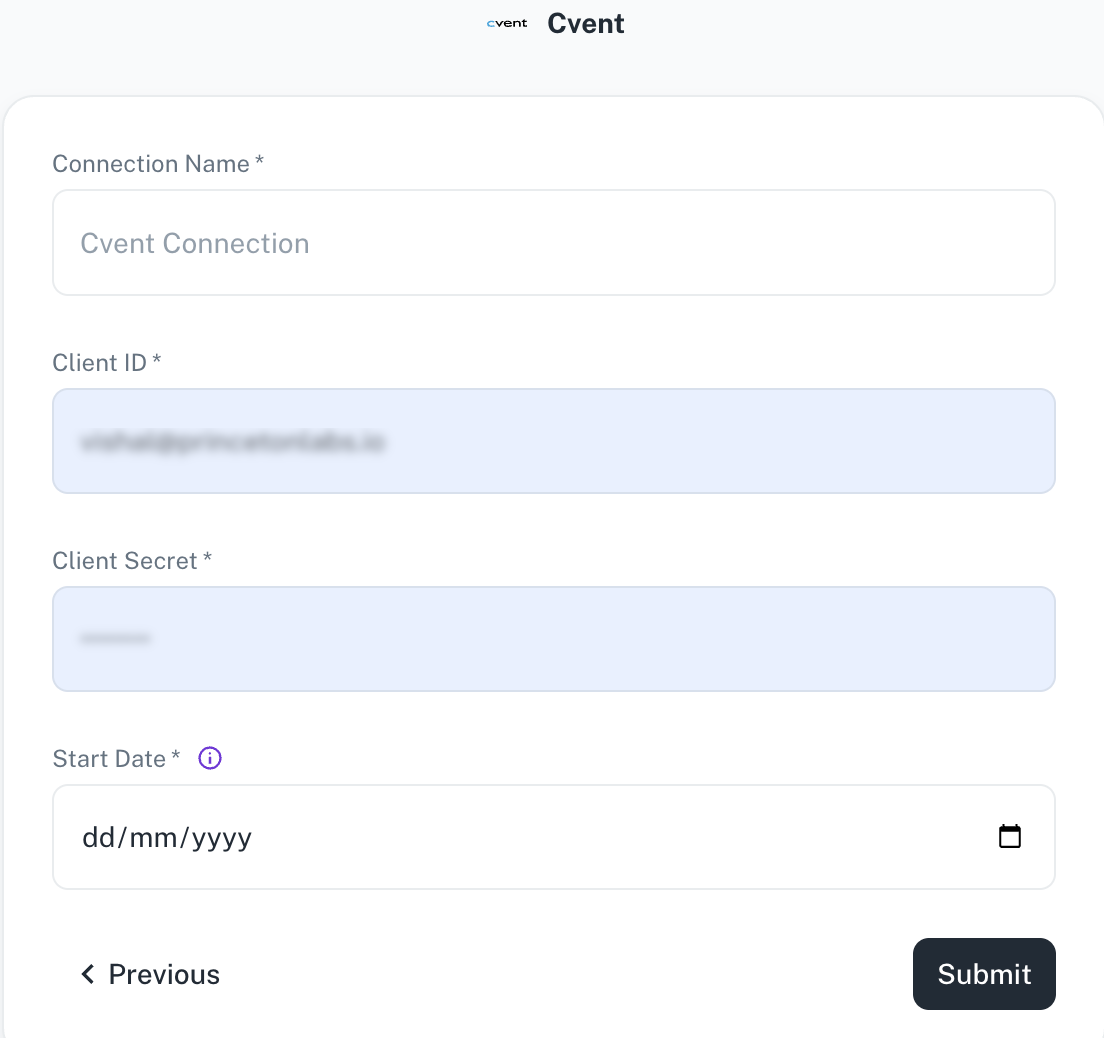
Field Description Connection Name Enter a unique name for the connection. Client ID A unique identifier for your application. Client secret A secret key that is used for securely authenticating API requests on behalf of your app. Start Date Enter the date in the MM-DD-YYYY format. DataGOL will replicate the data updated on and after this date. If this field is blank, DataGOL will replicate the data for last two years. -
Click Submit.
Adding HubSpot as data source
The following connector information is required from the client:
-
Access Token
-
Start Date
Do the following:
-
Login to your HubSpot account Hubspot Login
-
Set up Hubspot for Airbyte Open Source: Private app setup (Recommended): If you are authenticating via a Private App, you will need to use your access token to set up the connector. Refer to the official HubSpot documentation for a detailed guide.
-
After private app setup is complete In your HubSpot account, click the settings icon in the main navigation bar.
-
In the left sidebar menu, navigate to Integrations > Private apps.
-
Click the name of your app.
-
Click the Auth tab and then click Show token to reveal your access token.
-
Click Copy to copy the token to your clipboard.
Do the following to add HubSpot as a data source:
-
From the left navigation panel, click Lakehouse and then click Data Sources.
-
From the upper right corner of the page, click the + New Database button to start the process of adding a new database.
-
Specify the following details to add HubSpot and then click Submit. Once you have connected a data source, the system immediately fetches its schema. After this schema retrieval process is complete you can browse and interact with the tables and data.
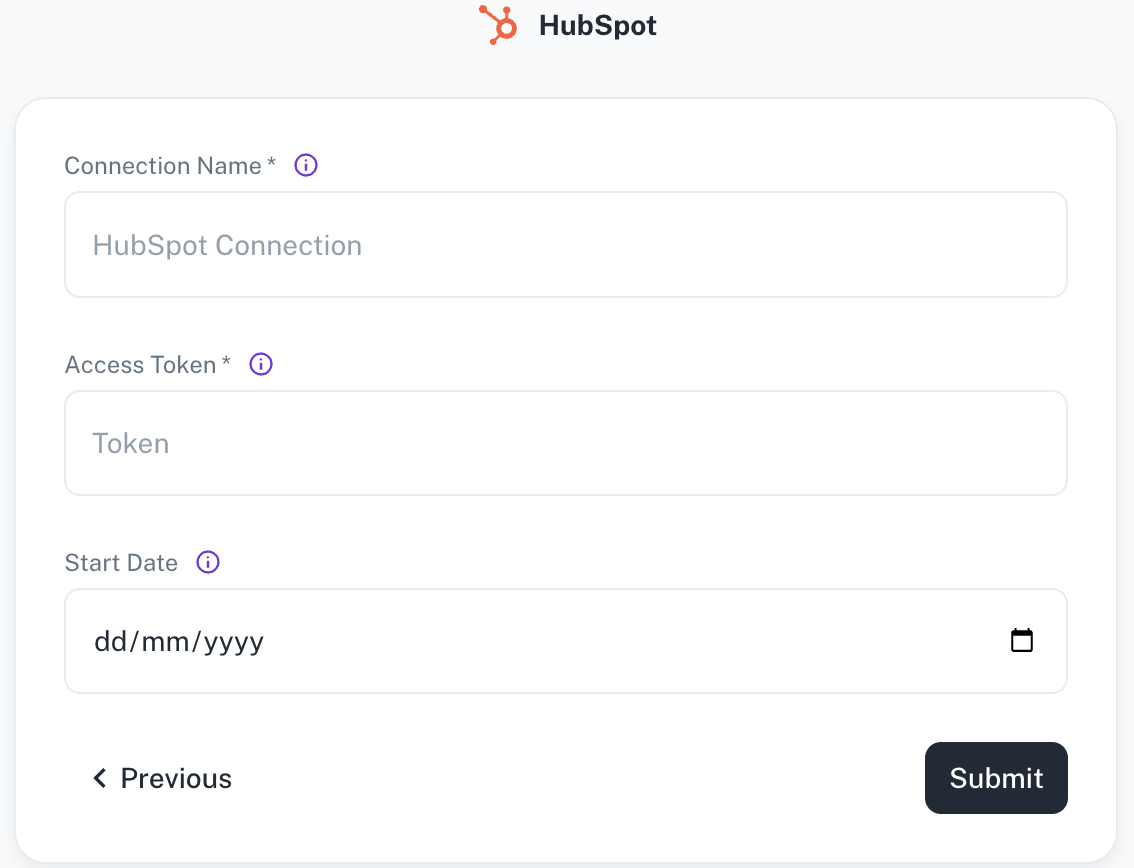
Field Description Connection name Enter a unique name for the connection. Access token Specify the HubSpot access token. Start Date Enter the date in the MM-DD-YYYY format. DataGOL will replicate the data updated on and after this date. If this field is blank, DataGOL will replicate the data for last two years. -
Click Submit.
Adding Monday as data source
The following connector information is required from the client:
- API Token
Do the following:
-
Login to your monday account.
-
Admin tab
If you are an admin user on your monday.com account, follow these steps to access your API token:-
Log into your monday.com account.
-
Click on your avatar/profile picture in the top right corner.
-
Select Administration > Connections > API.
-
Copy your personal token. Note that you can always regenerate a new token, but doing so will cause any previous tokens to expire.
-
-
Developer tab
If you are a member user or an admin on your monday.com account, follow these steps to access your API token:-
Log into your monday.com account.
-
Click on your profile picture in the top right corner.
-
Select Developers. This will open the Developer Center in another tab.
-
Click My Access Tokens > Show.
-
Copy your personal token. Note that you can always regenerate a new token, but doing so will cause any previous tokens to expire.
-
To add Monday as a data source, do the following:
-
From the left navigation panel, click Lakehouse and then click Data Sources.
-
From the upper right corner of the page, click the + New Database button to start the process of adding a new database.
-
Specify the following details to add Monday and then click Submit. Once you have connected a data source, the system immediately fetches its schema. After this schema retrieval process is complete you can browse and interact with the tables and data.
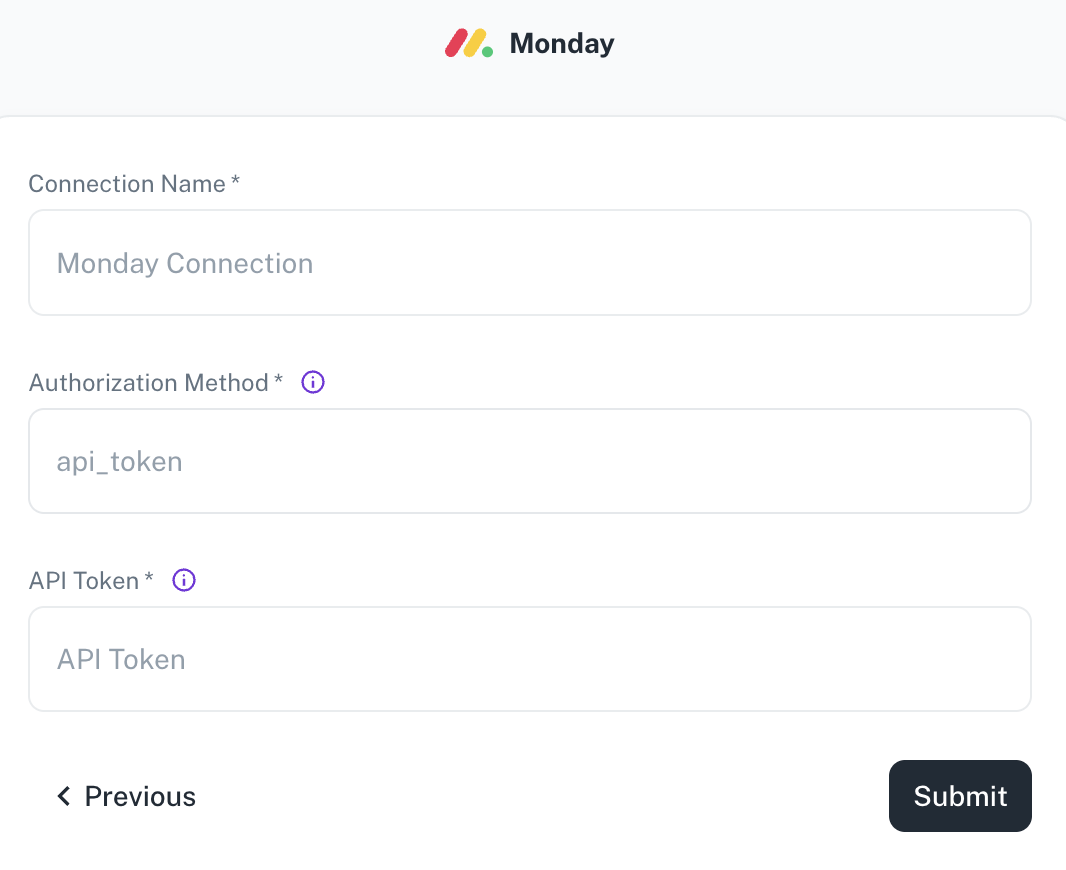
Field Description Connection Name Enter a unique name for the connection. Authorization Method The authorization method to use to retrieve data from Monday. API Token API Token for making authenticated requests. -
Click Submit.
Adding NetSuite as data source
The following connector information is required from the client:
-
Realm ID
-
Consumer Key
-
Consumer Secret
-
Token Key
-
Token Secret
-
Start Date
-
Window in Days (Default: 30 days)
Do the following:
1. Create NetSuite account
a. Create account on Oracle NetSuite.
b. Create account on Oracle NetSuite.
c. Confirm your Email.
d. Confirm your Email.
2. Setup NetSuite account
a. Obtain Realm info
-
Login into your NetSuite account
-
Go to Setup » Company » Company Information.
-
Copy your Account ID (Realm). It should look like 1234567 for the
Productionenv. or 1234567_SB2 for aSandbox.
b. Enable features
-
Go to Setup » Company » Enable Features.
-
Click on SuiteCloud tab.
-
Scroll down to SuiteScript section.
-
Enable checkbox for
CLIENT SUITESCRIPTandSERVER SUITESCRIPT. -
Scroll down to Manage Authentication section.
-
Enable checkbox
TOKEN-BASED AUTHENTICATION. -
Scroll down to SuiteTalk (Web Services).
-
Enable checkbox
REST WEB SERVISES. -
Save the changes.
c. Create Integration (obtain Consumer Key and Consumer Secret)
-
Go to Setup » Integration » Manage Integrations » New.
-
Fill the Name field (we recommend to put
airbyte-rest-integrationfor a name). -
Make sure the State is
enabled. -
Enable checkbox
Token-Based Authenticationin Authentication section. -
Save changes.
-
After that, Consumer Key and Consumer Secret will be showed once (copy them to the safe place).
d. Setup Role
-
Go to Setup » Users/Roles » Manage Roles » New.
-
Fill the Name field (we recommend to put
airbyte-integration-rolefor a name). -
Scroll down to Permissions tab.
-
(REQUIRED) Click on
Transactionsand manuallyaddall the dropdown entities with eitherfullorviewaccess level. -
(REQUIRED) Click
Reportsand manuallyaddall the dropdown entities with eitherfullorviewaccess level. -
(REQUIRED) Click
Listsand manuallyaddall the dropdown entities with eitherfullorviewaccess level. -
(REQUIRED) Click on
Setupand manuallyaddall the dropdown entities with eitherfullorviewaccess level.
Note
-
Make sure you have done all the
REQUIREDsteps correctly, to avoid sync issues in the future. -
Edit these parameters again when you
renameorcustomiseanyObjectin NetSuite forairbyte-integration-roleto reflect such changes.
e. Setup User
-
Go to Setup » Users/Roles » Manage Users.
-
In column
Nameclick on the user’s name you want to give access to theairbyte-integration-role. -
Then click on Edit button under the user’s name.
-
Scroll down to Access tab at the bottom.
-
Select from drop-down list the
airbyte-integration-rolerole which you created in step 2.4. -
Save changes.
f. Create Access Token for role
-
Go to Setup » Users/Roles » Access Tokens » New.
-
Select an Application Name.
-
Under User select the user you assigned the
airbyte-integration-rolein the step 2.4. -
Inside Role select the one you gave to the user in the step 2.5.
-
Under Token Name you can give a descriptive name to the Token you are creating (we recommend to put
airbyte-rest-integration-tokenfor a name). -
Save changes. After that, Token ID and Token Secret will be showed once (copy them to the safe place).
To add NetSuite as a data source, do the following:
-
From the left navigation panel, click Lakehouse and then click Data Sources.
-
From the upper right corner of the page, click the + New Database button to start the process of adding a new database.
-
Specify the following details to add NetSuite and then click Submit. Once you have connected a data source, the system immediately fetches its schema. After this schema retrieval process is complete you can browse and interact with the tables and data.
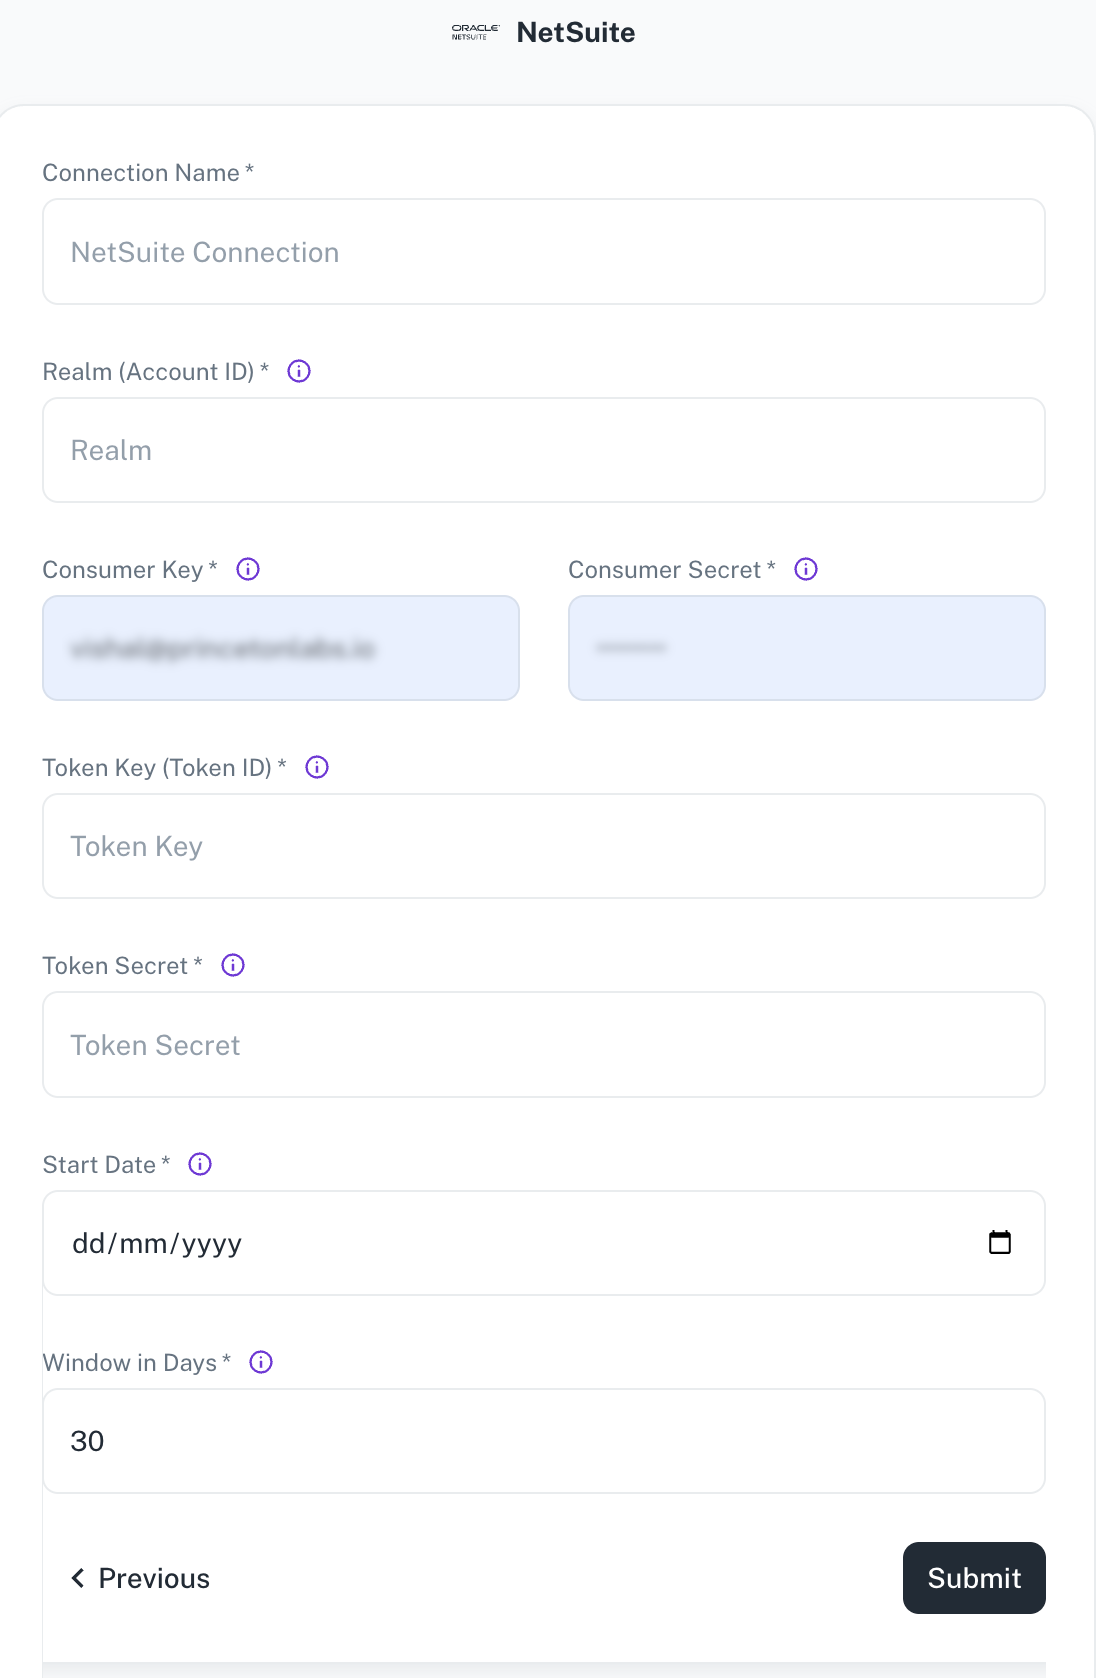
Field Description Connection Name Enter a unique name for this connection. This will help you identify it later. Realm (Account ID) Netsuite realm e.g. 2344535 for productionor 2344535_SB1, as for thesandboxConsumer Key Consumer key associated with your integration Consumer Secret Consumer secret associated with your integration Token Key (Token ID) Access token key Token Secret* Access token secret Start Date* Enter the date in the MM-DD-YYYY format. DataGOL will replicate the data updated on and after this date. Window in Days The amount of days used to query the data with date chunks. Set smaller value, if you have lots of data. -
Click Submit.
Adding NetSuite-JDBC as data source
-
From the left navigation panel, click Lakehouse and then click Data Sources.
-
From the upper right corner of the page, click the + New Database button to start the process of adding a new database.
-
Specify the following details to add NetSuite-JDBC and then click Submit. Once you have connected a data source, the system immediately fetches its schema. After this schema retrieval process is complete you can browse and interact with the tables and data.

Field Description Connection Name Enter a unique name for the connection. Account ID Specify the account ID. Role ID Specify the role ID. Username/password Provide the credentials for the account. Hostname Specify the host address of the database server. Port Specify the port number of the database server. -
Click Submit.
Adding NetSuite Reporting as data source
-
From the left navigation panel, click Lakehouse and then click Data Sources.
-
From the upper right corner of the page, click the + New Database button to start the process of adding a new database.
-
Specify the following details to add NetSuite Reporting and then click Submit. Once you have connected a data source, the system immediately fetches its schema. After this schema retrieval process is complete you can browse and interact with the tables and data.
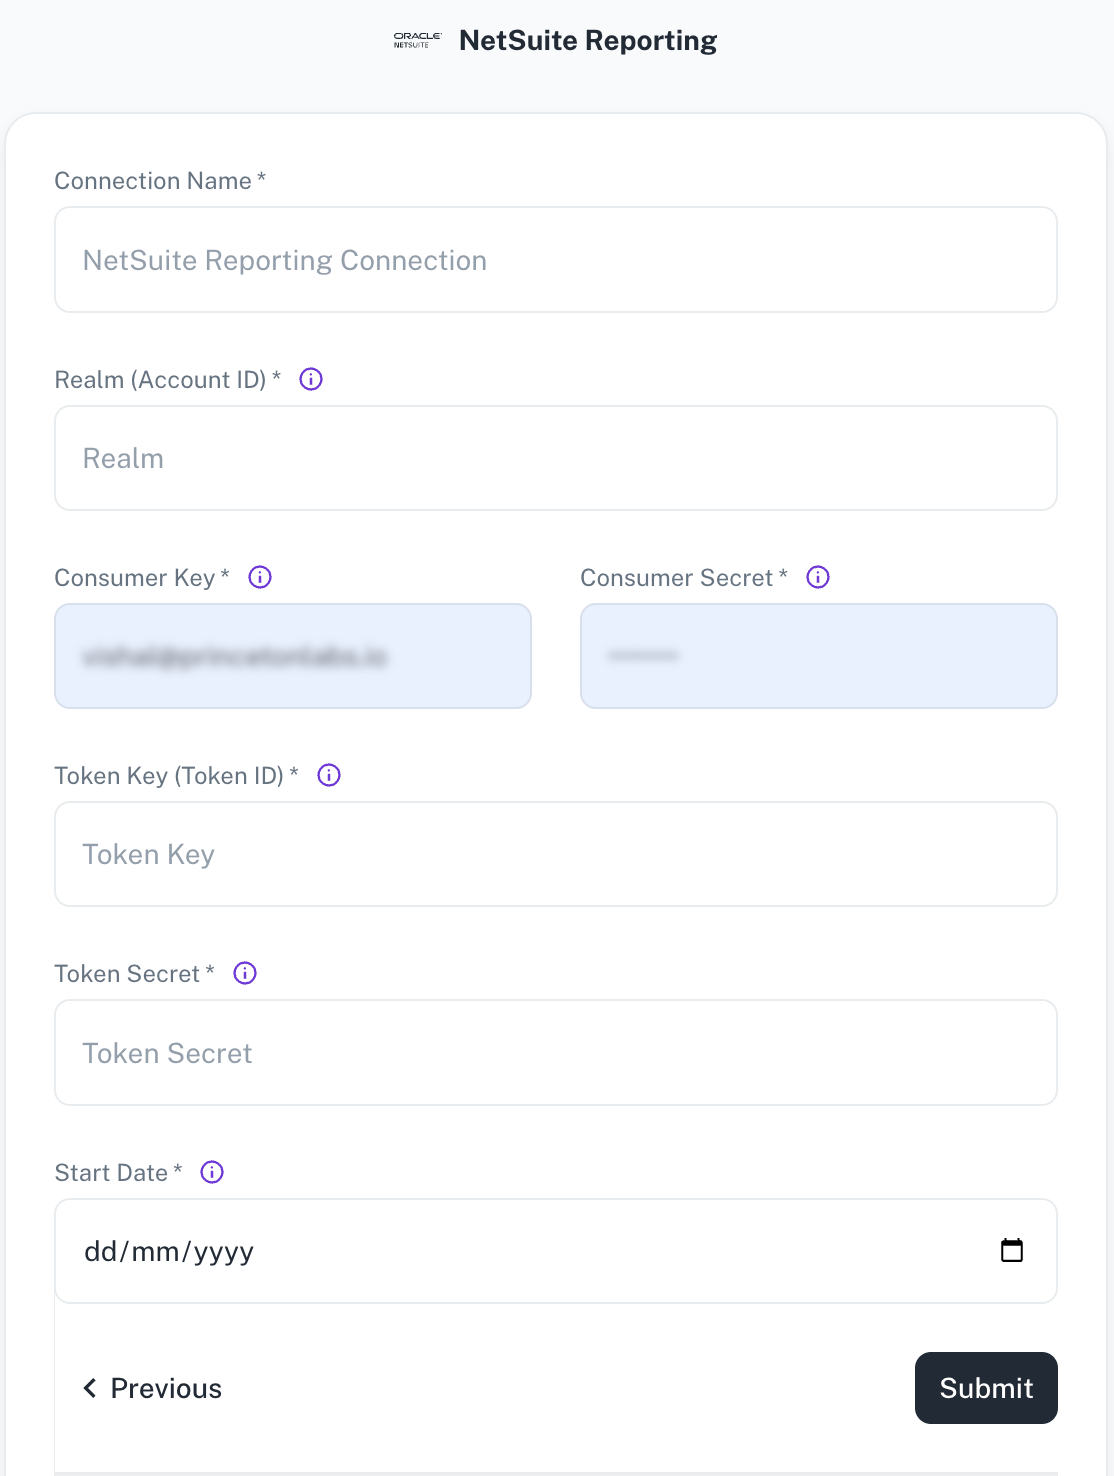
Field Description Connection Name Enter a unique name for the connection. Consumer Key Specify the Consumer Key for authentication. Token Key / Secret Specify the Token key and secret for authenticating the access. Start Date Specify the date from which to begin replicating extracting data. -
Click Submit.
Adding Pipedrive as data source
The following connector information is required from the client:
-
API Token
-
Start Date
Do the following:
-
Login to your Pipedrive account.
-
Enable API Token: If you do not see API next to the
Your companiessection, it is due to the permission sets handled by the company's admin. The company's admin can give you access to your API token by enabling it for you from the settings in Pipedrive web app.For more information, access enabling API for company users.
-
Find the API token:
You can get the API token manually from the Pipedrive web app by going to account name (on the top right) > Company settings > Personal preferences > API.
See How to find the API Token for detailed information.
-
You can get the API token manually from the Pipedrive web app by going to account name (on the top right) > Company settings > Personal preferences > API or by clicking here (in case you have multiple companies open at the same time, this link will redirect you to the API token of the last opened company).
To add Pipedrive as a data source, do the following:
-
From the left navigation panel, click Lakehouse and then click Data Sources.
-
From the upper right corner of the page, click the + New Database button to start the process of adding a new database.
-
Specify the following details to add Pipedrive and then click Submit. Once you have connected a data source, the system immediately fetches its schema. After this schema retrieval process is complete you can browse and interact with the tables and data.
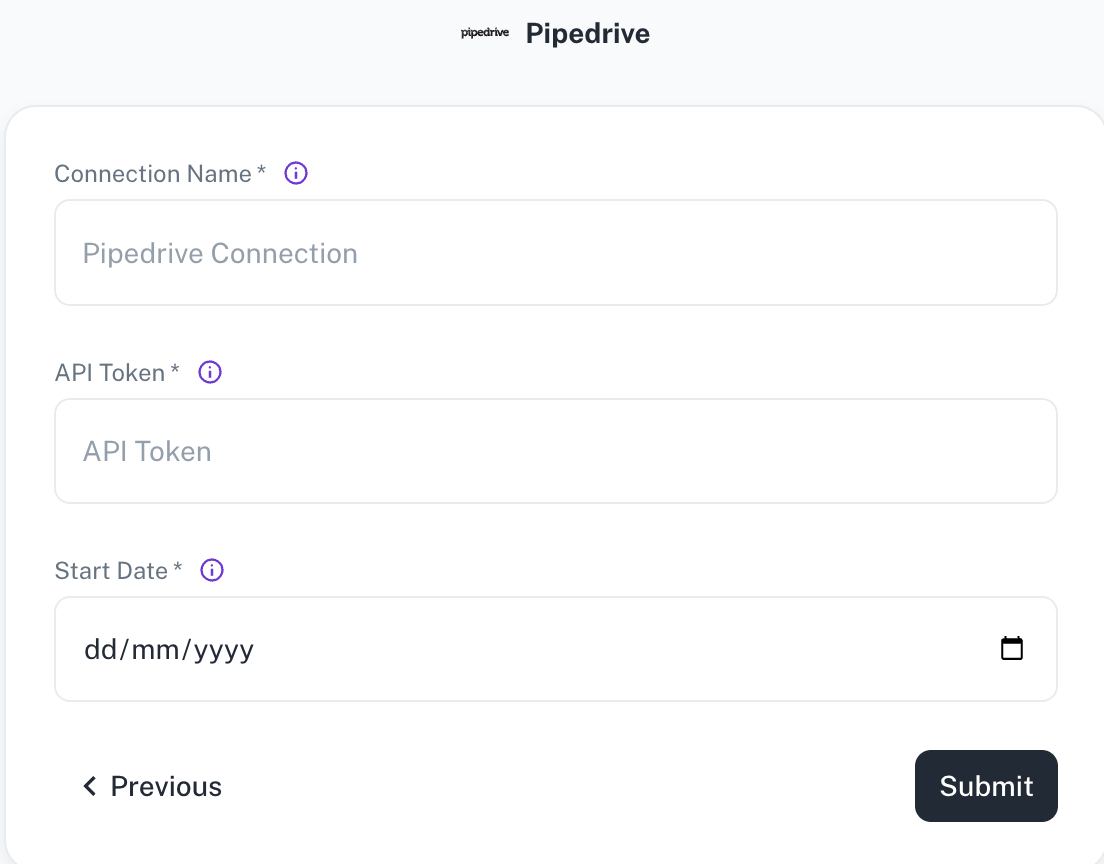
Field Description Connection Name Enter a unique name for the connection. API Token The Pipedrive API Token. This is a mandatory field. Start Date Enter the date in the MM-DD-YYYY format. DataGOL will replicate the data updated on and after this date. This is a mandatory field. -
Click Submit.
Adding Quickbooks as data source
The following connector information is required from the client:
-
Access Token
-
Client ID
-
Client Secret
-
Realm ID
-
Refresh Token
-
Token Expiry Date
-
Start Date
Do the following:
Set up QuickBooks
-
Create an Intuit Developer account
-
Create a workspace and then create an application by filing the required details in the form.
-
Obtain credentials. The easiest way to get these credentials is by using Quickbook's OAuth 2.0 playground
-
Access token expires every 60 min/hour and a new access token is automatically fetched by Airbyte using the refresh token. A Refresh token is valid for 101 days but expires every 24 hrs. A new Refresh token is automatically generated using the old refresh token and will be updated. After every 101 days a new refresh token has to be fetched from the 2.0 playground.
-
Quickbooks connector works only for Quickbooks online account. It doesn’t work for Quickbooks Desktop Account. If you are using a Quickbooks Desktop Account please migrate your account to Quickbooks online. Refer Migrate to Quickbooks online from desktop
To add Quickbook as a data source, do the following:
-
From the left navigation panel, click Lakehouse and then click Data Sources.
-
From the upper right corner of the page, click the + New Database button to start the process of adding a new database.
-
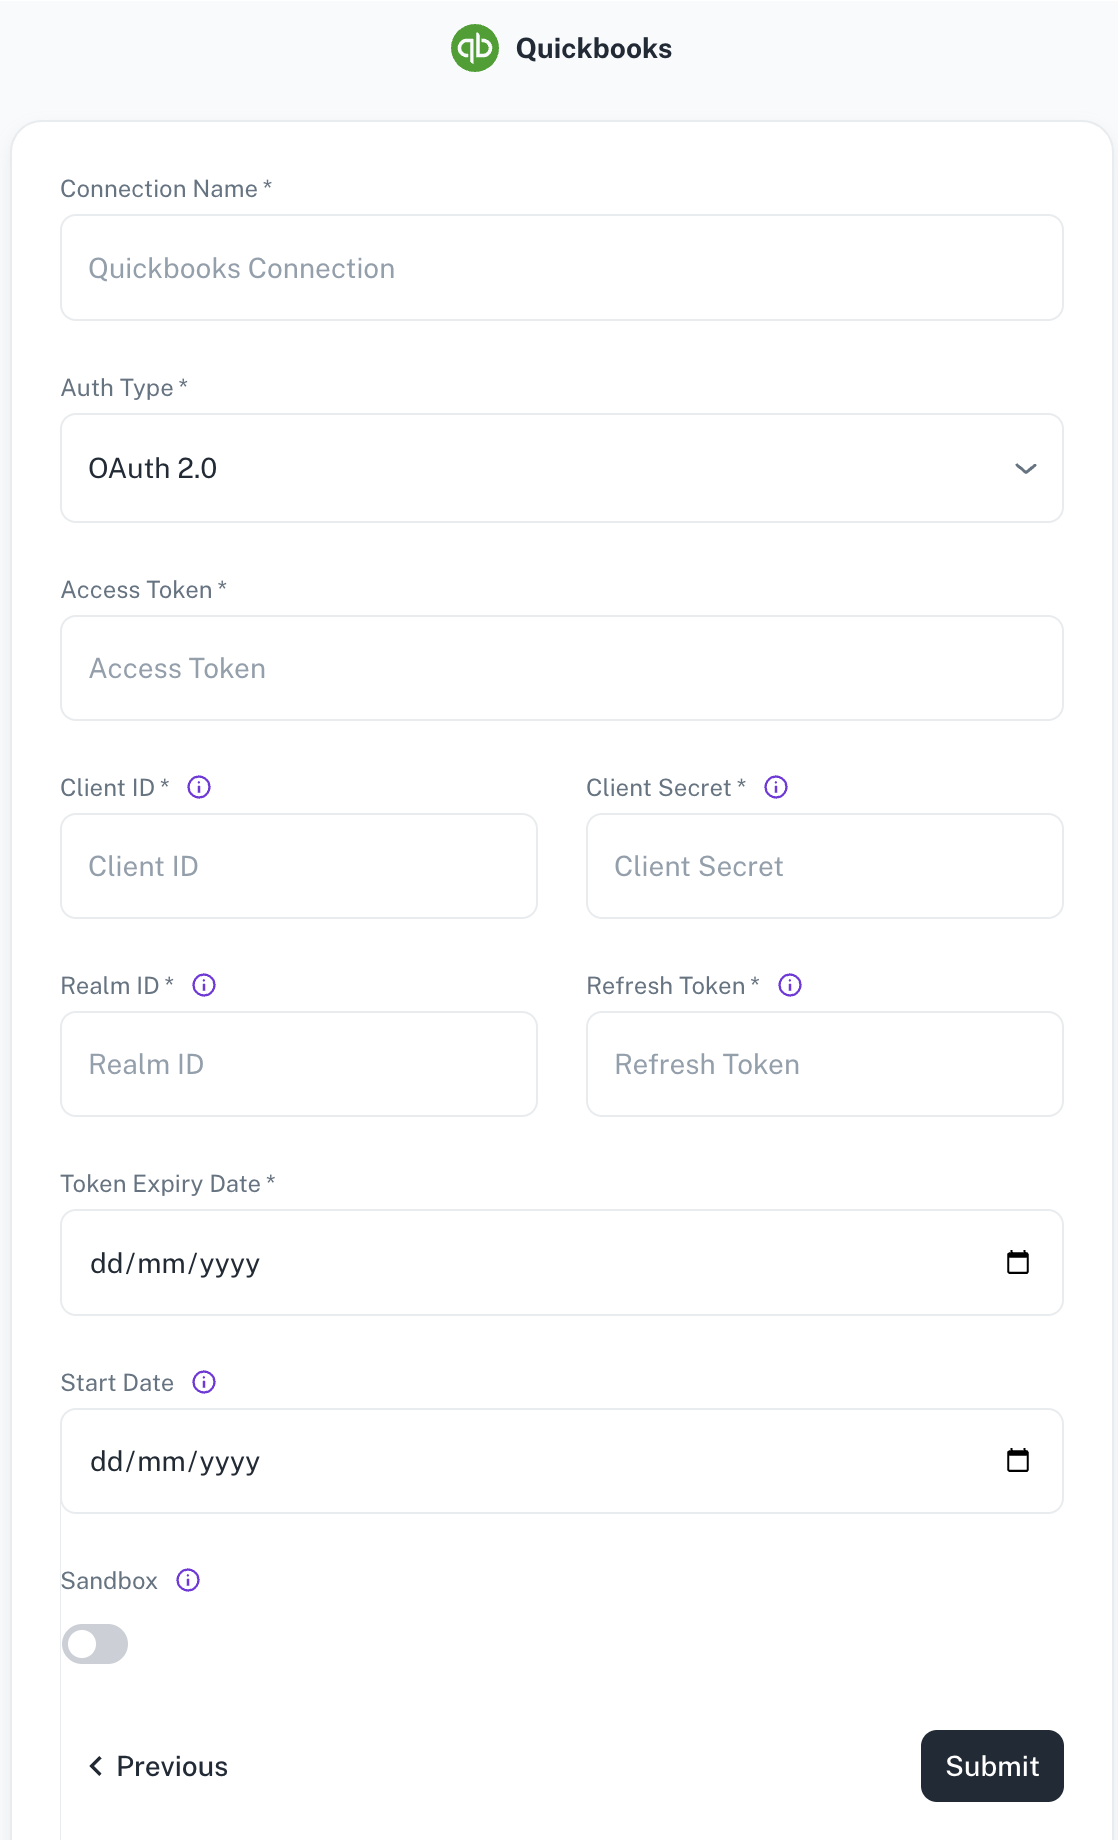
Specify the following details to add Quickbooks and then click Submit. Once you have connected a data source, the system immediately fetches its schema. After this schema retrieval process is complete you can browse and interact with the tables and data.
| Field | Description |
|---|---|
| Connection Name | Enter a unique name for the connection. |
| Auth Type | Specify the authentication type. |
| Access Token | Specify the Quickbooks access token. |
| Client ID | Identifies which app is making the request. Obtain this value from the Keys tab on the app profile via My Apps on the developer site. There are two versions of this key: development and production. |
| Realm ID | Labeled Company ID. The Make API Calls panel is populated with the realm id and the current access token. |
| Client secret | Obtain this value from the Keys tab on the app profile via My Apps on the developer site. There are two versions of this key: development and production. |
| Refresh Token | Specify a token that can be used when refreshing the access token. |
| Token Expiry Date | Specify the expiry date of the token. |
| Start Date | Enter the date in the MM-DD-YYYY format. DataGOL will replicate the data updated on and after this date. If this field is blank, DataGOL will replicate the data for last two years. |
| Sandbox | Use the toggle to specify whether to use the sandbox or production environment. |
- Click Submit.
Adding Salesforce as data source
The following connector information is required from the client:
-
Client ID
-
Client Secret
-
Refresh Token
-
Domain: eg salesforce.your-domain.com
-
Start Date
To obtain these credentials, follow this walkthrough with the following modifications:
-
If your Salesforce URL is not in the
X.salesforce.comformat, use your Salesforce domain name. For example, if your Salesforce URL isawesomecompany.force.comthen use that instead ofawesomecompany.salesforce.com. -
Use the user credentials when logging in to generate OAuth tokens.
To add Salesforce as a data source, do the following:
-
From the left navigation panel, click Lakehouse and then click Data Sources.
-
From the upper right corner of the page, click the + New Database button to start the process of adding a new database.
-
Specify the following details to add Salesforce and then click Submit. Once you have connected a data source, the system immediately fetches its schema. After this schema retrieval process is complete you can browse and interact with the tables and data.
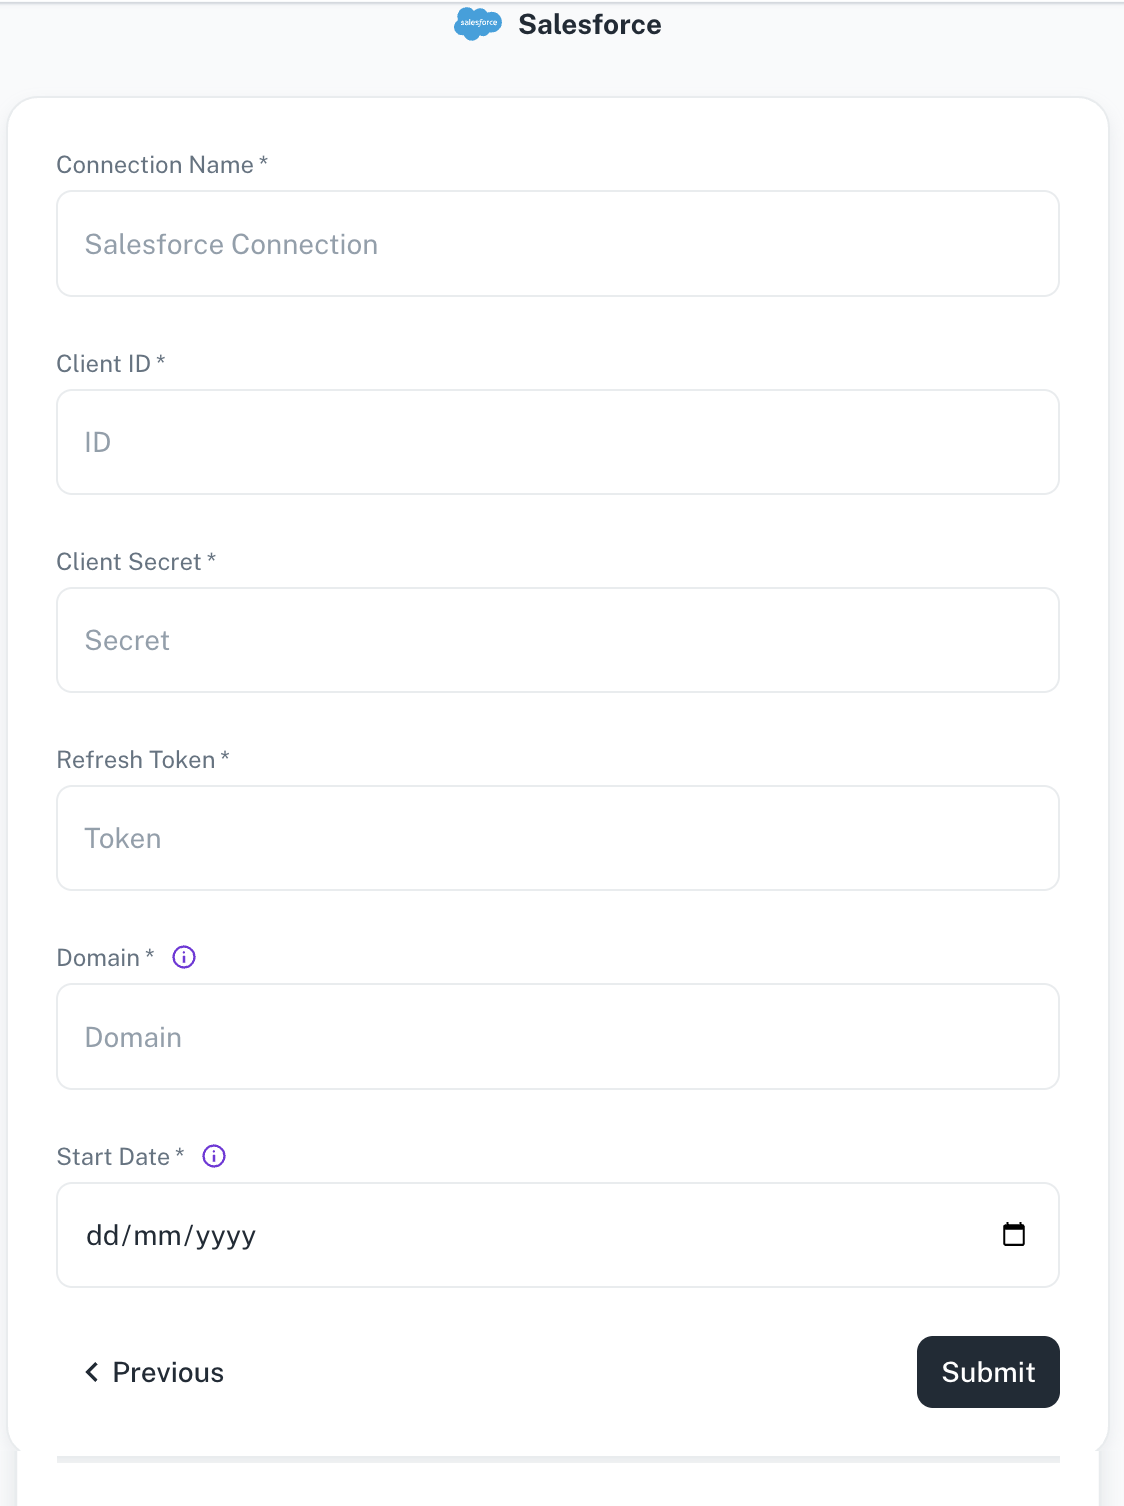
Field Description Connection name Enter a unique name for the Salesforce connection. Client ID/Client secret Enter your Salesforce developer application's Client ID and Secret. Refresh Token Enter your application's Salesforce Refresh Token used for Airbyte to access your Salesforce account. Domain The domain for your Salesforce account, e.g. datagol.salesforce.com,salesforce.your-domain.com.Start Date Enter the date in the MM-DD-YYYY format. DataGOL will replicate the data updated on and after this date. If this field is blank, DataGOL will replicate the data for last two years. -
Click Submit.
Adding Shopify as data source
The following connector information is required from the client:
-
Shopify Store
-
API password
-
Start Date
Do the following:
-
Login to your Shopify account.
-
Once logged in, your store name is often part of the URL in your browser's address bar. For example:
https://your-store-name.myshopify.com/admin -
In the dashboard, navigate to Settings > App and sales channels > Develop apps > Create an app.
-
Select a name for your new app.
-
Select Configure Admin API scopes.
-
Grant access to the following list of scopes. Only select scopes prefixed with
read_, notwrite_(e.g.read_locations,read_price_rules, etc ). -
Click Install app to give this app access to your data.
-
Once installed, go to API Credentials to copy the Admin API Access Token. You are now ready to set up the source in Airbyte.
Refer:
To add Shopify as a data source, do the following:
-
From the left navigation panel, click Lakehouse and then click Data Sources.
-
From the upper right corner of the page, click the + New Database button to start the process of adding a new database.
-
Specify the following details to add Shopify and then click Submit. Once you have connected a data source, the system immediately fetches its schema. After this schema retrieval process is complete you can browse and interact with the tables and data.
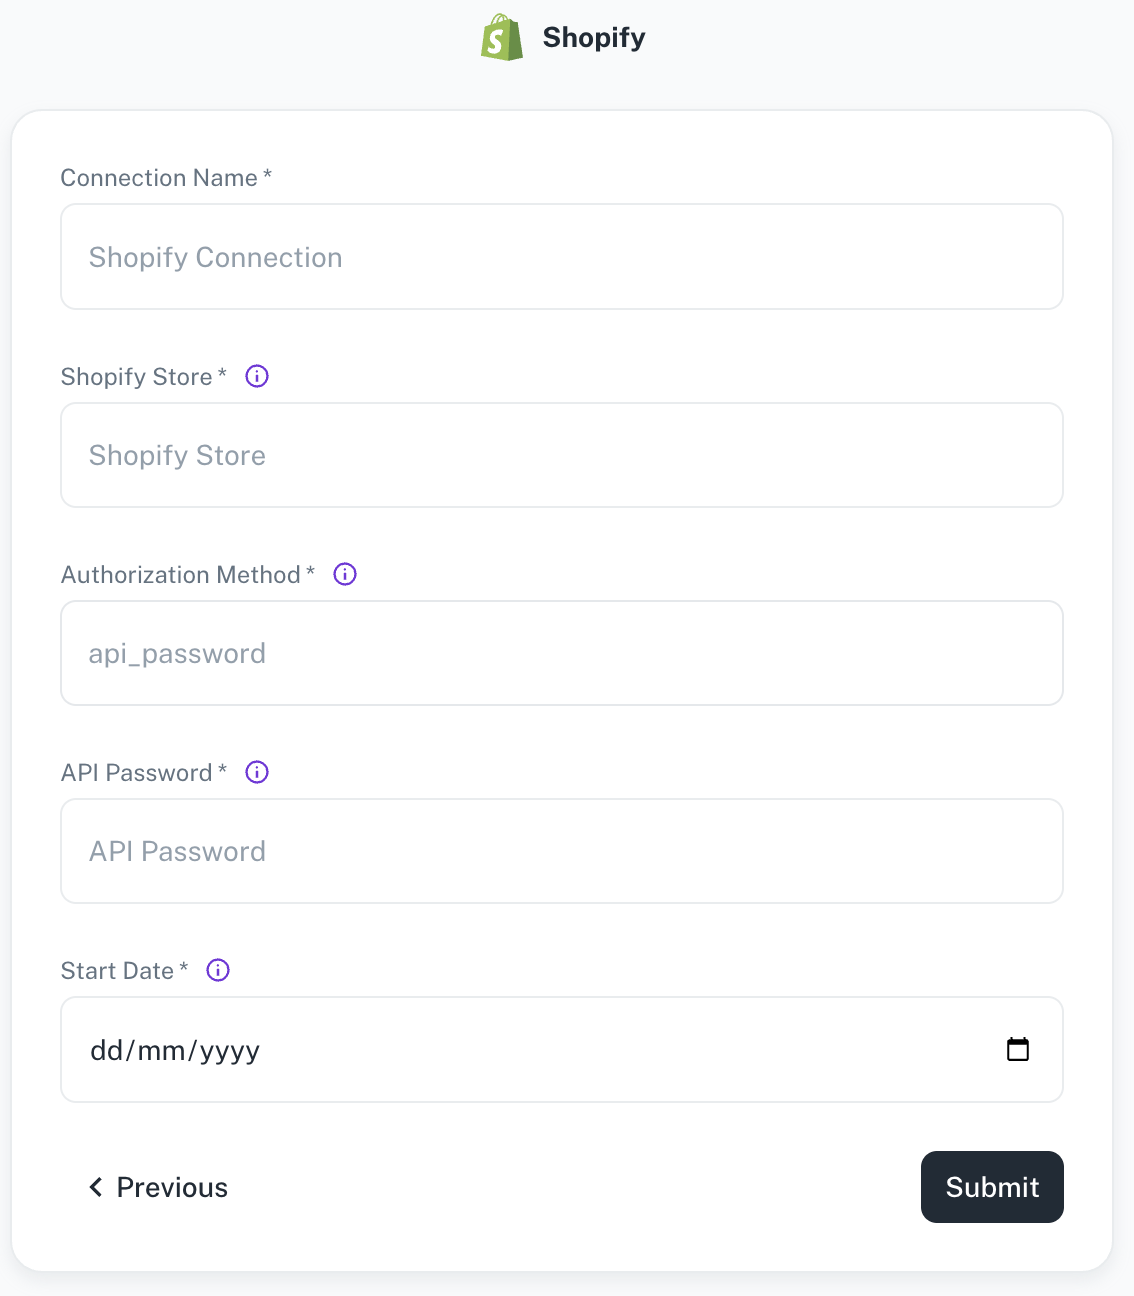
Field Description Connection Name Enter a unique name for the connection. Shopify Store The name of your Shopify store found in the URL. Authorization Method The authorization method to use to retrieve data from Shopify. API Password The API Password for your private application in the Shopifystore.Start Date Enter the date in the MM-DD-YYYY format. DataGOL will replicate the data updated on and after this date. -
Click Submit.
Adding SurveyMonkey as data source
The following connector information is required from the client:
-
Access Token
-
Origin datacenter of the SurveyMonkey account (Default: USA)
-
Start Date
Do the following:
-
Login to your SurveyMonkey account Survey Monkey Login
-
Create an app.
-
After creating an app, navigate to the created app settings, and check the credentials section for the access token. Ensure to have a higher daily API limit to read data without any issues.
To add Survey Monkey as data source, do the following:
-
From the left navigation panel, click Lakehouse and then click Data Sources.
-
From the upper right corner of the page, click the + New Database button to start the process of adding a new database.
-
Specify the following details to add SurveyMonkey and then click Submit. Once you have connected a data source, the system immediately fetches its schema. After this schema retrieval process is complete you can browse and interact with the tables and data.
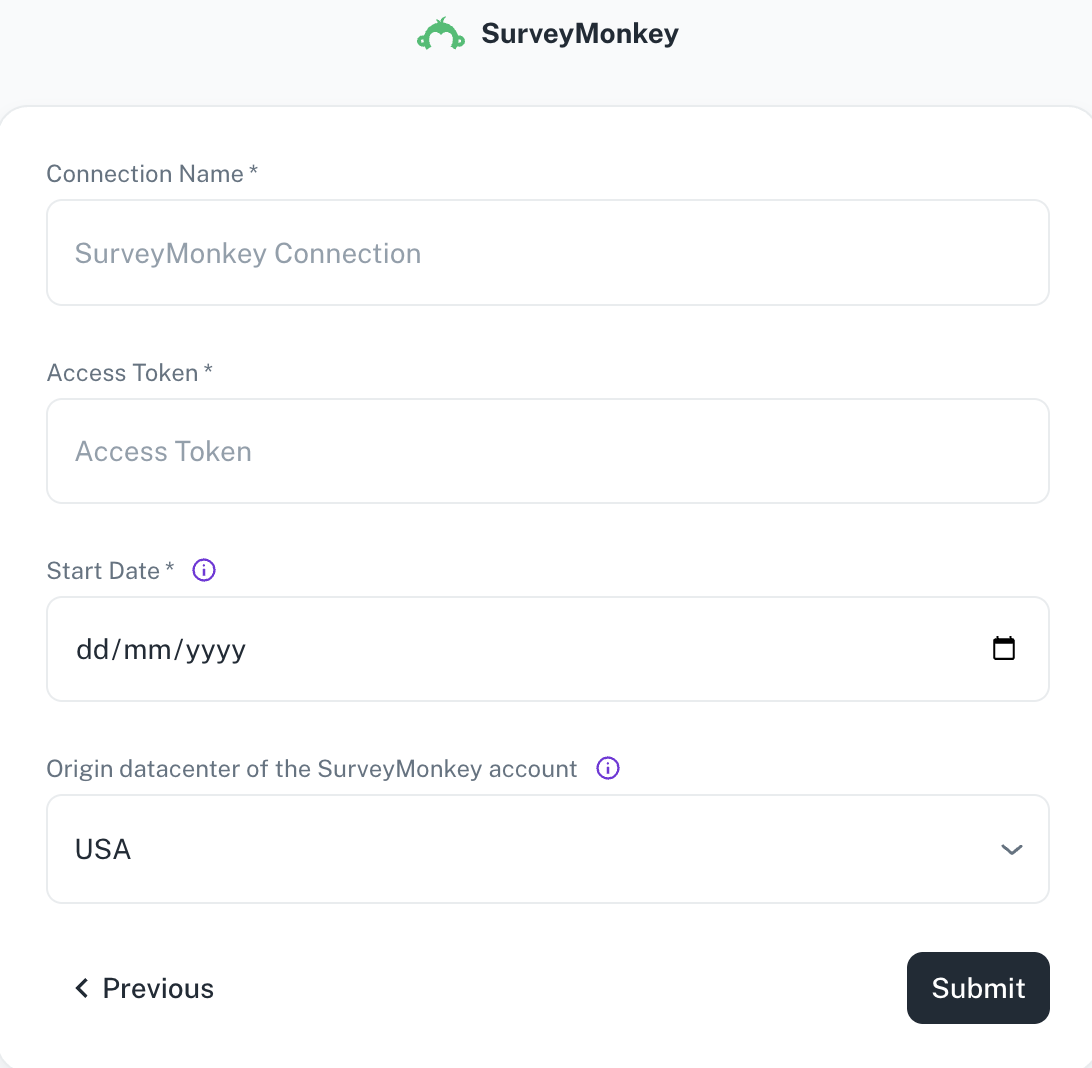
Field Description Connection Name Enter a unique name for the connection. Access Token Specify the SurveyMonkey access token. Start Date Enter the date in the MM-DD-YYYY format. DataGOL will replicate the data updated on and after this date. If this field is blank, DataGOL will replicate the data for last two years. Origin datacenter of the SurveyMonkey account Depending on the originating datacenter of the SurveyMonkey account, the API access URL may be different. -
Click Submit.