NetSuite
Adding NetSuite as data source
The following connector information is required from the client:
-
Realm ID
-
Consumer Key
-
Consumer Secret
-
Token Key
-
Token Secret
-
Start Date
-
Window in Days (Default: 30 days)
Do the following:
1. Create NetSuite account
a. Create account on Oracle NetSuite.
b. Create account on Oracle NetSuite.
c. Confirm your Email.
d. Confirm your Email.
2. Setup NetSuite account
a. Obtain Realm info
-
Login into your NetSuite account
-
Go to Setup » Company » Company Information.
-
Copy your Account ID (Realm). It should look like 1234567 for the
Productionenv. or 1234567_SB2 for aSandbox.
b. Enable features
-
Go to Setup » Company » Enable Features.
-
Click on SuiteCloud tab.
-
Scroll down to SuiteScript section.
-
Enable checkbox for
CLIENT SUITESCRIPTandSERVER SUITESCRIPT. -
Scroll down to Manage Authentication section.
-
Enable checkbox
TOKEN-BASED AUTHENTICATION. -
Scroll down to SuiteTalk (Web Services).
-
Enable checkbox
REST WEB SERVISES. -
Save the changes.
c. Create Integration (obtain Consumer Key and Consumer Secret)
-
Go to Setup » Integration » Manage Integrations » New.
-
Fill the Name field (we recommend to put
airbyte-rest-integrationfor a name). -
Make sure the State is
enabled. -
Enable checkbox
Token-Based Authenticationin Authentication section. -
Save changes.
-
After that, Consumer Key and Consumer Secret will be showed once (copy them to the safe place).
d. Setup Role
-
Go to Setup » Users/Roles » Manage Roles » New.
-
Fill the Name field (we recommend to put
airbyte-integration-rolefor a name). -
Scroll down to Permissions tab.
-
(REQUIRED) Click on
Transactionsand manuallyaddall the dropdown entities with eitherfullorviewaccess level. -
(REQUIRED) Click
Reportsand manuallyaddall the dropdown entities with eitherfullorviewaccess level. -
(REQUIRED) Click
Listsand manuallyaddall the dropdown entities with eitherfullorviewaccess level. -
(REQUIRED) Click on
Setupand manuallyaddall the dropdown entities with eitherfullorviewaccess level.
Note
-
Make sure you have done all the
REQUIREDsteps correctly, to avoid sync issues in the future. -
Edit these parameters again when you
renameorcustomiseanyObjectin NetSuite forairbyte-integration-roleto reflect such changes.
e. Setup User
-
Go to Setup » Users/Roles » Manage Users.
-
In column
Nameclick on the user’s name you want to give access to theairbyte-integration-role. -
Then click on Edit button under the user’s name.
-
Scroll down to Access tab at the bottom.
-
Select from drop-down list the
airbyte-integration-rolerole which you created in step 2.4. -
Save changes.
f. Create Access Token for role
-
Go to Setup » Users/Roles » Access Tokens » New.
-
Select an Application Name.
-
Under User select the user you assigned the
airbyte-integration-rolein the step 2.4. -
Inside Role select the one you gave to the user in the step 2.5.
-
Under Token Name you can give a descriptive name to the Token you are creating (we recommend to put
airbyte-rest-integration-tokenfor a name). -
Save changes. After that, Token ID and Token Secret will be showed once (copy them to the safe place).
To add NetSuite as a data source, do the following:
-
From the left navigation panel, click Lakehouse and then click Data Sources.
-
From the upper right corner of the page, click the + New Data Source button to start the process of adding a new database.
-
In the New Data Source page, click the NetSuite icon.
-
Specify the following details to add NetSuite. Once you have connected a data source, the system immediately fetches its schema. After this schema retrieval process is complete you can browse and interact with the tables and data.
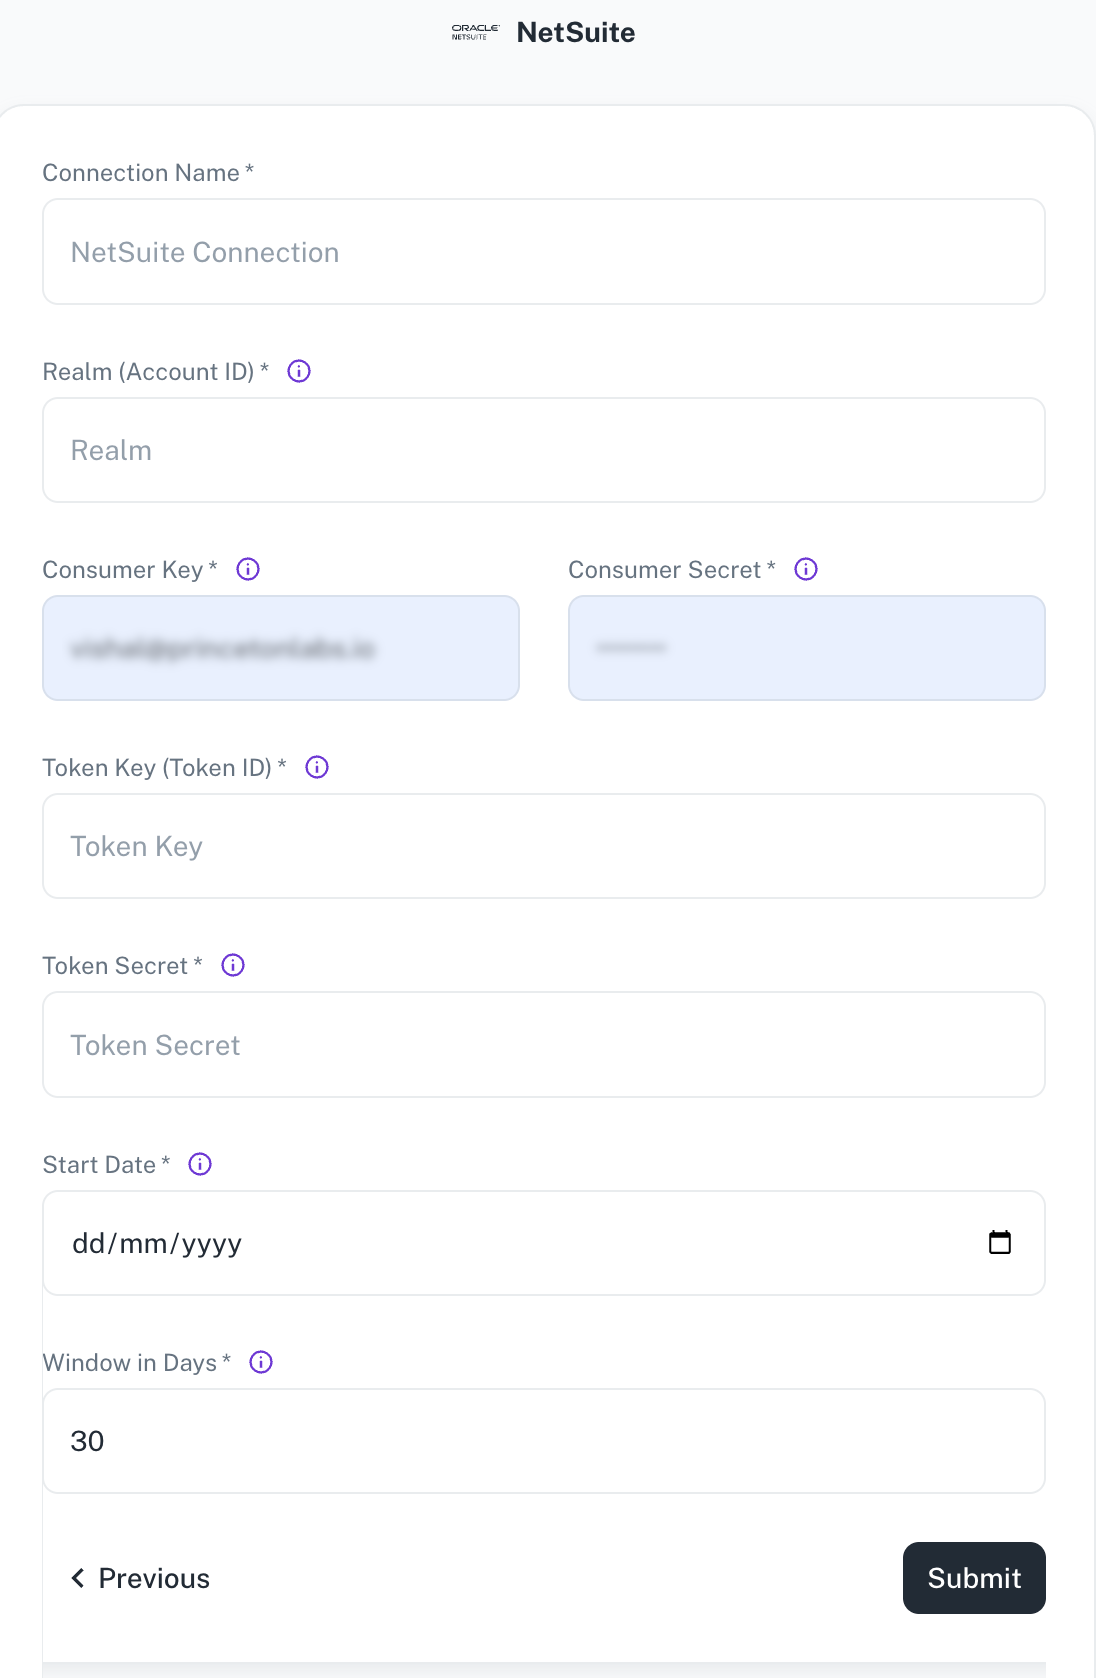
Field Description Connection Name Enter a unique name for this connection. This will help you identify it later. Realm (Account ID) Netsuite realm e.g. 2344535 for productionor 2344535_SB1, as for thesandboxConsumer Key Consumer key associated with your integration Consumer Secret Consumer secret associated with your integration Token Key (Token ID) Access token key Token Secret* Access token secret Start Date* Enter the date in the MM-DD-YYYY format. DataGOL will replicate the data updated on and after this date. Window in Days The amount of days used to query the data with date chunks. Set smaller value, if you have lots of data. -
Click Submit.
Sync modes
The NetSuite source connector supports the following sync modes:
- Full Refresh
- Incremental
Was this helpful?