Creating workbook with file upload
-
On the Home page, from the left navigation panel, click Workspace, and from the list of workspaces, open a workspace.
-
From the left panel, at the bottom, click Import.

-
In the Import dialog box, do the following:
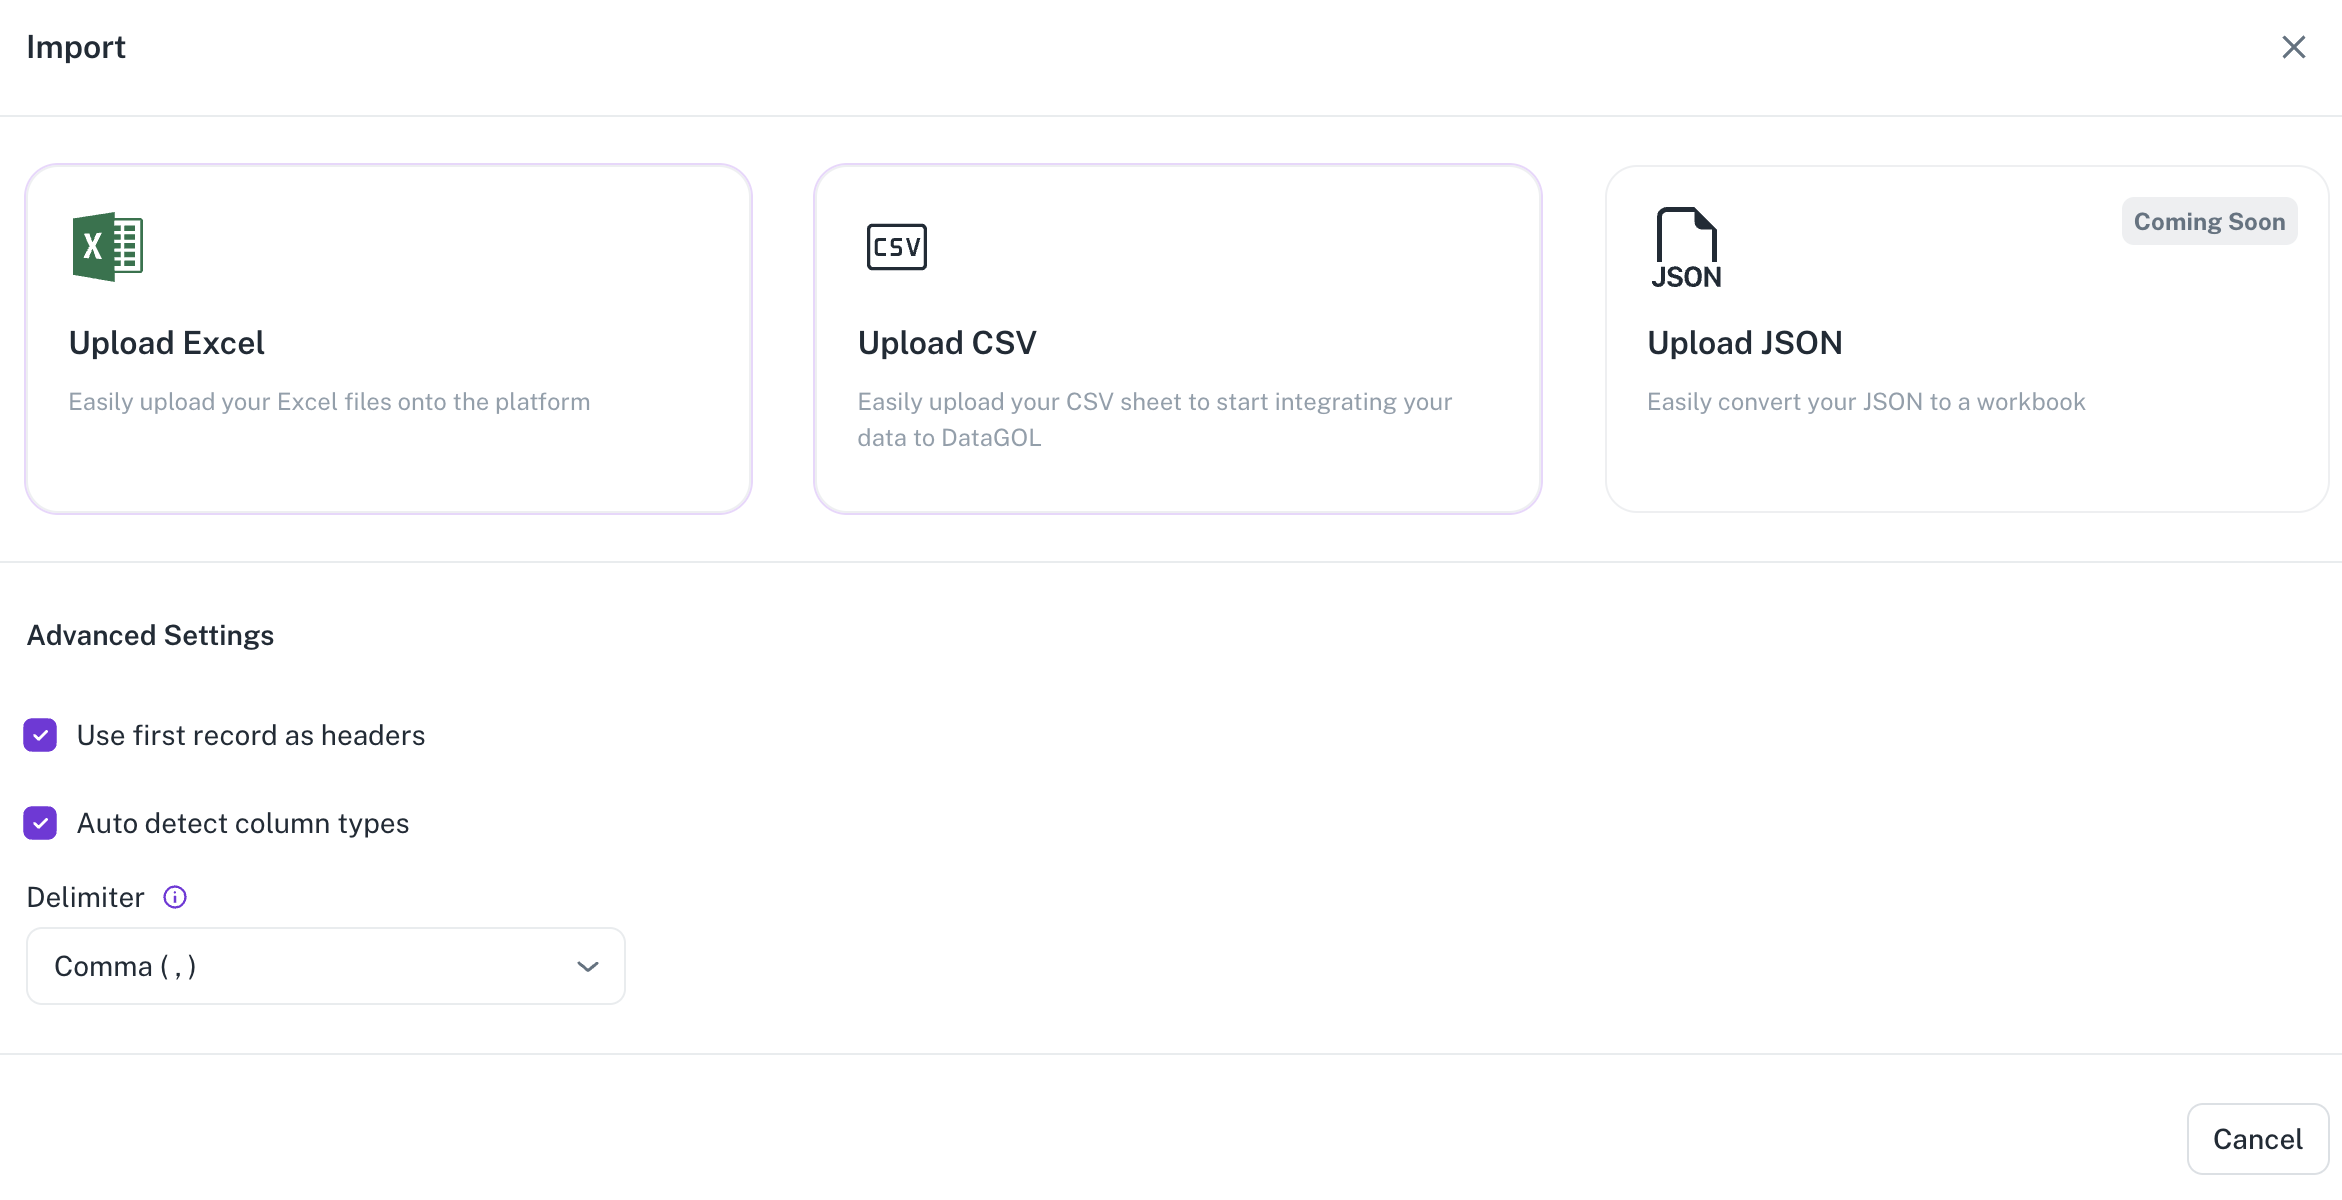
- Check the following settings if required:
- Use first record as headers
- Auto detect column types
- Specify the delimiter or the character that is used to separate the fields in the CSV file.
- Click Upload Excel or Upload CSV to upload the corresponding file from your system.
- A preview of the data you are importing is displayed. You can review the data and if there are any sheets you do not wish to import, you can close those tabs before proceeding.
- You can change the name or edit types from within the preview. You can upload Excel files with multiple sheets; each sheet will be imported as a workbook. Users have the option of removing some sheets from being imported from within the preview.
- Check the following settings if required:
-
Click Import. The import status is shown. Once the import is completed, you can click the Open button to open the Workbook. Optionally, you can also download this sheet.
Was this helpful?