Extracting data from documents
What is data extraction?
Data extraction is the process of identifying and pulling specific pieces of information from unstructured documents. Imagine you have a pile of resumes, invoices, or shipping documents. Instead of manually sifting through each one to find the candidate's name, the invoice number, or the delivery address, data extraction automates this process. It helps you convert chaotic, unorganized data into structured, actionable information that can be easily analyzed and used.
DataGOL uses AI to help you generate columns for your workbook output from the extracted data. You can guide the AI by providing clear and specific prompts and instructions for each column you want to extract. The more precise you are with your instructions to the AI, the more accurate data gets extracted.
You also have the flexibility to create and save multiple extraction configurations for the same set of documents. This is useful if you need to extract different types of information at various times or for different purposes.
Who benefits from data extraction?
Almost anyone dealing with a large volume of documents can benefit from data extraction. For example:
-
Human resources: Quickly pull out candidate names, contact details, experience, and skills from resumes.
-
Finance departments: Extract invoice numbers, line items, vendor details, and amounts from invoices for streamlined accounting.
-
Logistics and supply chain: Capture shipping addresses, product details, and tracking numbers from shipping documents.
-
Legal professionals: Identify key clauses, dates, and parties from legal contracts.
-
Researchers: Extract specific data points from research papers or reports.
In short, if you are spending significant time manually reviewing documents for specific information, data extraction can save you time, reduce errors, and improve efficiency.
Watch a Quick Demo
Step-by-step guide to data extraction
This guide will walk you through the process of extracting data from your documents.
Step 1: Prepare your documents in a workspace
Before you can extract data, your documents need to be organized within a workspace and placed into a folder.
-
Create a workspace (if you have not already): This is your main area for organizing different projects. For example, you might create a workspace called Resumes or Invoices.
-
Go to the documents section: Within your chosen workspace, navigate to the Documents section.
-
Create a folder: Data extraction works best when documents are grouped. Create a new folder (e.g., Resumes or Invoices_2025). All documents you wish to extract data from should be placed in a folder.
- Why a folder? While file-level extraction is possible, organizing documents into folders allows for batch processing and easier management of extraction configurations for similar document types.
-
Upload your documents: Upload the unstructured documents (e.g., resumes, invoices, shipping documents) into the newly created folder.
infoCurrently, only PDF files are supported for data extraction. While you can upload other file types like PPT, PNG, CSV, and JSON, they will not be processed for extraction. Support for other document types is coming soon in future releases.
Step 2: Configure data extraction
Once your documents are in a folder, you can set up the extraction process.
-
Access extraction configuration: You can access data from folder level or file level.
Folder vs. file level extraction:
-
Folder level: Ideal for processing multiple files of a similar type, allowing you to create a new workbook or append to an existing one. This is the primary method for batch extraction.
-
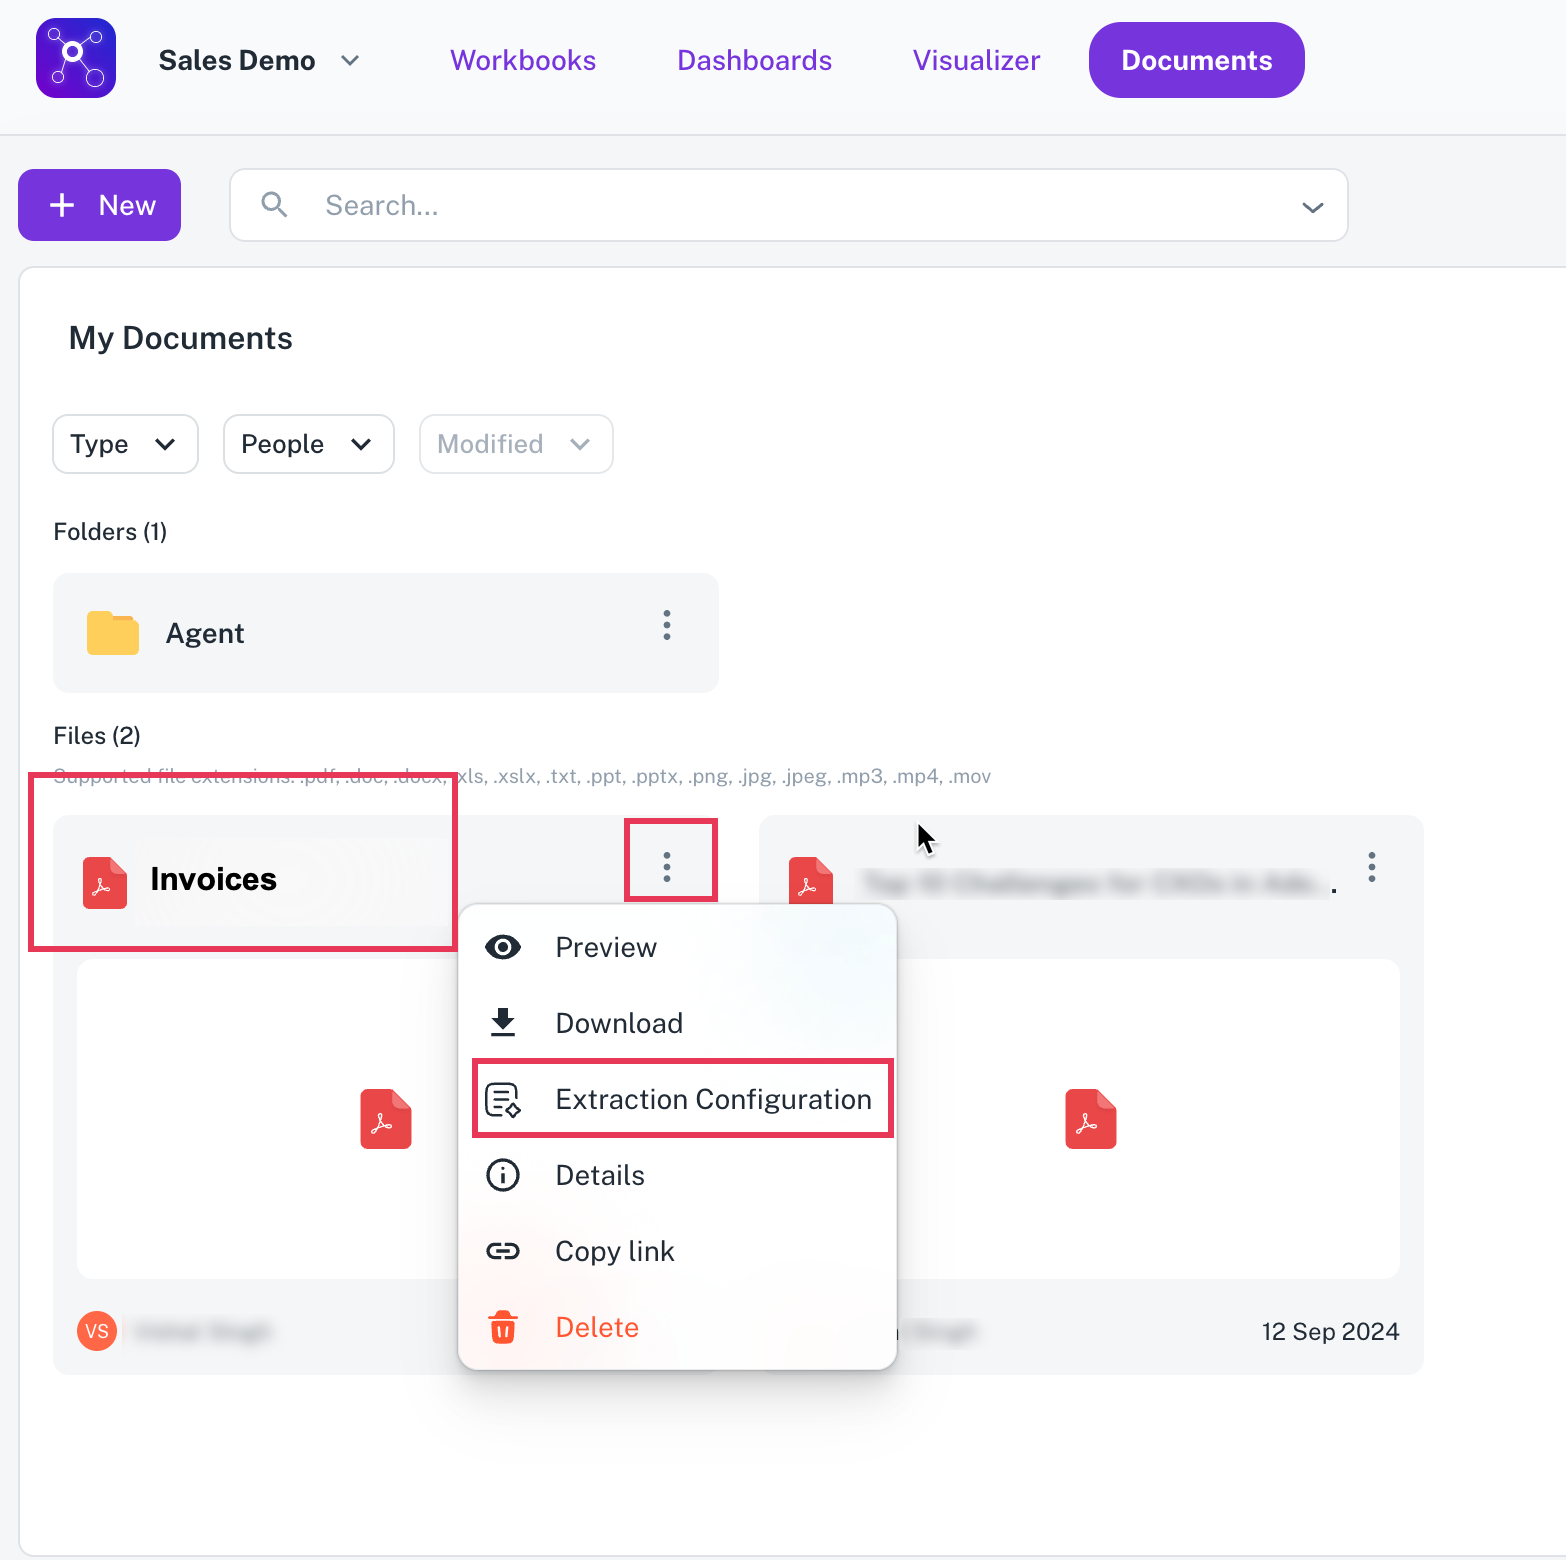
File level: Useful if you have an existing workbook and want to append information from a single file to it.
At the folder level or file level, click on the three-dot menu next to the folder name.
Folder level data extraction File level data extraction 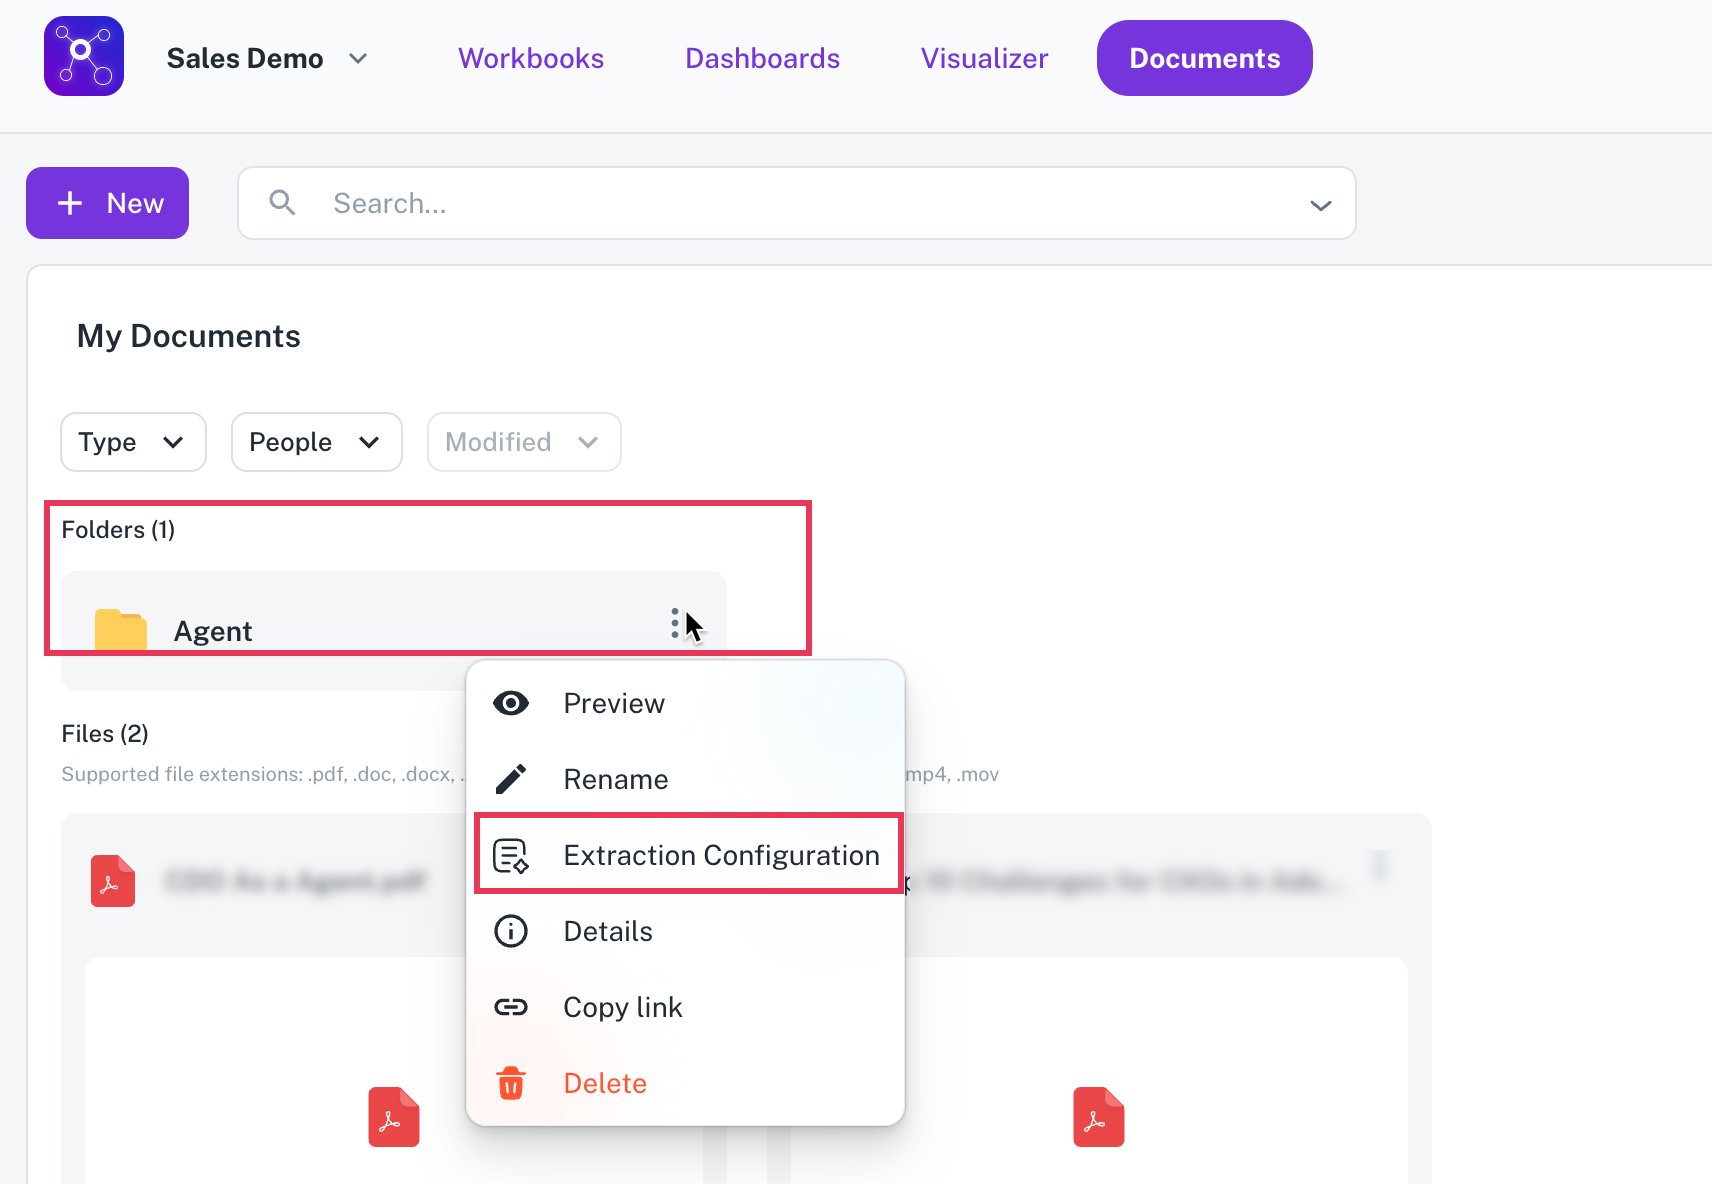
-
-
Select Extraction configuration.
Step 3: Create or use an existing workbook for the extracted data
Data extraction results are stored in a workbook, which is essentially a structured table. You have two options:
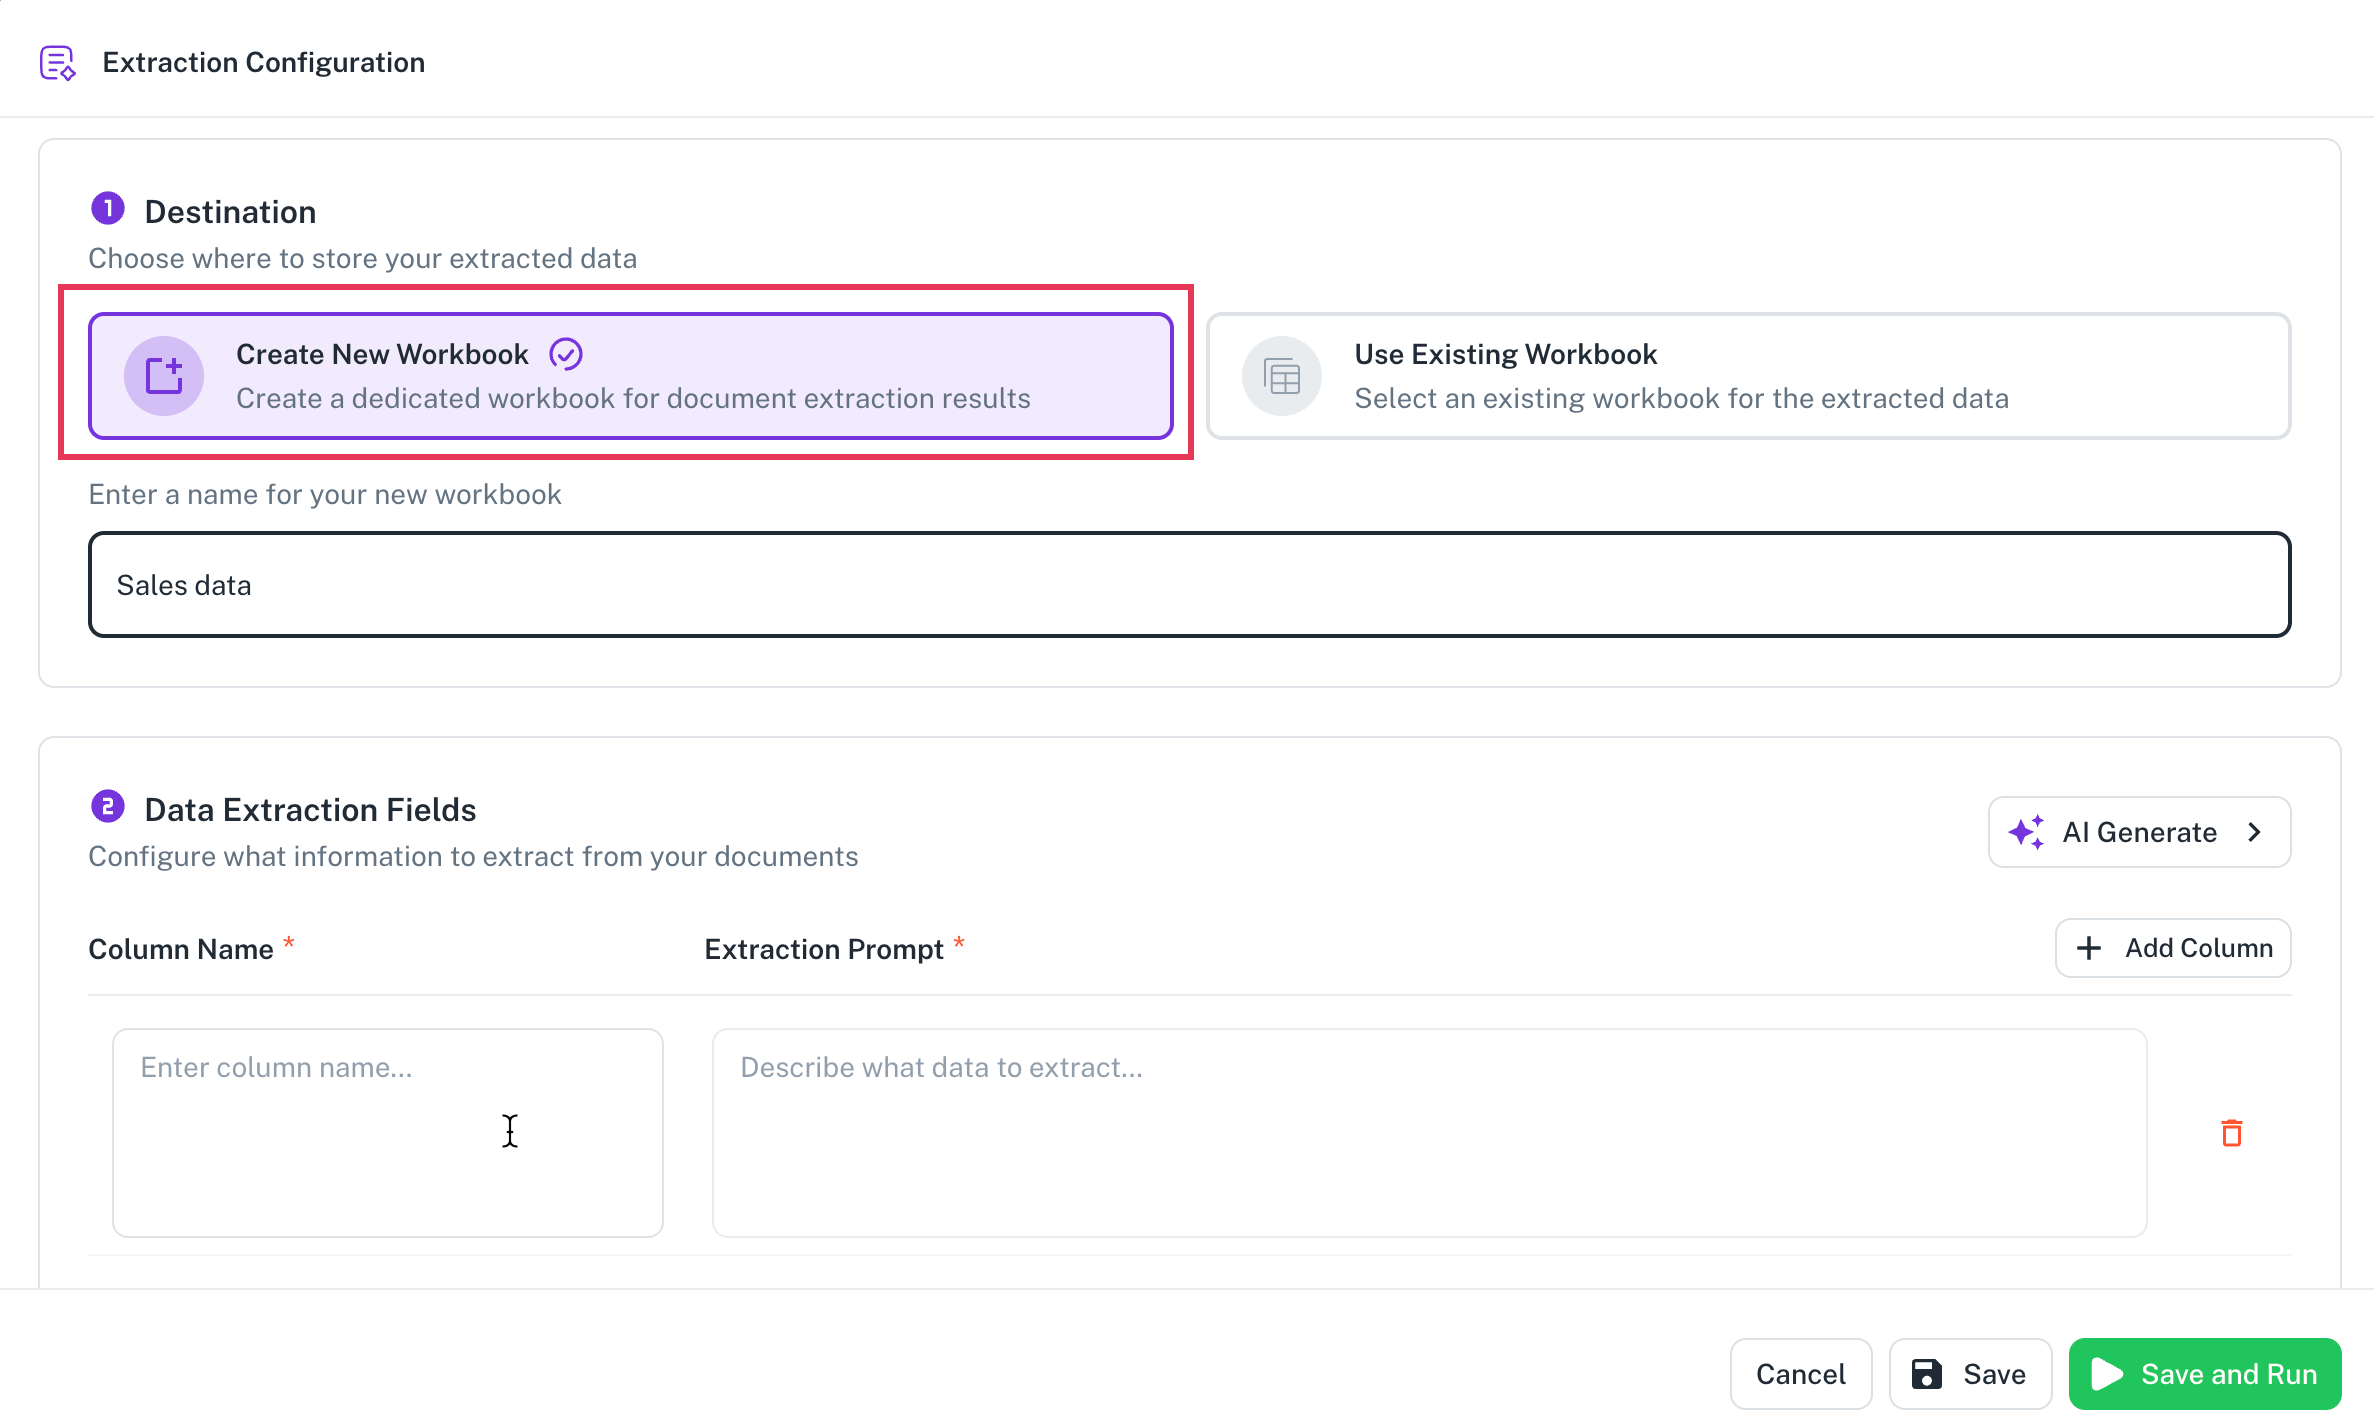
Option A: Create a new workbook
-
Click on Create new workbook.
-
Enter a workbook name: Give your workbook a descriptive name.
-
Define columns for extraction:
-
Add columns one by one: Manually add columns and specify what data you want to extract for each.
-
AI generate (recommended): This uses AI to suggest common fields based on the document type.
-
Provide a prompt describing what you want to extract (e.g., Extract all possible information from resumes or Extract name, experience, and skills).
-
Click Generate instructions. The AI will create a list of suggested columns (e.g., Full Name, Email Address, Phone Number, LinkedIn Profile, Professional Summary, Skills, Work Experience, Education).
-
Review and refine columns:
-
You can delete any columns you don't need (e.g., if you only want a summary and not full work experience).
-
You can edit the Extraction prompt for each column. This is crucial as it acts as an instruction to the AI on exactly what to extract for that specific column. For example, for Full Name, you might instruct it to extract the candidate's full name, last name first, then a comma, then the first name.
-
-
-
-
Accept columns: Once satisfied with your column setup, click Accept.
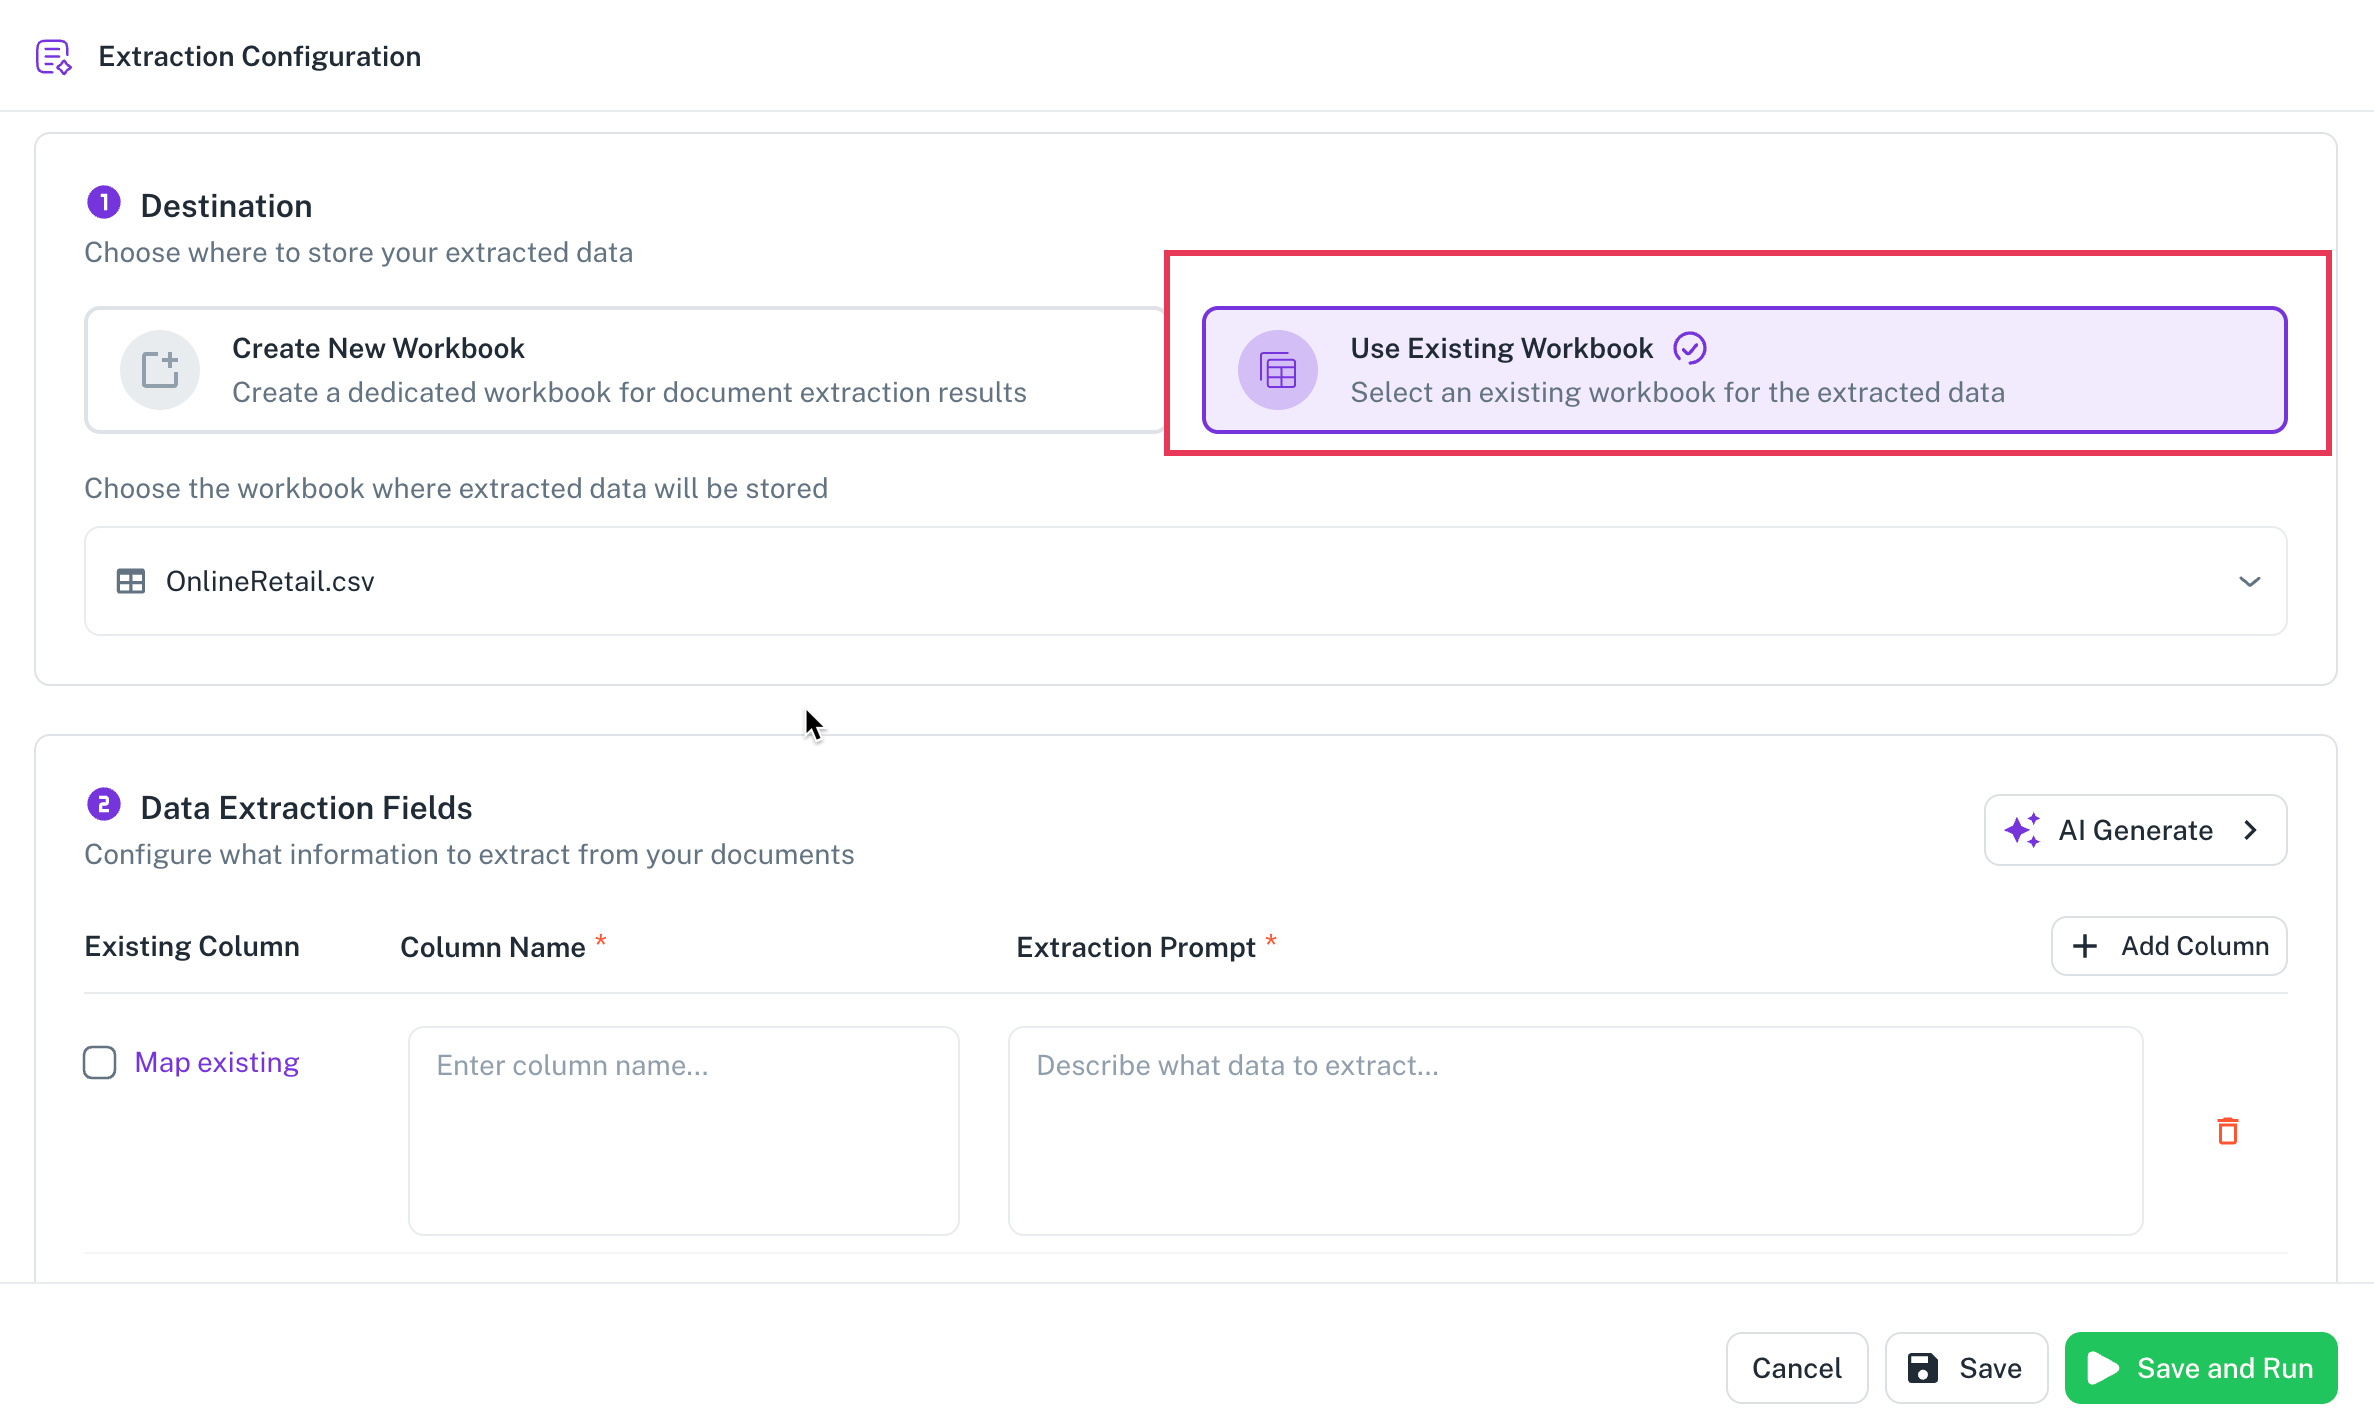
Option B: Use an existing workbook
-
Select Use existing workbook.
-
Choose the workbook you want to use from the available options.
- The system will often pre-select a workbook if one was previously used with that folder.
Step 4: Configure extraction settings
Before running the extraction, adjust these settings:
-
Configuration name: Give your extraction configuration a name (e.g., Resume Extraction Config 1). You can save multiple configurations for the same document type if you have different extraction needs.
-
Extract raw JSON: Check this box if you want to see the raw JSON output of the extracted data in addition to the structured workbook. This can be useful for debugging or advanced use cases.
-
Map existing columns (when using an existing workbook): If you are using an existing workbook and have added new columns or want to ensure correct mapping, click Map existing to align your extraction instructions with the existing workbook columns.
Step 5: Run the extraction
-
Click Save and run.
-
Choose processing option:
-
Process only new files: This will only process documents that have been added to the folder since the last extraction. Use this to efficiently add new data to an existing workbook.
-
Process all files: This will re-process all documents in the folder, including those that were previously extracted. This can be useful if you have changed your extraction configuration and want to re-extract all data.
-
-
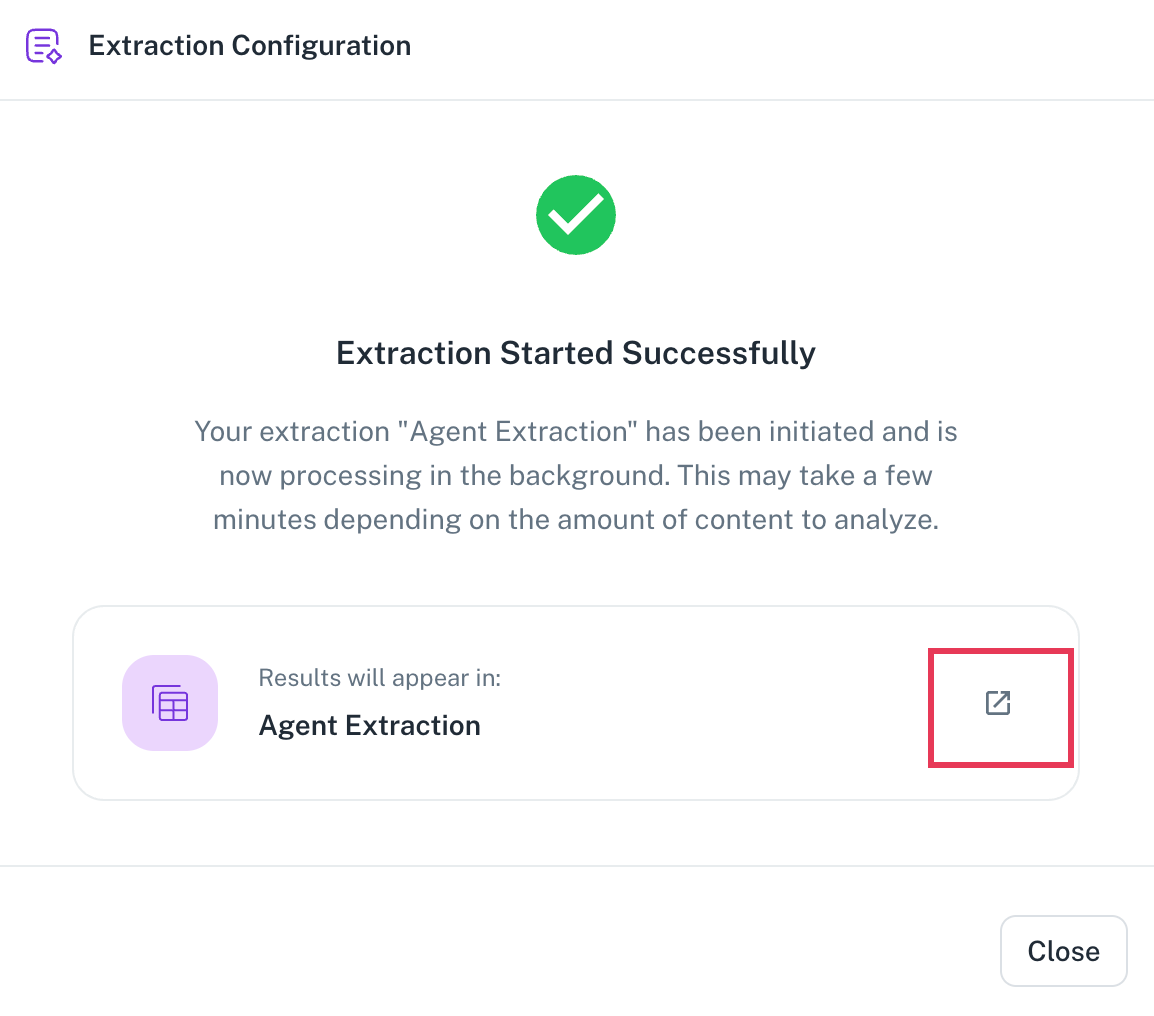
Click Run extraction. The data extration process will be triggered in the background. You can wait for the extraction process to complete and click the arrow icon to access the workbook where the data is extracted.
Accessing and utilizing your extracted data
Once the extraction is complete, you can view and work with your data in the workbooks section.
-
Go to the workbooks section: Navigate to the Workbooks section within your workspace.
-
View extracted data: You will see your newly populated workbook with the extracted information. Each row will represent a document, and each column will contain the extracted data based on your configuration.
-
Examine extracted JSON (if enabled): If you checked the Extract raw JSON option, you will see a column with the raw JSON output for each extracted record.
-
Trace back to source document: Each row in the workbook will include a URL column. Clicking this URL will take you directly to the source document from which the data was extracted, allowing you to easily verify the information.
Handling new documents and updates
-
Adding new documents: When you add new documents to an already processed folder, you can run the extraction again and choose Process only new files to append the new data to your existing workbook.
-
Document changes: If you upload a document with the same name but different content (e.g., a revised resume), the system will treat it as a new file if its creation timestamp is different. This means it will be processed separately and result in a new entry in your workbook.
-
PDF requirement: Remember that only PDF files are currently supported for data extraction.
-
Instructional prompts: The Extraction prompt for each column is a powerful tool. Be specific and clear in your instructions to the AI to ensure accurate data extraction.
-
Multiple configurations: You can create and save multiple extraction configurations for the same type of document, allowing for flexibility in what data you extract.
Was this helpful?