Workbook columns
Workbooks offer a rich set of column types designed to capture and manage your data effectively. By strategically choosing these column types, you can structure your data precisely to meet your specific requirements, ensuring accuracy, consistency, and enhanced functionality within your workbooks. The following column types are included in workbooks:
-
Textual data: Use Single Line Text for short entries and Long Text for detailed notes and rich content (including HTML).
-
Boolean and categorical Choices: Implement Checkbox for simple yes/no tracking, Multi-Select for choosing multiple predefined options, and Single Select for selecting one option from a list.
-
Date and contact information: Capture dates easily with the Date column (featuring a calendar picker), store Phone Numbers in a dedicated format, and manage Email addresses with specific validation.
-
Web and numeric values: Record website addresses with the URL type (including validation), store numerical data (integers and decimals) in the Number column, and represent monetary values with the Currency type (supporting various currencies like USD, EUR, INR). Display values as Percentages for clear interpretation.
-
Dynamic and connected data: Create dynamically calculated values using Formula columns. Attach relevant files with Attachment columns (offering previews for common formats). Establish relationships with other workbooks by referencing values through Link / Lookup columns.
-
AI-powered content generation: Leverage the AI Generate column to automatically create content (like email drafts or text summaries) based on the row's context.
Adding a column
-
On the Home page, from the left navigation panel, click Workspace and from the list of workspaces, open the workspace where the workbook that you want to edit is located.
-
Click the Workbook tab and select the required workbook.
-
Navigate to the last empty column towards the right and then click + from the header.

-
Enter a unique name for the column. This name will be displayed in the header.
-
Select any of the following column type from the list:
-
Single Line Text: For concise text entries.
-
Long Text: Ideal for detailed notes, HTML markups, and rich text.
-
Checkbox: A simple toggle for binary status tracking.
-
Multiple Select: Enables the selection of multiple options from a predefined list.
-
Single Select: Allows choosing one option from a predefined list.
-
Date: For storing and selecting dates with an intuitive calendar.
-
Phone Number: Dedicated input for telephone numbers.
-
Email: Specifically designed for storing email addresses.
-
URL: For entering and validating website links.
-
Number: Stores numeric values, including both integers and decimals.
-
Currency: Formats numbers as monetary values in various currencies (USD, EUR, GBP, JPY, CHF, INR).
-
Percentage: Displays numerical values as percentages.
-
Formula/Agentic formula: Calculates values dynamically based on defined expressions.
-
User: Add or tag one or multiple users to a specific row.
-
Button: Push a record to a different workbook or generate Jira tickets directly from a workbook.
-
Attachment: Facilitates file uploads with previews for common image and document formats.
-
Link / Lookup: Enables referencing values from other workbooks, fostering relationships between datasets.
-
-
From Style select a color to mark the column header separately with that selected color. Click the Include cells to mark the complete column with the same color.
-
Click Create.
Creating Single line text column
-
On the Home page, from the left navigation panel, click Workspace and from the list of workspaces, open the workspace where the workbook that you want to edit is located.
-
Click the Workbook tab and select the required workbook.
-
Navigate to the last empty column towards the right and then click + from the header.
-
Enter a unique name for the column. This name will be displayed in the header.
-
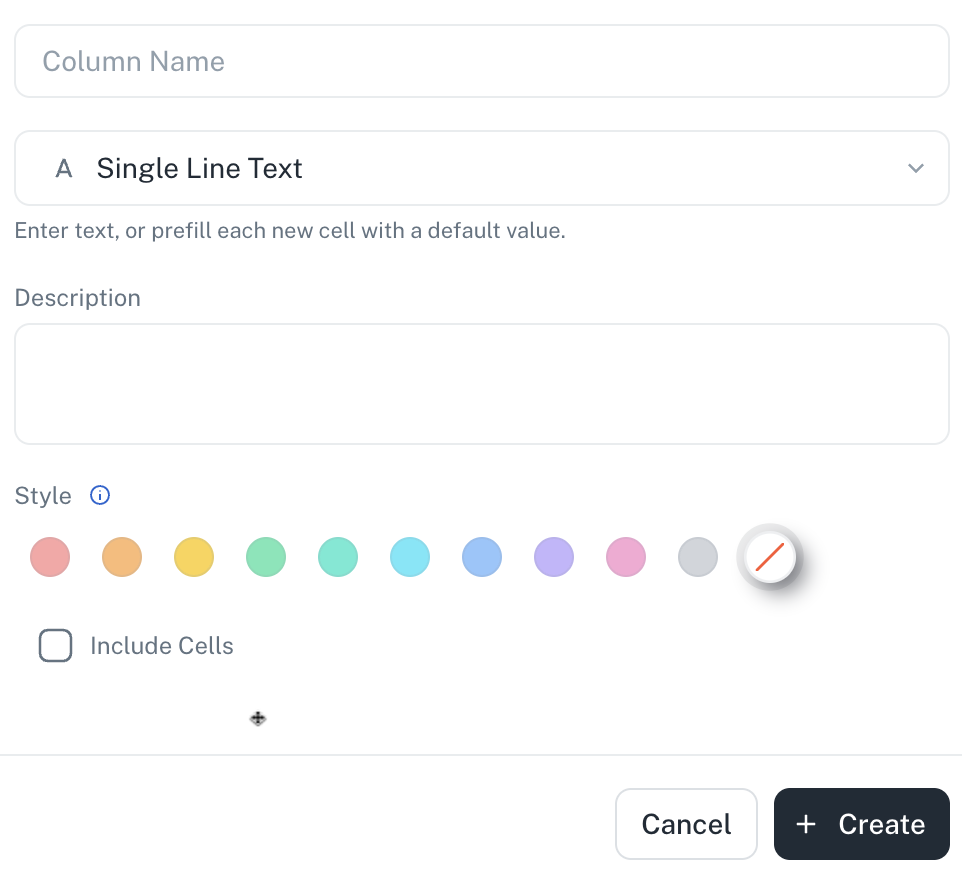
Select Single line text from the list.
-
Optionally provide a short description.
-
From Style select a color to mark the column header separately with that selected color. Click the Include cells to mark the complete column with the same color.
-
Click Create.
Creating Link column
-
On the Home page, from the left navigation panel, click Workspace and from the list of workspaces, open the workspace where the workbook that you want to edit is located.
-
Click the Workbook tab and select the required workbook.
-
Navigate to the last empty column towards the right and then click + from the header.
-
Enter a unique name for the column. This name will be displayed in the header.
-
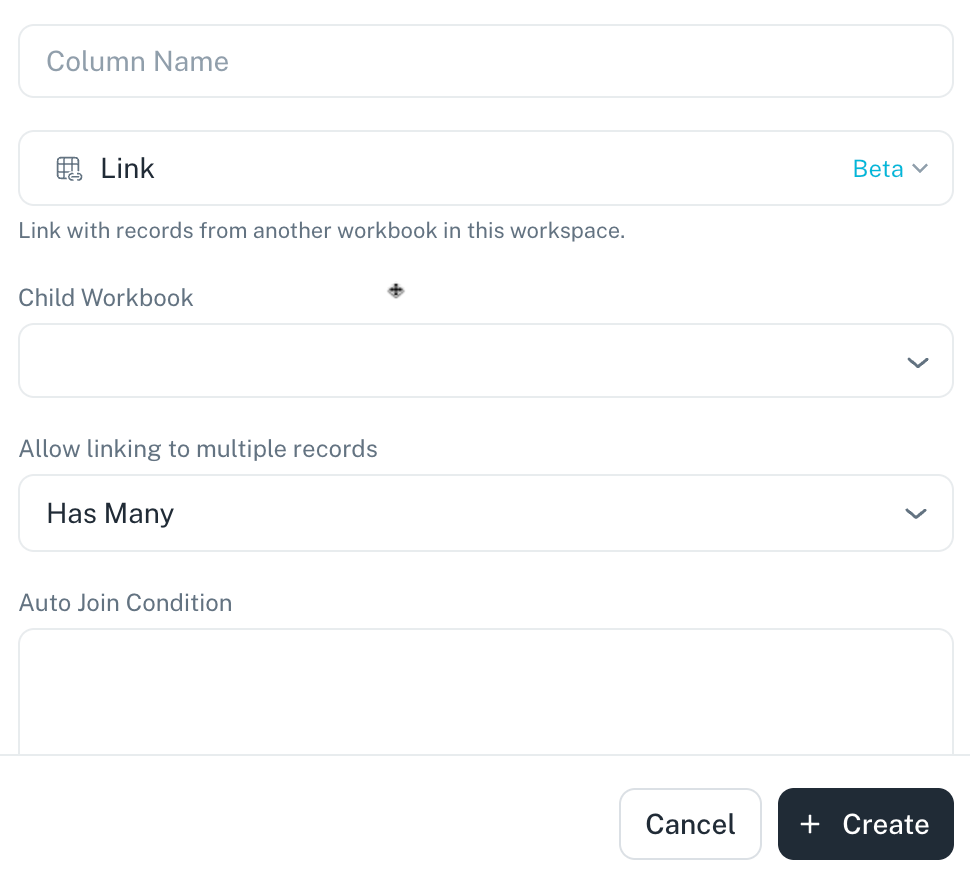
Select Link from the list.
-
From the Child Workbook dropdown select the workbook that you want to link from the current workbook.
-
From Allow linking to multiple records dropdown, specify, if you want to link to multiple records in the workbook.
-
You can specify join conditions in the Auto Join Condition text box.
-
From Style select a color to mark the column header separately with that selected color. Click the Include cells to mark the complete column with the same color.
-
Click Create.
Creating Lookup column
-
On the Home page, from the left navigation panel, click Workspace and from the list of workspaces, open the workspace where the workbook that you want to edit is located.
-
Click the Workbook tab and select the required workbook.
-
Navigate to the last empty column towards the right and then click + from the header.
-
Enter a unique name for the column. This name will be displayed in the header.
-
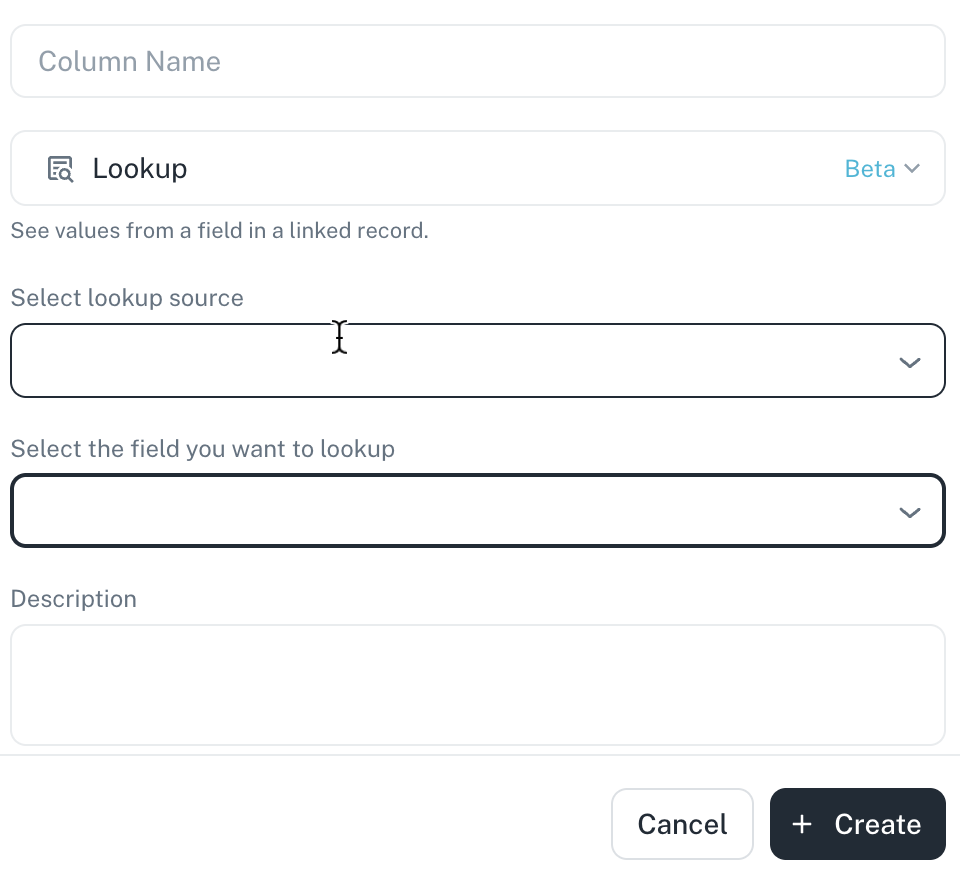
Select Lookup from the list.
 Open
Open -
From the Select lookup source dropdown, choose the source for lookup.
-
From the Select the field you want to lookup, choose the field that you want to lookup. Optionally, you can provide a description.
-
From Style select a color to mark the column header separately with that selected color. Click the Include cells to mark the complete column with the same color.
-
Click Create.
Creating Long Text column
-
On the Home page, from the left navigation panel, click Workspace and from the list of workspaces, open the workspace where the workbook that you want to edit is located.
-
Click the Workbook tab and select the required workbook.
-
Navigate to the last empty column towards the right and then click + from the header.
-
Enter a unique name for the column. This name will be displayed in the header.
-
Select Long Text from the list.
-
Turn on the toggle for enabling rich text formatting. Optionally, you can provide a description.
-
From Style select a color to mark the column header separately with that selected color. Click the Include cells to mark the complete column with the same color.
-
Click Create.
Creating Checkbox column
-
On the Home page, from the left navigation panel, click Workspace and from the list of workspaces, open the workspace where the workbook that you want to edit is located.
-
Click the Workbook tab and select the required workbook.
-
Navigate to the last empty column towards the right and then click + from the header.
-
Enter a unique name for the column. This name will be displayed in the header.
-
Select Checkbox from the list. Optionally, you can provide a description.
-
From Style select a color to mark the column header separately with that selected color. Click the Include cells to mark the complete column with the same color.
-
Click Create.
Creating Multiple Select column
-
On the Home page, from the left navigation panel, click Workspace and from the list of workspaces, open the workspace where the workbook that you want to edit is located.
-
Click the Workbook tab and select the required workbook.
-
Navigate to the last empty column towards the right and then click + from the header.
-
Enter a unique name for the column. This name will be displayed in the header.
-
Select Multiple Select from the list.
-
Click +Add option and specify the options. Optionally, you can provide a description.
-
From Style select a color to mark the column header separately with that selected color. Click the Include cells to mark the complete column with the same color.
-
Click Create.
Creating Single Select column
-
On the Home page, from the left navigation panel, click Workspace and from the list of workspaces, open the workspace where the workbook that you want to edit is located.
-
Click the Workbook tab and select the required workbook.
-
Navigate to the last empty column towards the right and then click + from the header.
-
Enter a unique name for the column. This name will be displayed in the header.
-
Select Single Select from the list.
-
Click +Add option and specify the options. Optionally, you can provide a description.
-
From Style select a color to mark the column header separately with that selected color. Click the Include cells to mark the complete column with the same color.
-
Click Create.
-
The Auto option automatically detects unique options within a column.
-
You can define display names if enums are stored in DB.
Creating Date column
-
On the Home page, from the left navigation panel, click Workspace and from the list of workspaces, open the workspace where the workbook that you want to edit is located.
-
Click the Workbook tab and select the required workbook.
-
Navigate to the last empty column towards the right and then click + from the header.
-
Enter a unique name for the column. This name will be displayed in the header.
-
Select Date from the list.
-
Select a date format. Switch the toggle on to include time. Optionally, you can provide a description.
-
From Style select a color to mark the column header separately with that selected color. Click the Include cells to mark the complete column with the same color.
-
Click Create.
Creating Email column
-
On the Home page, from the left navigation panel, click Workspace and from the list of workspaces, open the workspace where the workbook that you want to edit is located.
-
Click the Workbook tab and select the required workbook.
-
Navigate to the last empty column towards the right and then click + from the header.
-
Enter a unique name for the column. This name will be displayed in the header.
-
Select Email from the list. Optionally, you can provide a description.
-
From Style select a color to mark the column header separately with that selected color. Click the Include cells to mark the complete column with the same color.
-
Click Create.
Creating URL column
-
On the Home page, from the left navigation panel, click Workspace and from the list of workspaces, open the workspace where the workbook that you want to edit is located.
-
Click the Workbook tab and select the required workbook.
-
Navigate to the last empty column towards the right and then click + from the header.
-
Enter a unique name for the column. This name will be displayed in the header.
-
Select URL from the list. Optionally, you can provide a description.
-
From Style select a color to mark the column header separately with that selected color. Click the Include cells to mark the complete column with the same color.
-
Click Create.
Creating Phone Number column
-
On the Home page, from the left navigation panel, click Workspace and from the list of workspaces, open the workspace where the workbook that you want to edit is located.
-
Click the Workbook tab and select the required workbook.
-
Navigate to the last empty column towards the right and then click + from the header.
-
Enter a unique name for the column. This name will be displayed in the header.
-
Select Phone Number from the list. Optionally, you can provide a description.
-
From Style select a color to mark the column header separately with that selected color. Click the Include cells to mark the complete column with the same color.
-
Click Create.
Creating Number column
-
On the Home page, from the left navigation panel, click Workspace and from the list of workspaces, open the workspace where the workbook that you want to edit is located.
-
Click the Workbook tab and select the required workbook.
-
Navigate to the last empty column towards the right and then click + from the header.
-
Enter a unique name for the column. This name will be displayed in the header.
-
Select Single line text from the list.
-
From Style select a color to mark the column header separately with that selected color. Click the Include cells to mark the complete column with the same color.
-
Click Create.
Creating User column
-
On the Home page, from the left navigation panel, click Workspace and from the list of workspaces, open the workspace where the workbook that you want to edit is located.
-
Click the Workbook tab and select the required workbook.
-
Navigate to the last empty column towards the right and then click + from the header.
-
Enter a unique name for the column. This name will be displayed in the header.
-
Select User from the list.
-
Turn the toggle on to add multiple users in a row.
-
From Style select a color to mark the column header separately with that selected color. Click the Include cells to mark the complete column with the same color.
-
Click Create.
Creating AI Generate column
AI Generate is a feature that allows you to populate a column with AI-generated content based on a prompt. This prompt can reference other columns in the same workbook, allowing the AI to generate content that is specific to each row. You can also enable web access to allow the AI to gather information from the internet to inform its generation.
The AI Generate feature leverages AI to perform tasks like research, summarization, or content creation that is contextually relevant to the data within their workbook, using prompts that can dynamically adapt to each row's information.
Do the following to create an AI Generate column
-
On the Home page, from the left navigation panel, click Workspace and from the list of workspaces, open the workspace where the workbook that you want to edit is located.
-
Click the Workbook tab and select the required workbook.
-
Navigate to the last empty column towards the right and then click + from the header.
-
Enter a unique name for the column. This name will be displayed in the header.
-
Select the required type of column from the list.
-
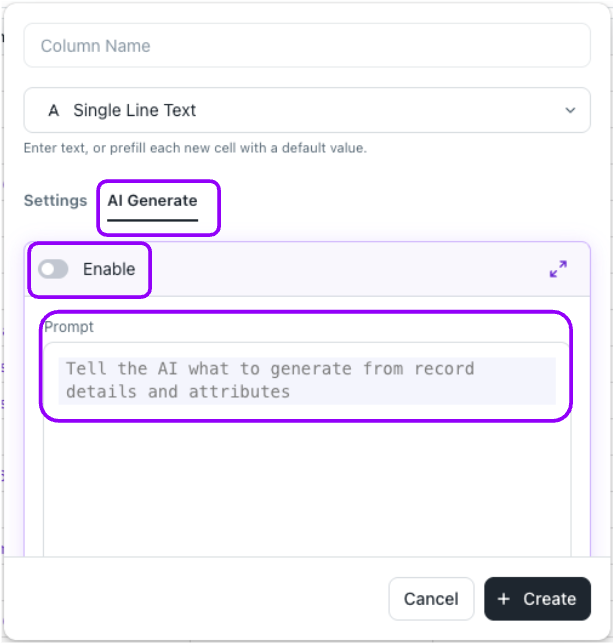
Click on AI Generate next to the Settings option and click on Enable.
-
Write a prompt that instructs the AI on what kind of information to generate. This prompt can include placeholders (indicated by curly braces
{}) that reference existing columns in the workbook. For example, the prompt could be “Research on{company name}which has website{company website}and identify the company founder and company motives."
-
Turn the Internet Search toggle to specify if the prompt requires the AI to access information from the internet (like visiting a company website).
-
Select your most preferred AI model from the drop down list.
-
Click Create.
-
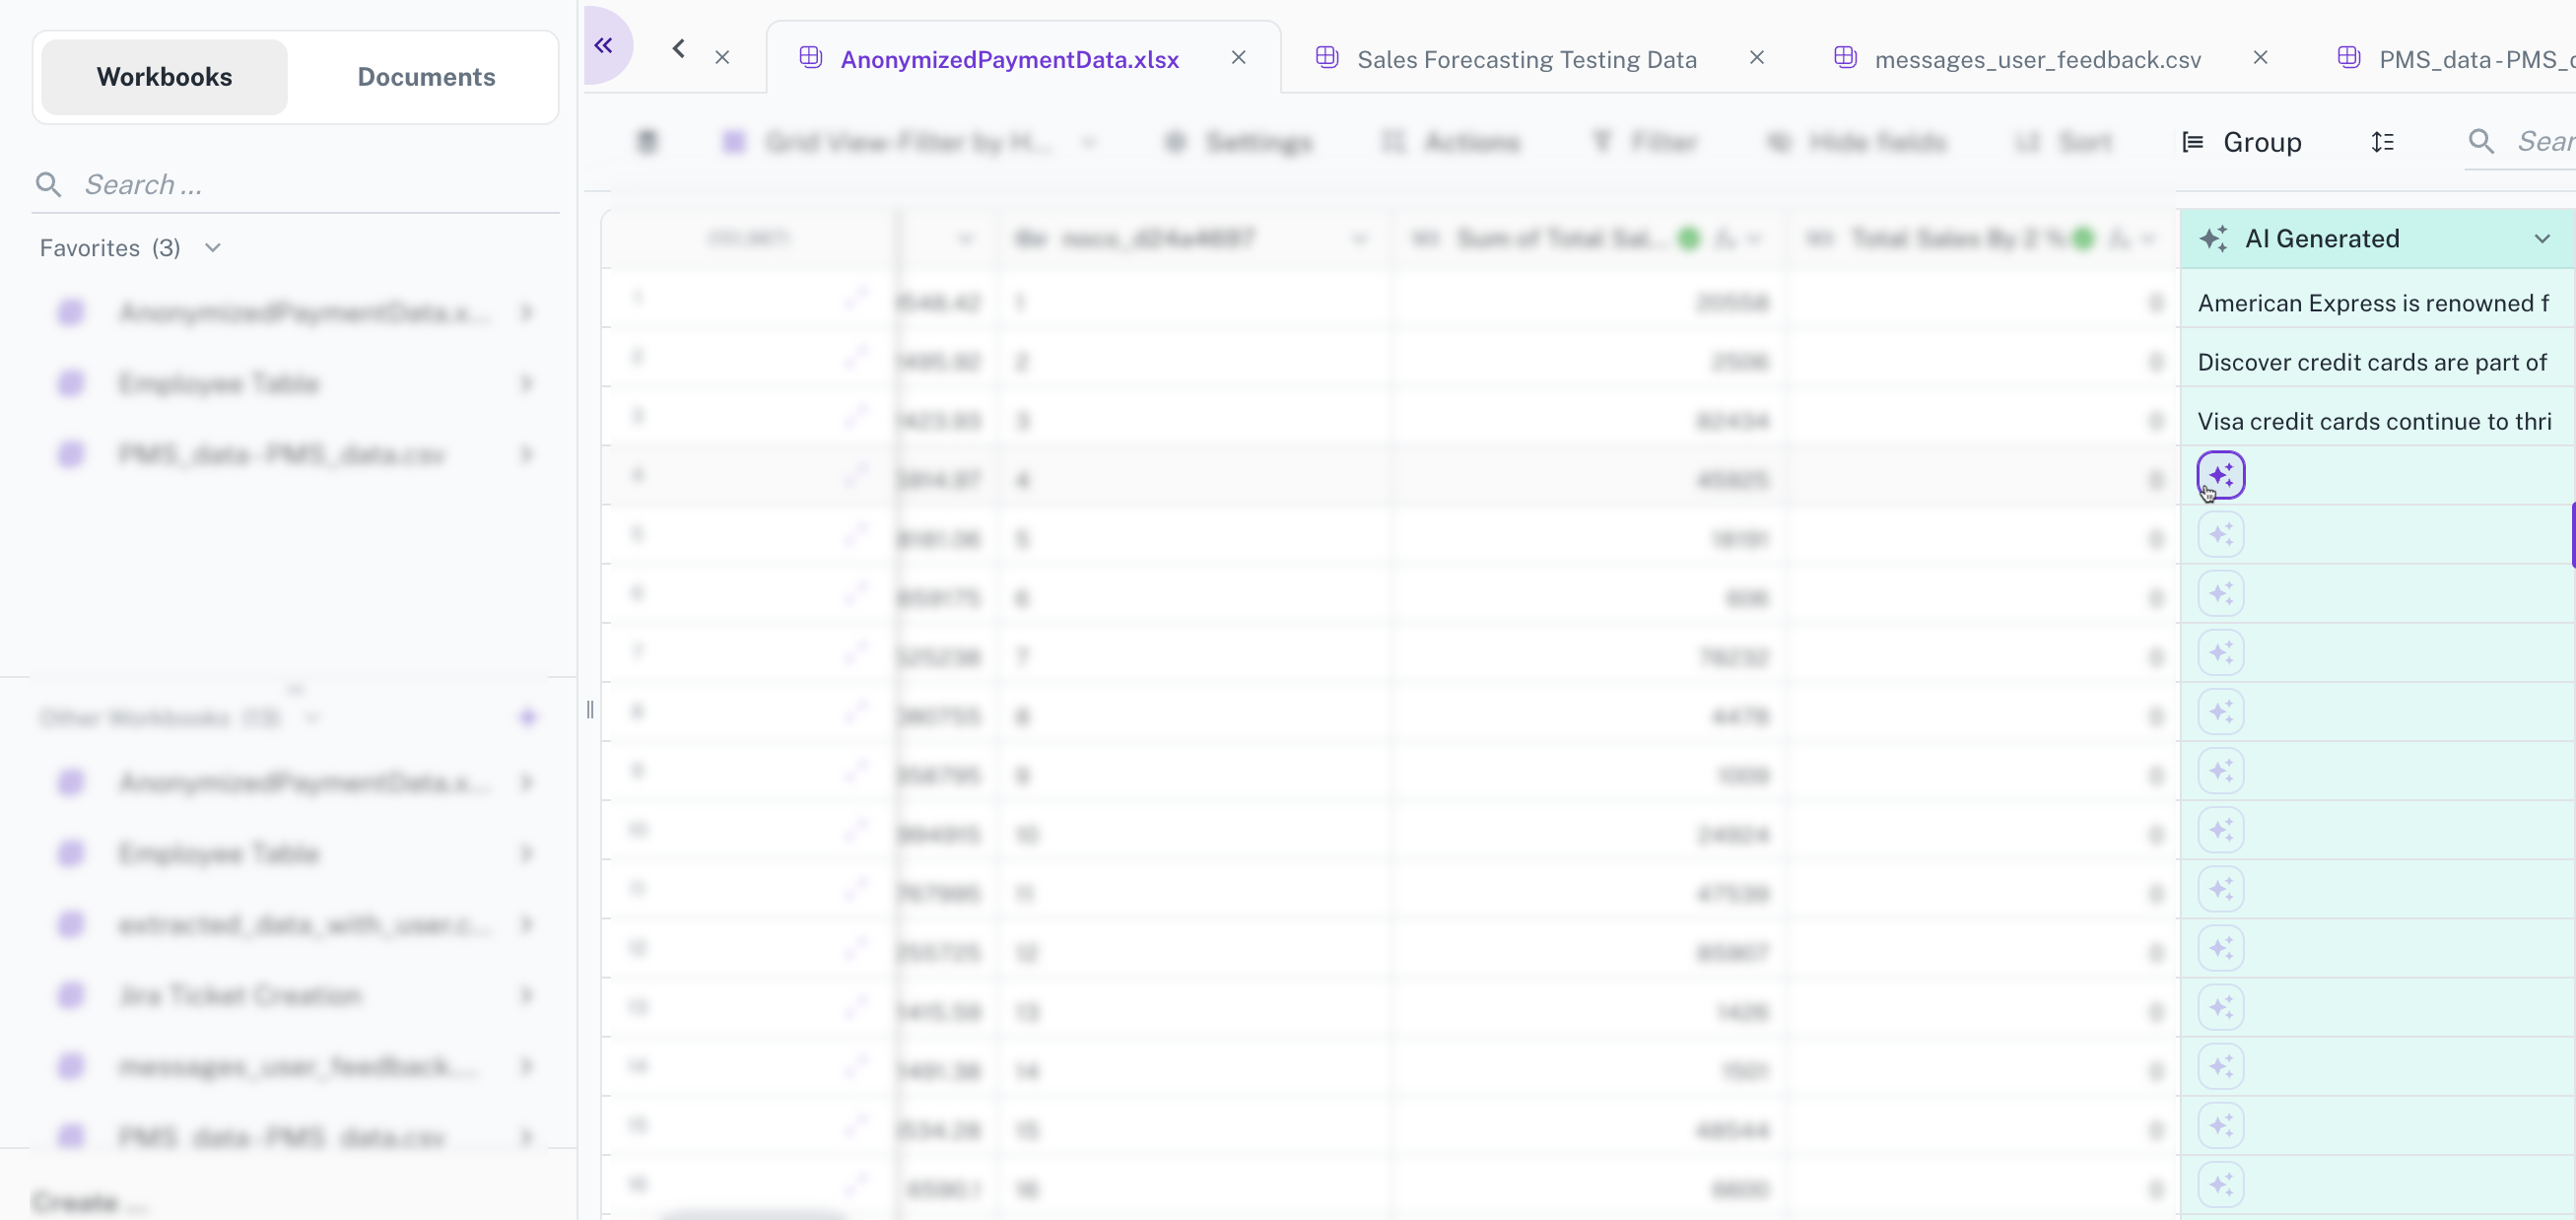
Click the AI Generate icon to view the results of your query in each row.

Once the prompt is set, the AI processes each row in the workbook.
For each row, it replaces the placeholders in the prompt with the corresponding values from the specified columns. It then uses the prompt (and web access, if enabled) to generate the requested information. The generated content appears in the new AI Generate column for each row.
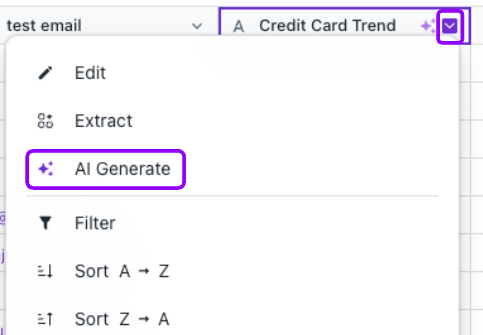
Bulk AI Generate
- Click the dropdown arrow on the column header in which the AI Generate is enabled.
- Select AI Generate from the menu.
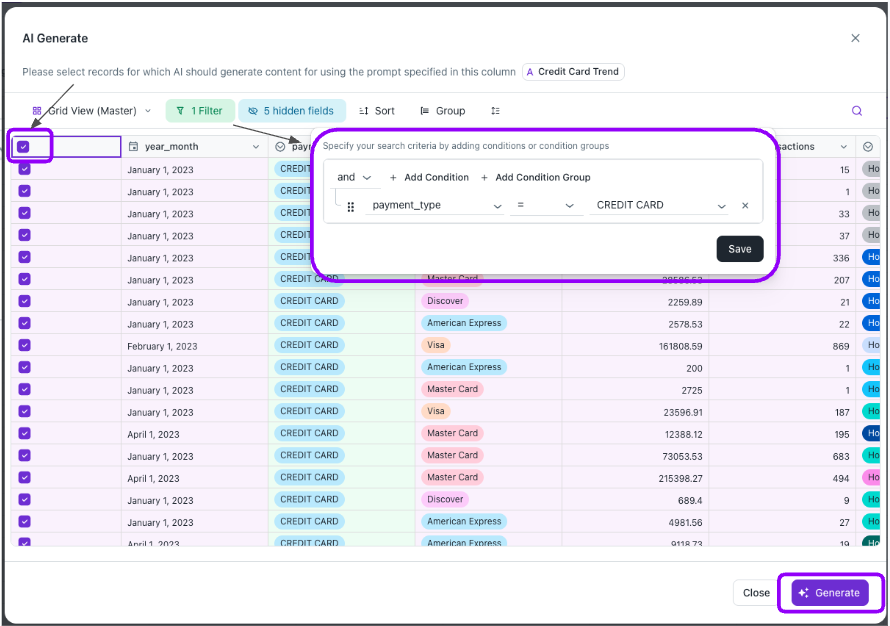
- In the dialog, select all rows or choose specific rows to process. You can also add certain filter conditions and select specific rows as necessary
- Click Generate.
Rows will be processed and updated asynchronously — results will appear as each row completes.
Example:
Create an AI Generate column called Credit Card Type Information and write the following prompt:
"Provide some details about {credit_card_type} and their business trends.
Also enables the web access.
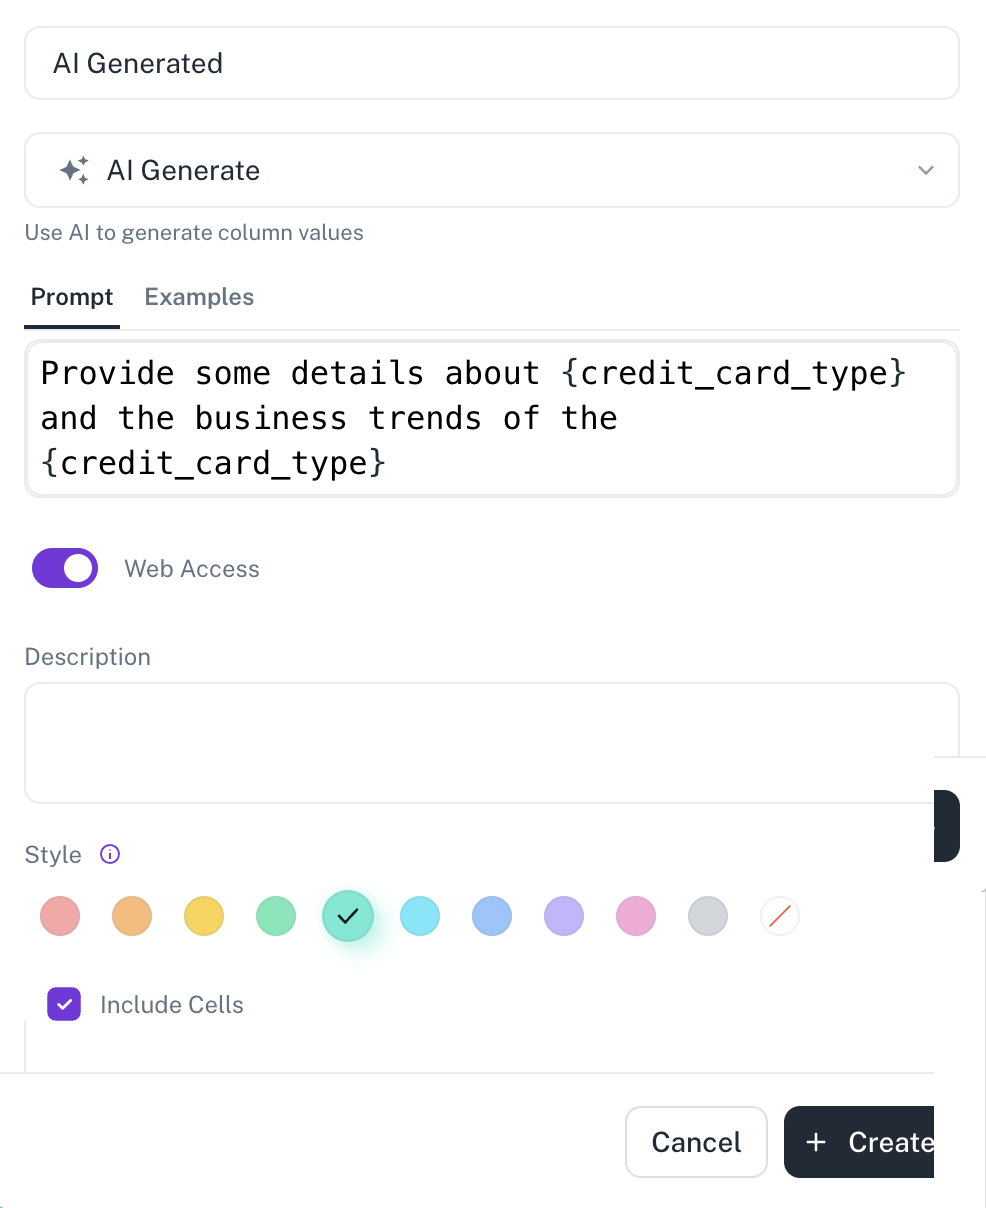
When this AI Generate column is applied to rows containing company names and websites, the AI uses this information to search the web and populate the Credit Card Type Information column with details. The placeholder {credit_card_type} is dynamically replaced with the values from the respective row for each company being processed.
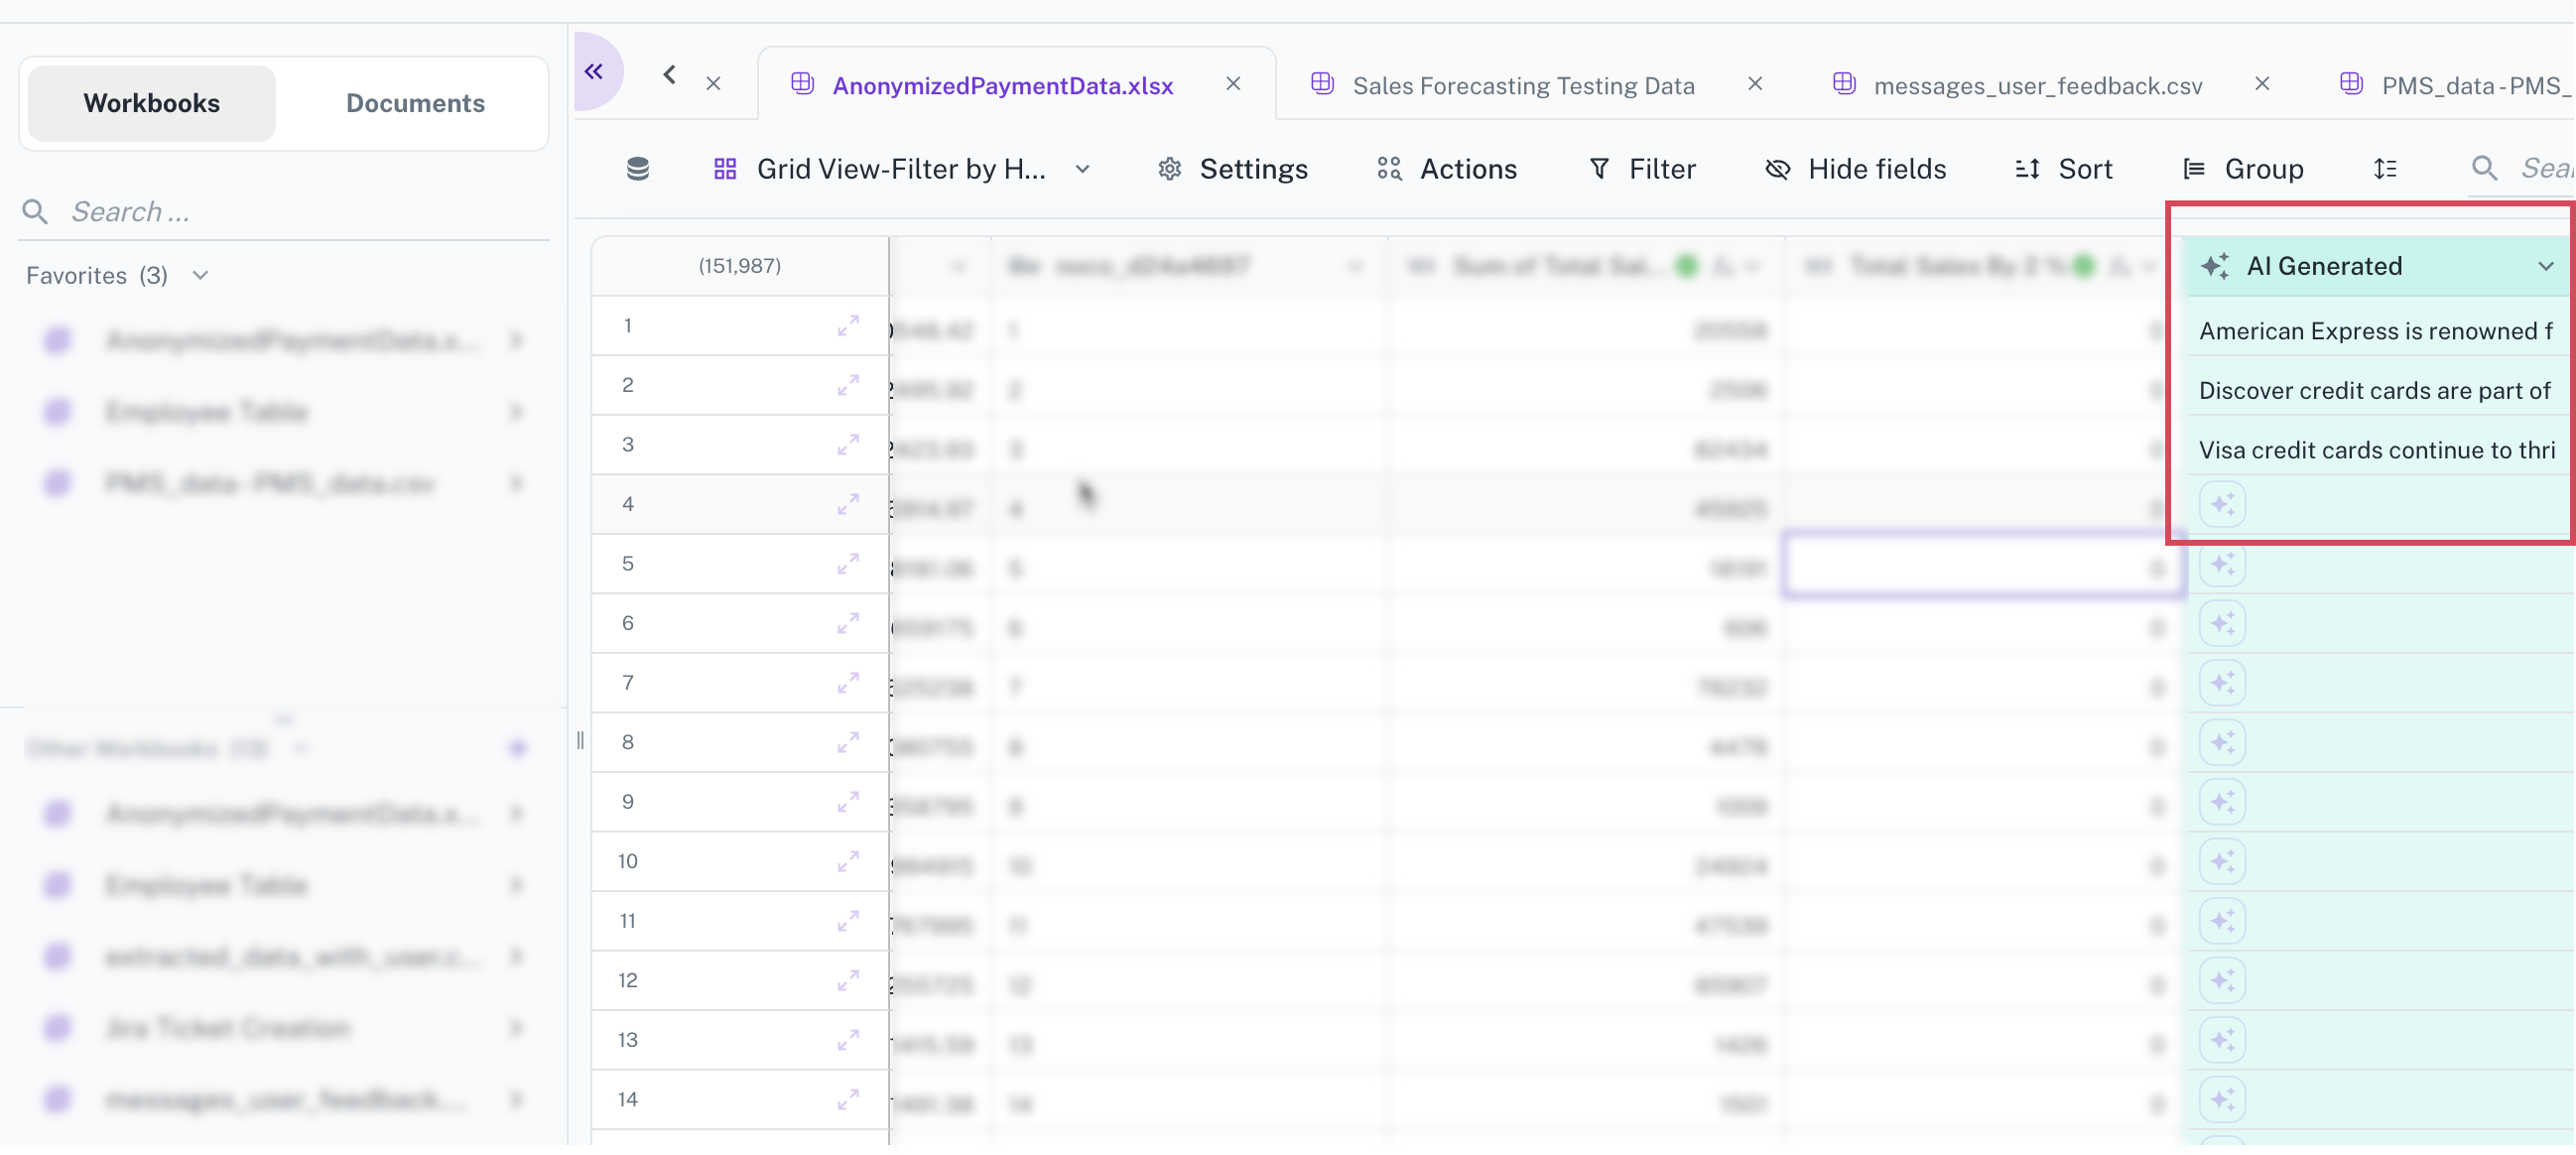
The same prompt applied to a different credit card, yields different results based on the information the AI finds online for that specific company.
Creating Formula column
Workbooks support formulas, enabling sophisticated data analysis directly within their respective interfaces. This feature enhances data analysis capabilities, providing greater flexibility and control over data insights.
A formula column is a type of column you create within a workbook by applying a formula to one or more existing columns within the workbook. This formula can involve various mathematical operations, logical comparisons, text manipulations, date calculations, and more.
Formula columns empower you to go beyond the raw data and create the specific information you need to answer your analytical questions effectively within the familiar environment of a workbook. They provide a powerful way to transform, enrich, and derive insights from your data without modifying the original source.
-
Only users with Creator or Editor permissions for the workspace can add a formula column.
-
Formula columns are visually distinguished and marked with an indicator. A tool tip is shown when you hover over the formula, which displays the details of the formula.
-
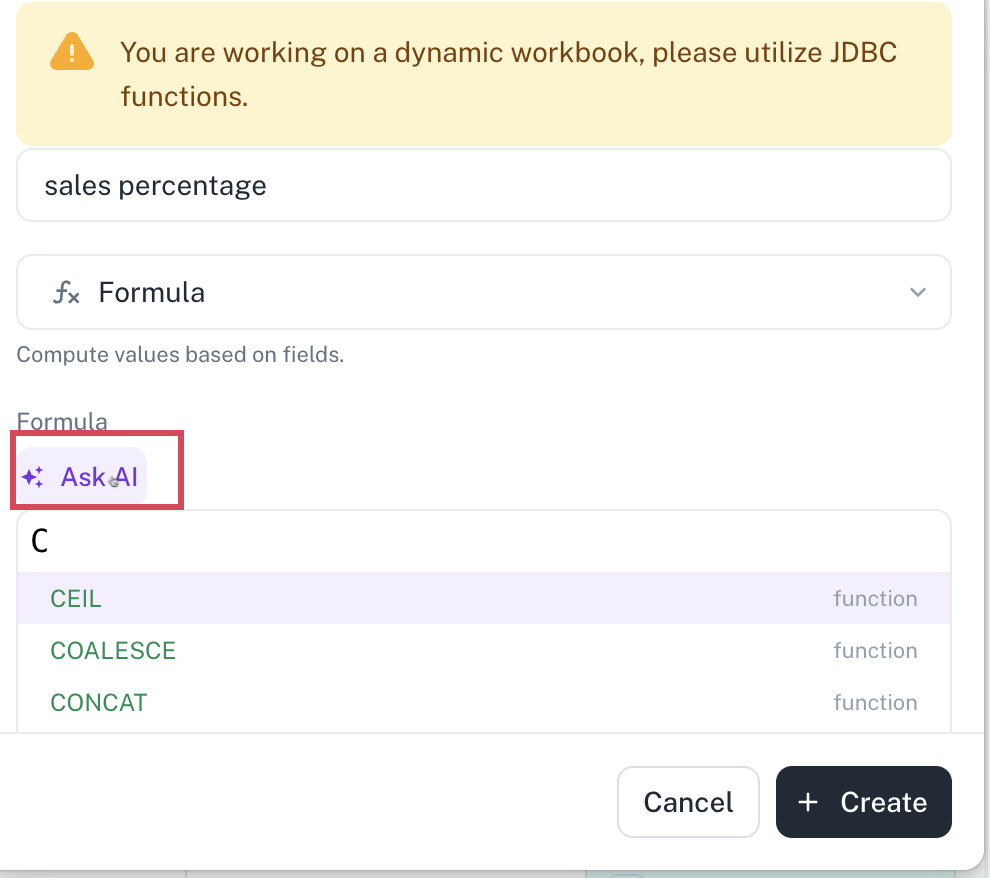
In formula addition, static workbooks exclusively use Spark functions, while dynamic workbooks utilize JDBC functions.
Adding Formula in Workbook
-
Open a workbook and click + in the last column to add a new column.
-
In the box, provide a unique name for the column and select Formula column type.
-
In the Formula field, specify the formula. Refer the Formula handbook for more details or you can AI generate the formula.
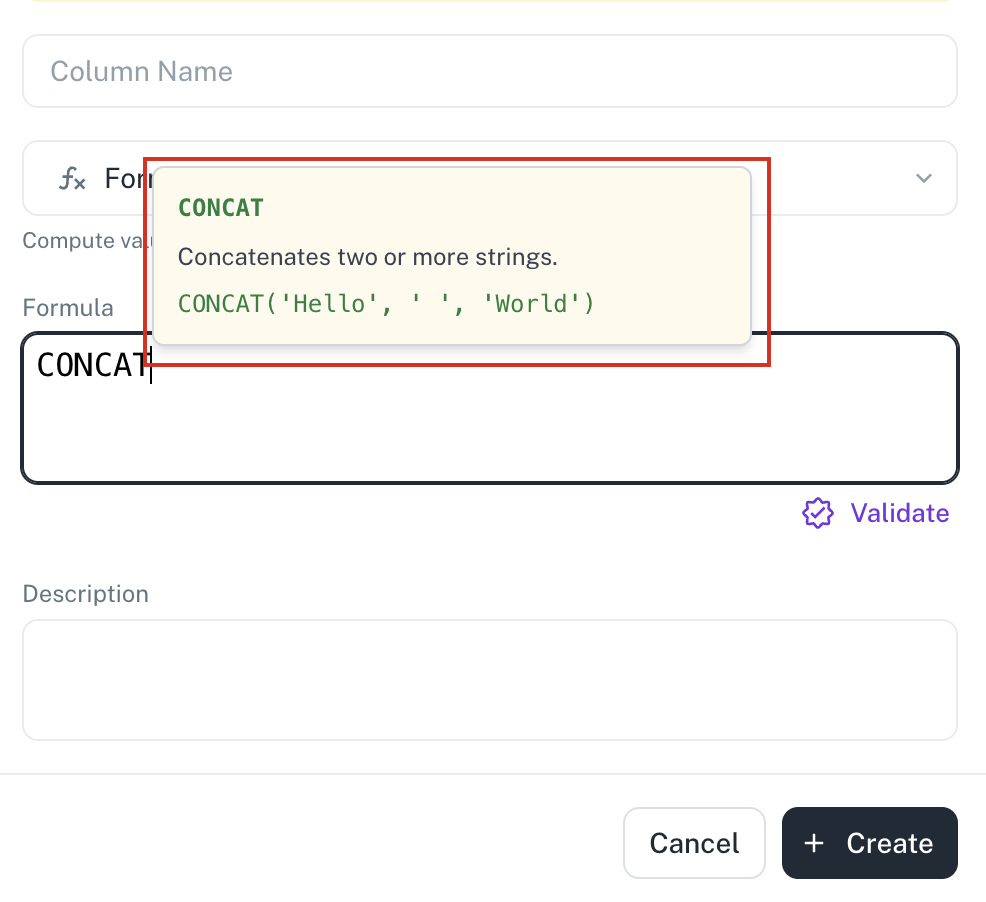
-
When you type a formula in the Formula field, a pop-up is displayed with examples that demonstrate the syntax and usage.
-
The Validate option allows you to check the correctness of the entered formula before creating the column. If errors are detected, the system displays appropriate error messages.
Detailed error logs are also available, providing you with insights into the specific issues encountered and enabling further investigation.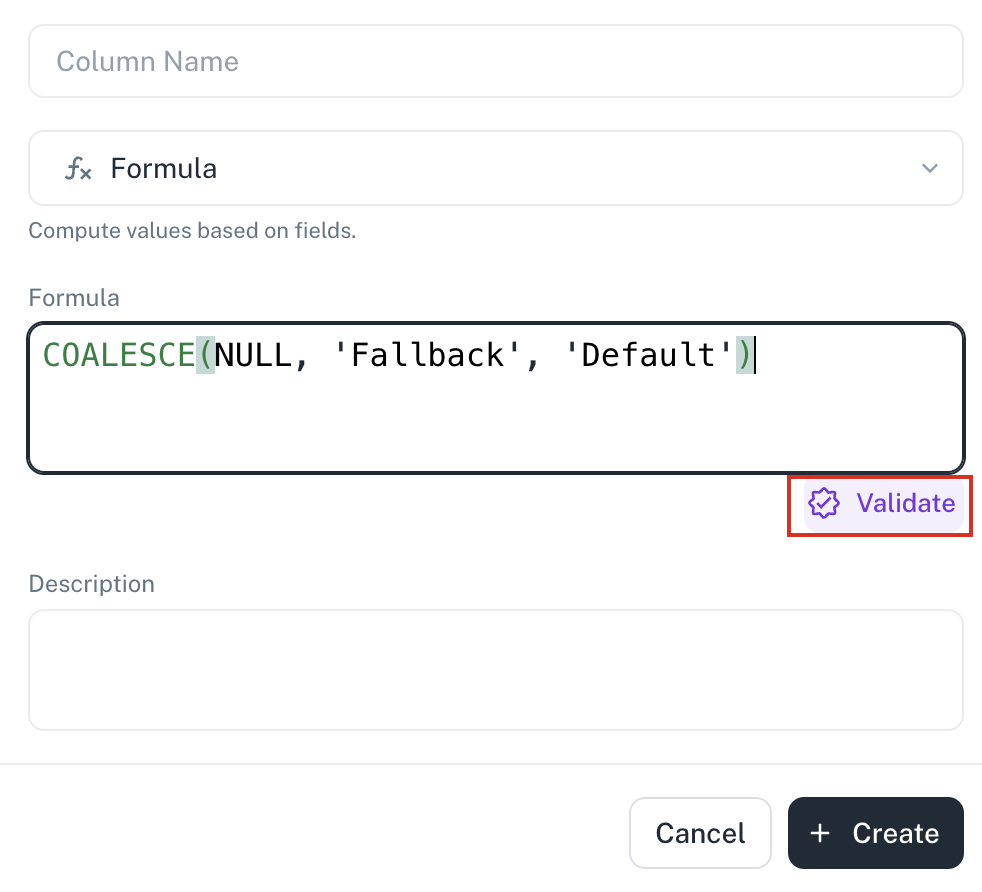
-
Even if the user chooses to bypass the Validate option, the system performs a background validation.If any potential errors are detected during this background check, a warning message is shown, which provides all the details of the potential issue.
-
In the Description box, provide a description for the formula.
-
Click Create. A timeline icon displays the in-progress status during Formula column creation.
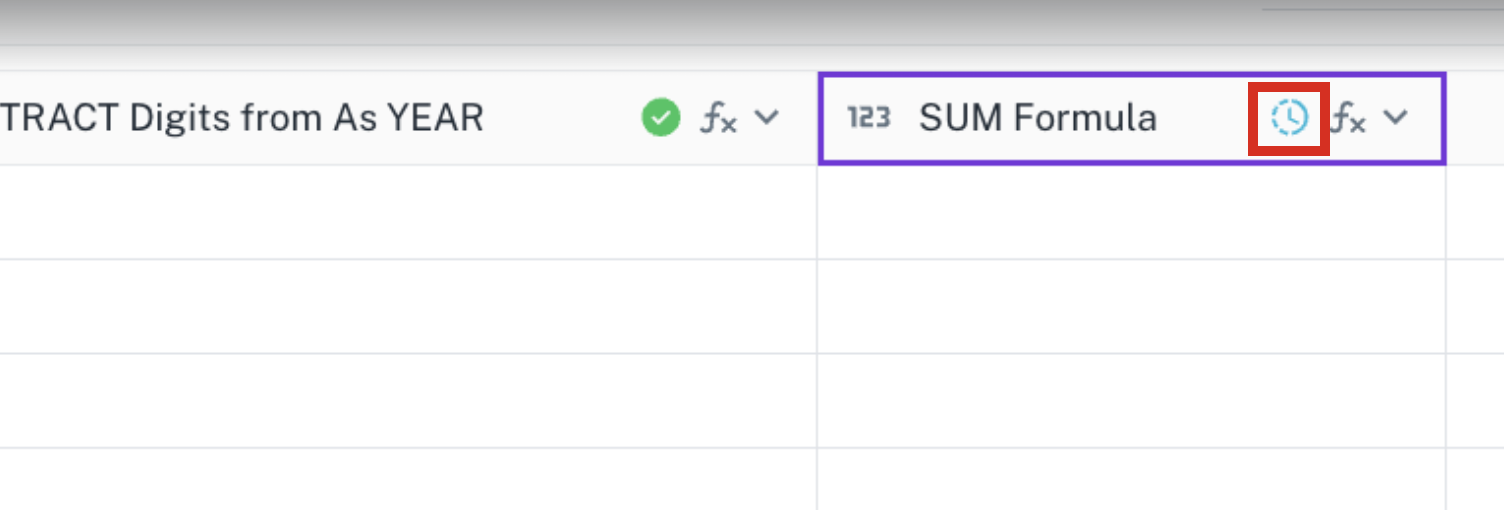
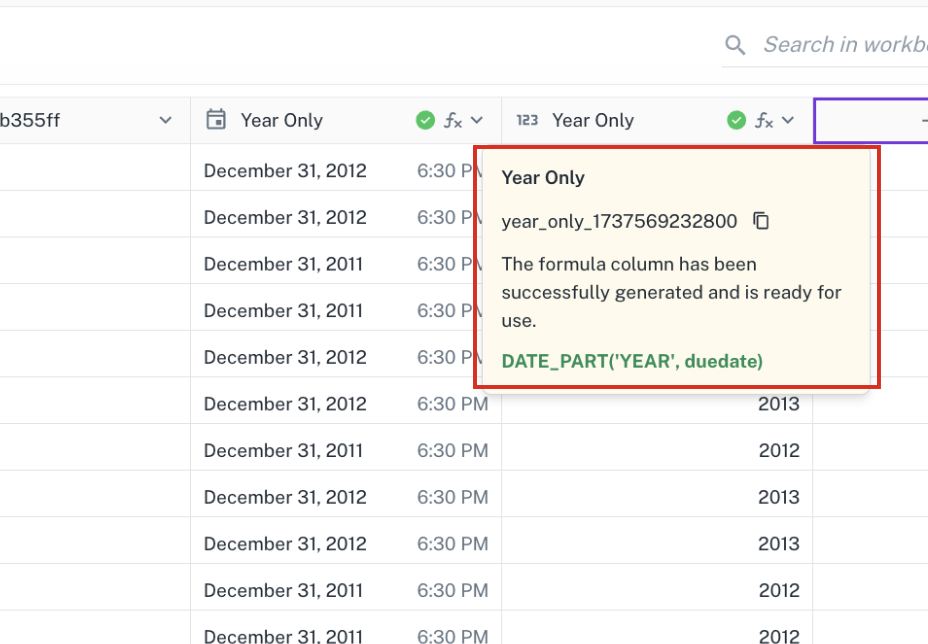
Formula columns are indicated with an icon of formula in the header.
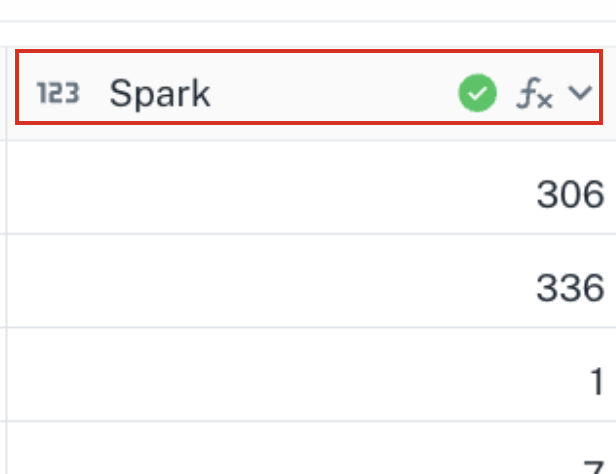
Tooltips are added to Formula column headers to easily refer to the underlying formula that is used to calculate the column's values.
Generating formula with AI assist
You can leverage the AI-assisted formula generation feature to describe your desired formula logic in natural language, prompting the system to generate the corresponding formula. AI-assisted formula creation significantly streamlines the process of building calculated columns within workbooks. This eliminates the need for users to possess deep SQL expertise.
Furthermore, you can verify the compatibility of the generated formula with the specific data source, such as JDBC or Spark.
-
A separate dialog box provides a dedicated space for users to describe their desired formula logic using natural language. The system generates the corresponding formula directly within the same dialog box, allowing for immediate validation.
-
A Use this button enables users to insert the validated formula directly into the column, eliminating the need for manual copying and pasting.
-
Users receive immediate output confirming successful query validation within the dialog box.
-
This combination of AI-powered formula generation and enhanced validation simplifies the workflow, accelerates formula creation, and reduces the likelihood of errors, making the feature more accessible to a wider range of users.
-
Open a workbook and click + in the last column to add a new column.
-
In the box, provide a unique name for the column and select Formula column type.
-
Click Ask AI. AI Assistant dialog box opens separately.
-
Enter the prompt for generating formula in natural language.
-
Click Validate to validate the formula.
-
Click Use this button. The formula is added.

Create Button column
You can directly generate Jira tickets from the workbooks using the Button data type. This feature allows for column mapping to Jira fields, and supports both individual and bulk issue creation, streamlining workflows and enhancing traceability. To create Jira tickets directly from the workbook, do the following:
-
In a workbook, click + to add a column.
-
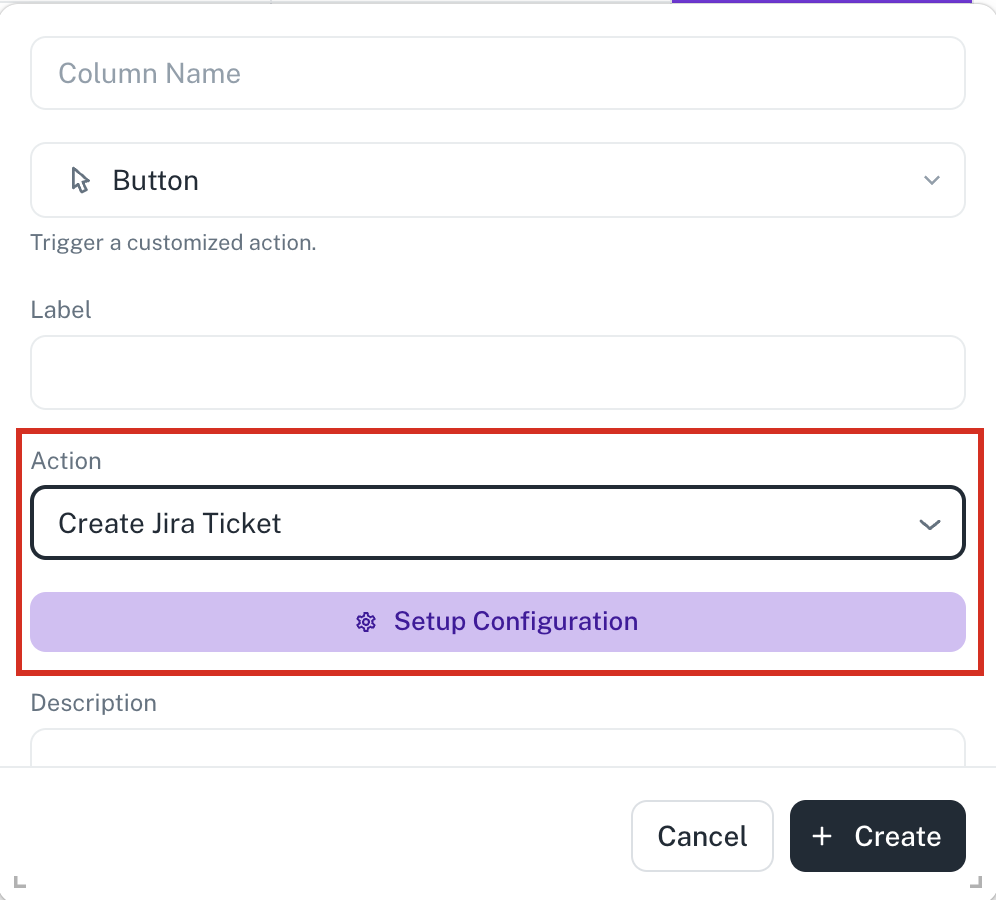
Specify a column name and select Button data type.
-
In the Action dropdown, select Create Jira Ticket and then click to Setup Configuration.
-
In the Action configuration box, specify the following. The Jira fields are auto-populated.
-
Connector: Select the connector that you use to get the Jira credentials
-
Project: The project in the Jira.
-
Issue Type: The issue type.
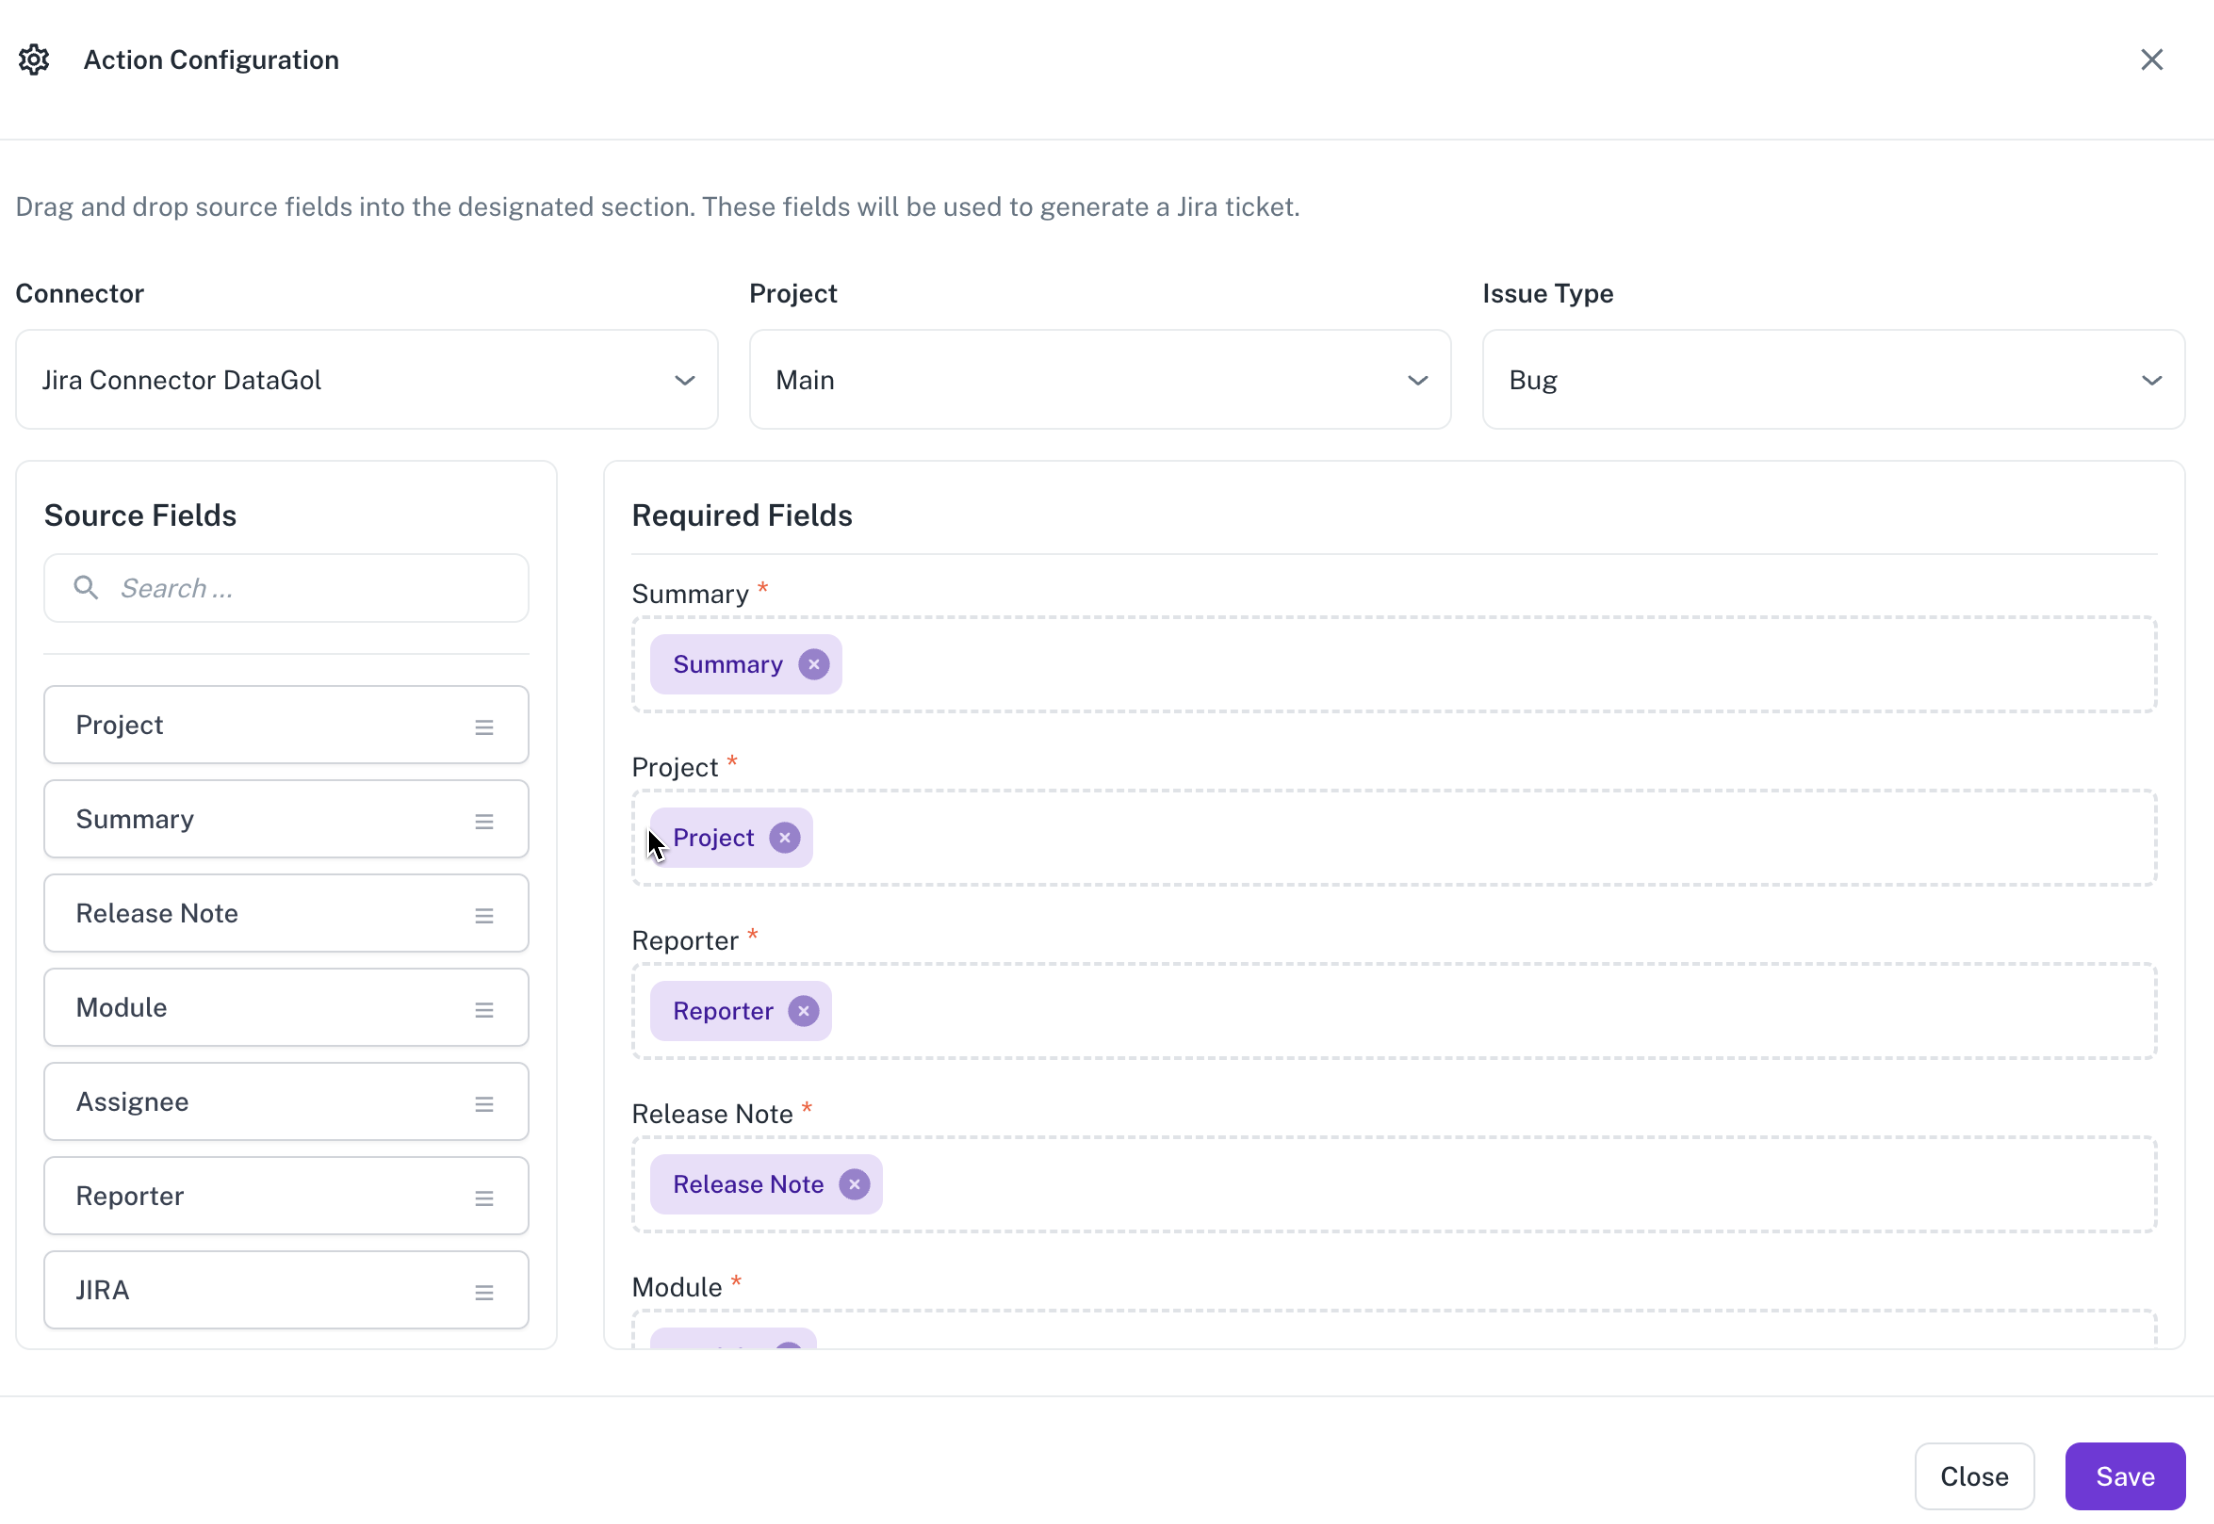
-
-
Click Save.
-
From the column configuration, select Create Jira ticket and then select the rows for which you need to create the Jira tickets. Click the button in any row to create a single Jira ticket, or select multiple rows and click to create tickets in bulk.
Create Jira connector
Creating Jira connectors is prerequisite to creating Jira tickets from workbook data.
To create a Jira connector, do the following:
-
From the Home page, left navigation panel, click Connectors.
-
Click New Connector.
-
Click the Jira icon and then click Next.
-
Enter the following details:
-
Provide a name for the connector.
-
Enter the Jira username and password.
-
Enter your Jira base URL.
-
-
Click Submit.
Was this helpful?