Supabase
Adding Supabase data source
-
From the left navigation panel, click Lakehouse and then click Data Sources.
-
From the upper right corner of the page, click the + New Data Source button to start the process of adding a new database.
-
In the New Data Source page, click the Supabase icon.
-
Specify the following details to add Supabase. Once you have connected a data source, the system immediately fetches its schema. After this schema retrieval process is complete you can browse and interact with the tables and data.
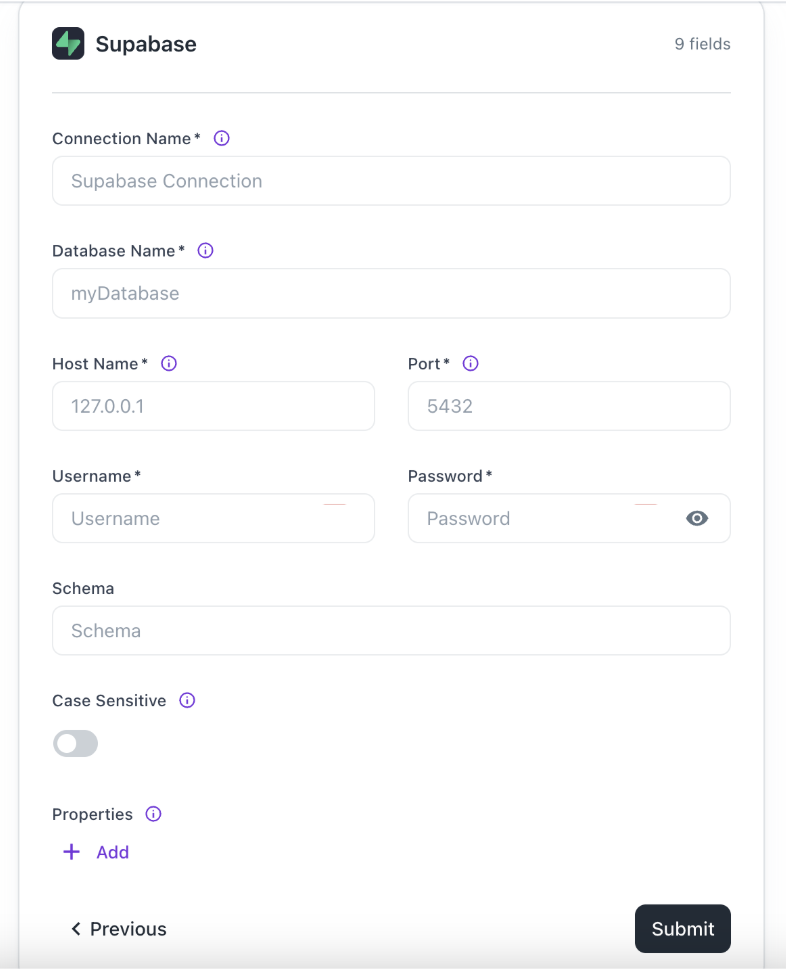
| Field | Description |
|---|---|
| Connection Name | Enter a unique name for the connection. |
| Database Name | Specify the name of the existing database that you want to connect. |
| Host Name | Specify the hostname or IP address of the server wherein the database is located. |
| Port | Enter the port number used by the database server. The default port for Supabase (PostgreSQL) is 5432. |
| Username | Enter the username used to authenticate with the database. |
| Password | Enter the password associated with the specified username. |
| Schema | Specify the schema name for your Supabase connection. If left blank, the default schema "public" will be used. |
| Case Sensitive | Specify whether your Supabase data source has case-sensitive table names. This option allows for seamless integration with databases that use Camel Case or other naming conventions. |
| Properties | Specify additional settings by entering key/value pairs. Each pair represents a unique property and its value. |
- Click Submit.
Was this helpful?